Create a sign-up URL
Create a sign-up URL for a course, decide who can sign up and when, and share the link.
A sign-up URL belongs to one course. Only the course is required. Do give the URL a name, though, because that’s how you find it again. The advanced settings let you control when learners can sign up, how many can sign up and from which email domains.
Step by step
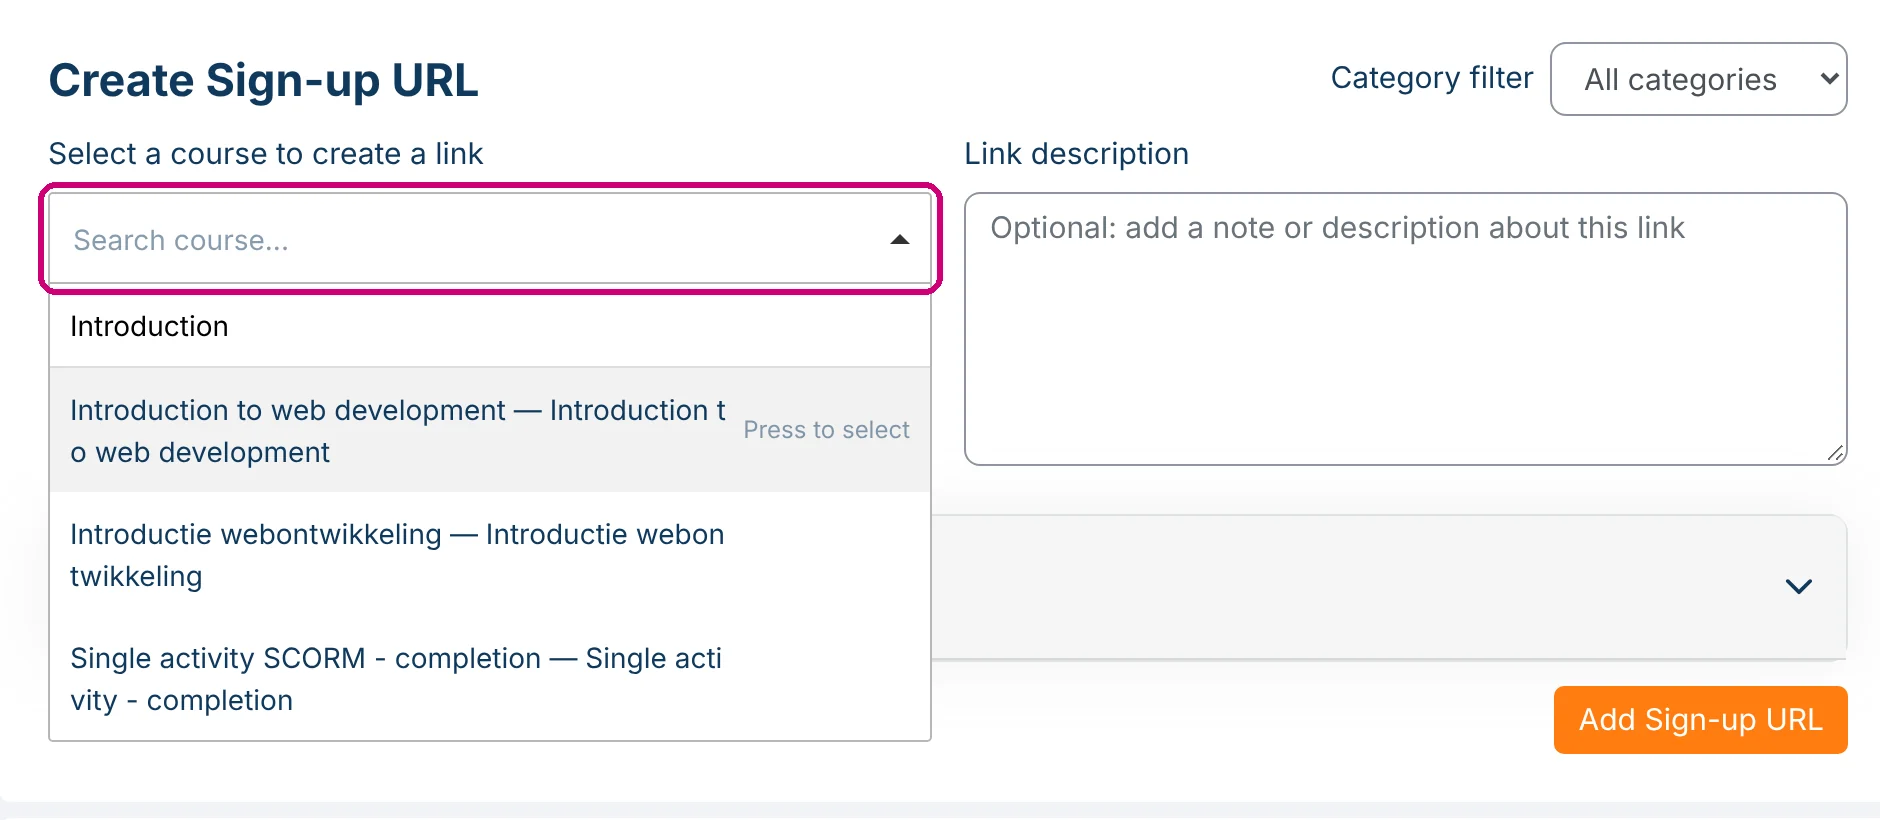
1. Choose the course
Click Sign-up URL’s in the menu on the left. In the Create Sign-up URL block, click Search course… and type part of the course name. Pick the course from the list. If you have many courses, narrow the list first with Category filter.
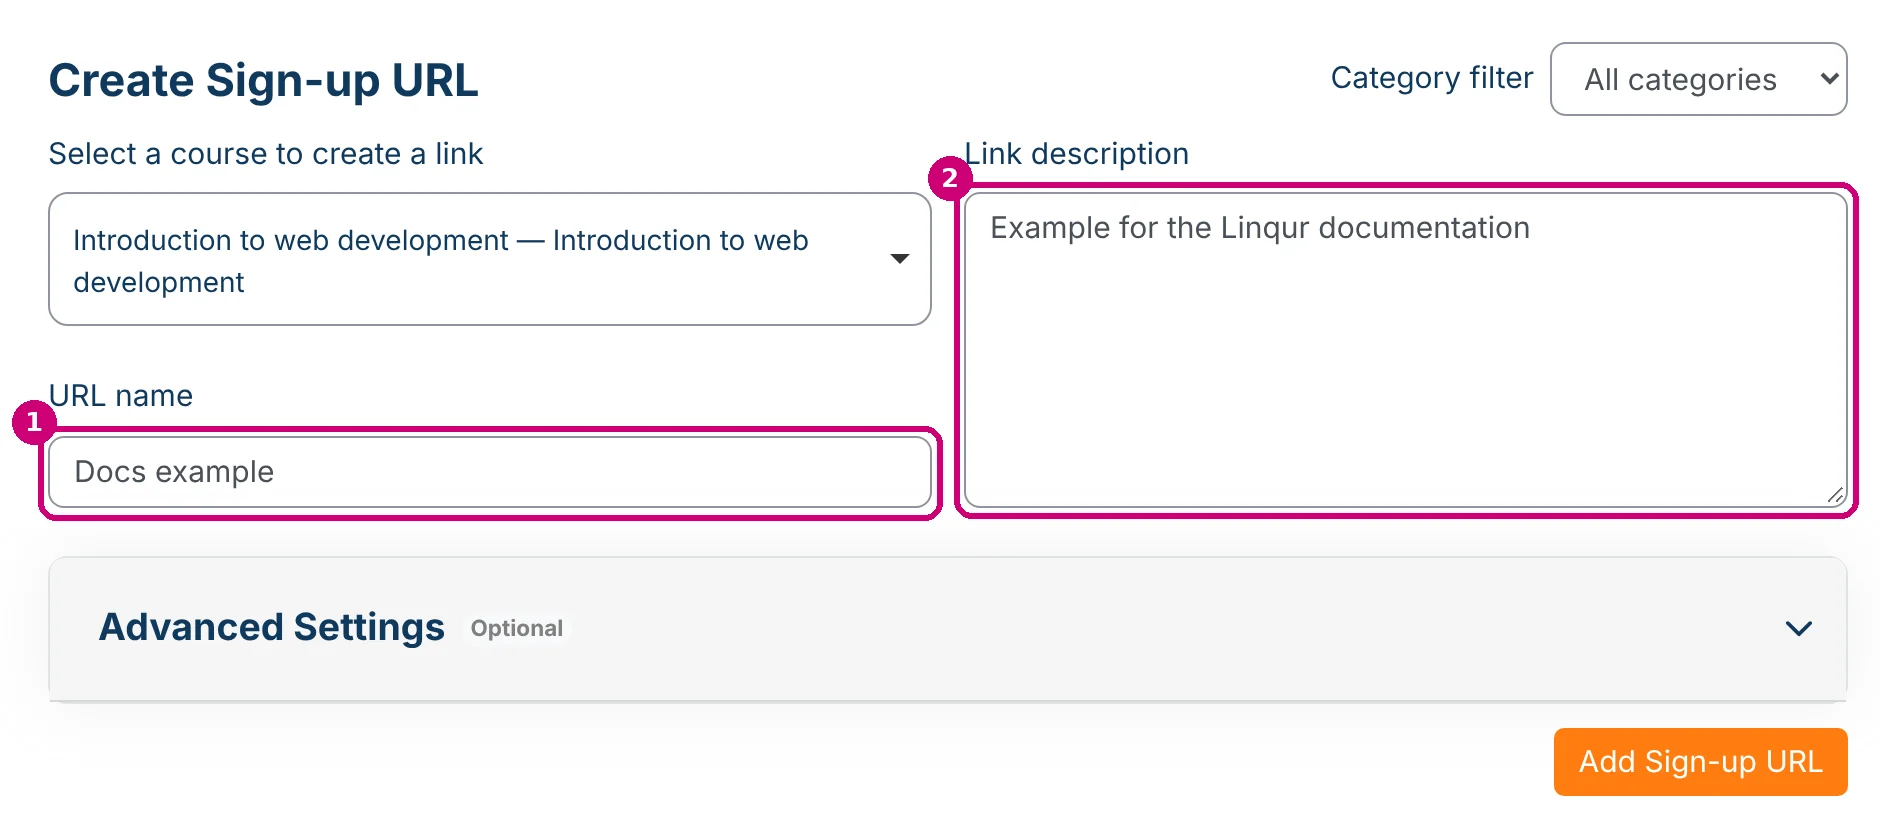
2. Give the URL a name and description
- URL name (1): this is how you find the URL in the overview. Sign-up URL Analytics shows it as the label. The name doesn’t have to be unique, so pick one that identifies the client or group, for example “Client A spring 2027”.
- Link description (2): optional. For example who the link is for or who asked for it.
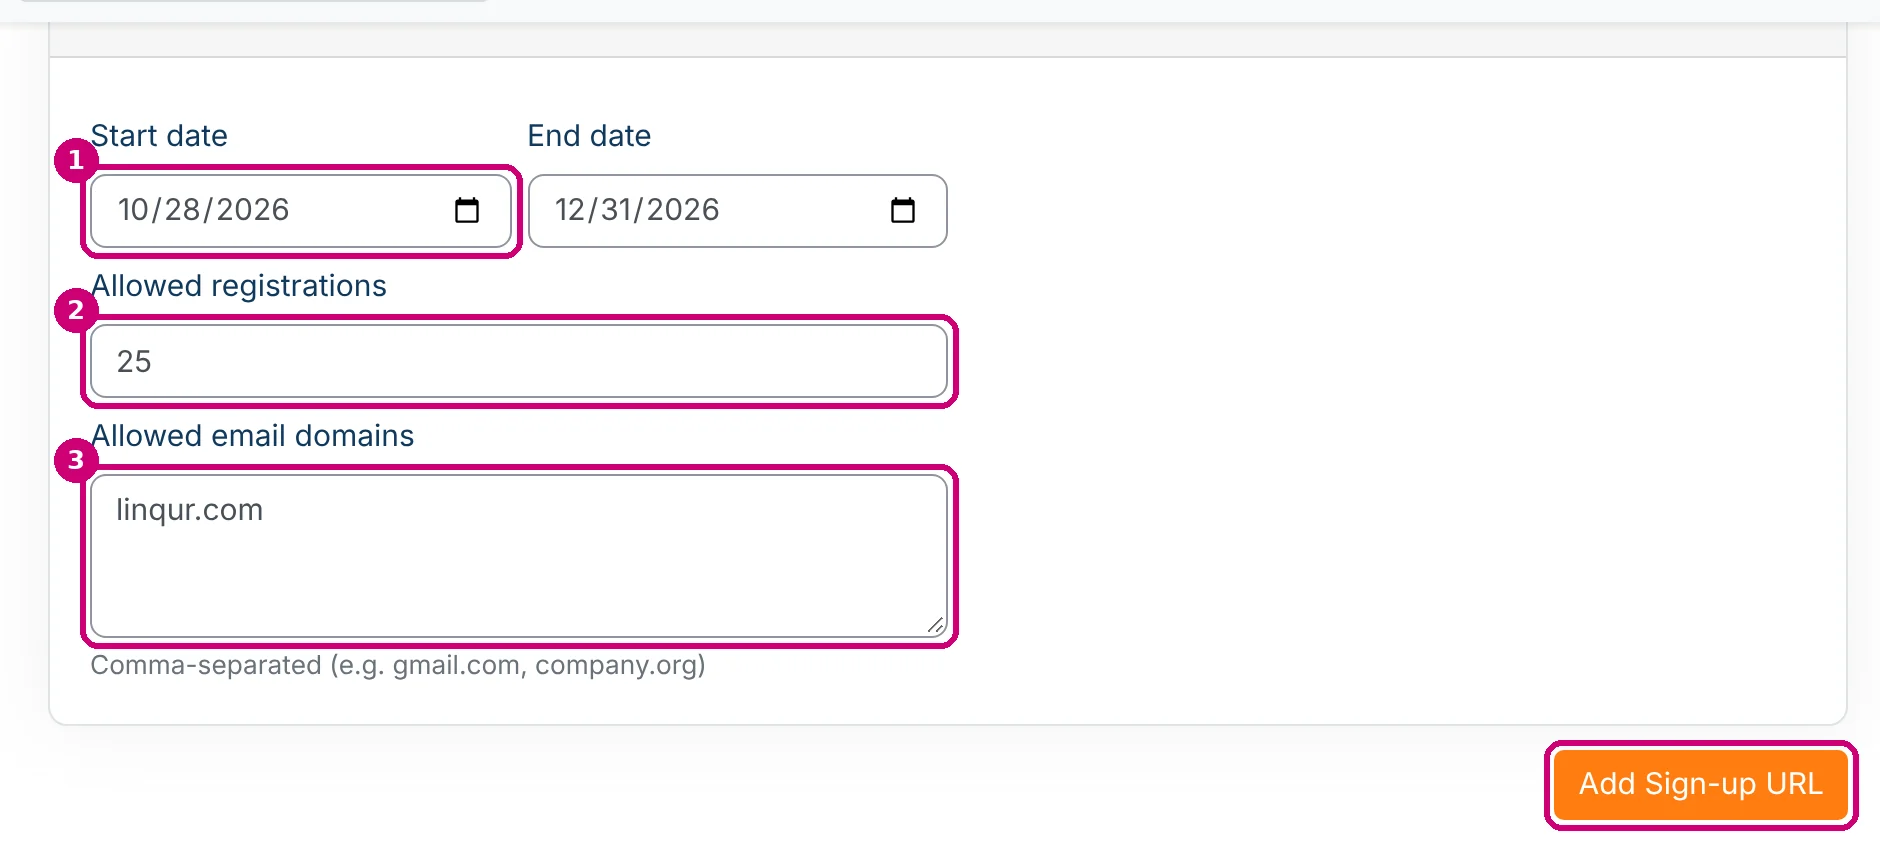
3. Set the advanced settings (optional)
Click Advanced Settings.
| Field | What it does |
|---|---|
| Start date and End date (1) | Learners can only sign up within this period. |
| Allowed registrations (2) | The maximum number of sign-ups through this URL. Leave it empty for unlimited. |
| Allowed email domains (3) | Only email addresses on these domains can sign up, for example yourclient.com. Separate multiple domains with a comma. |
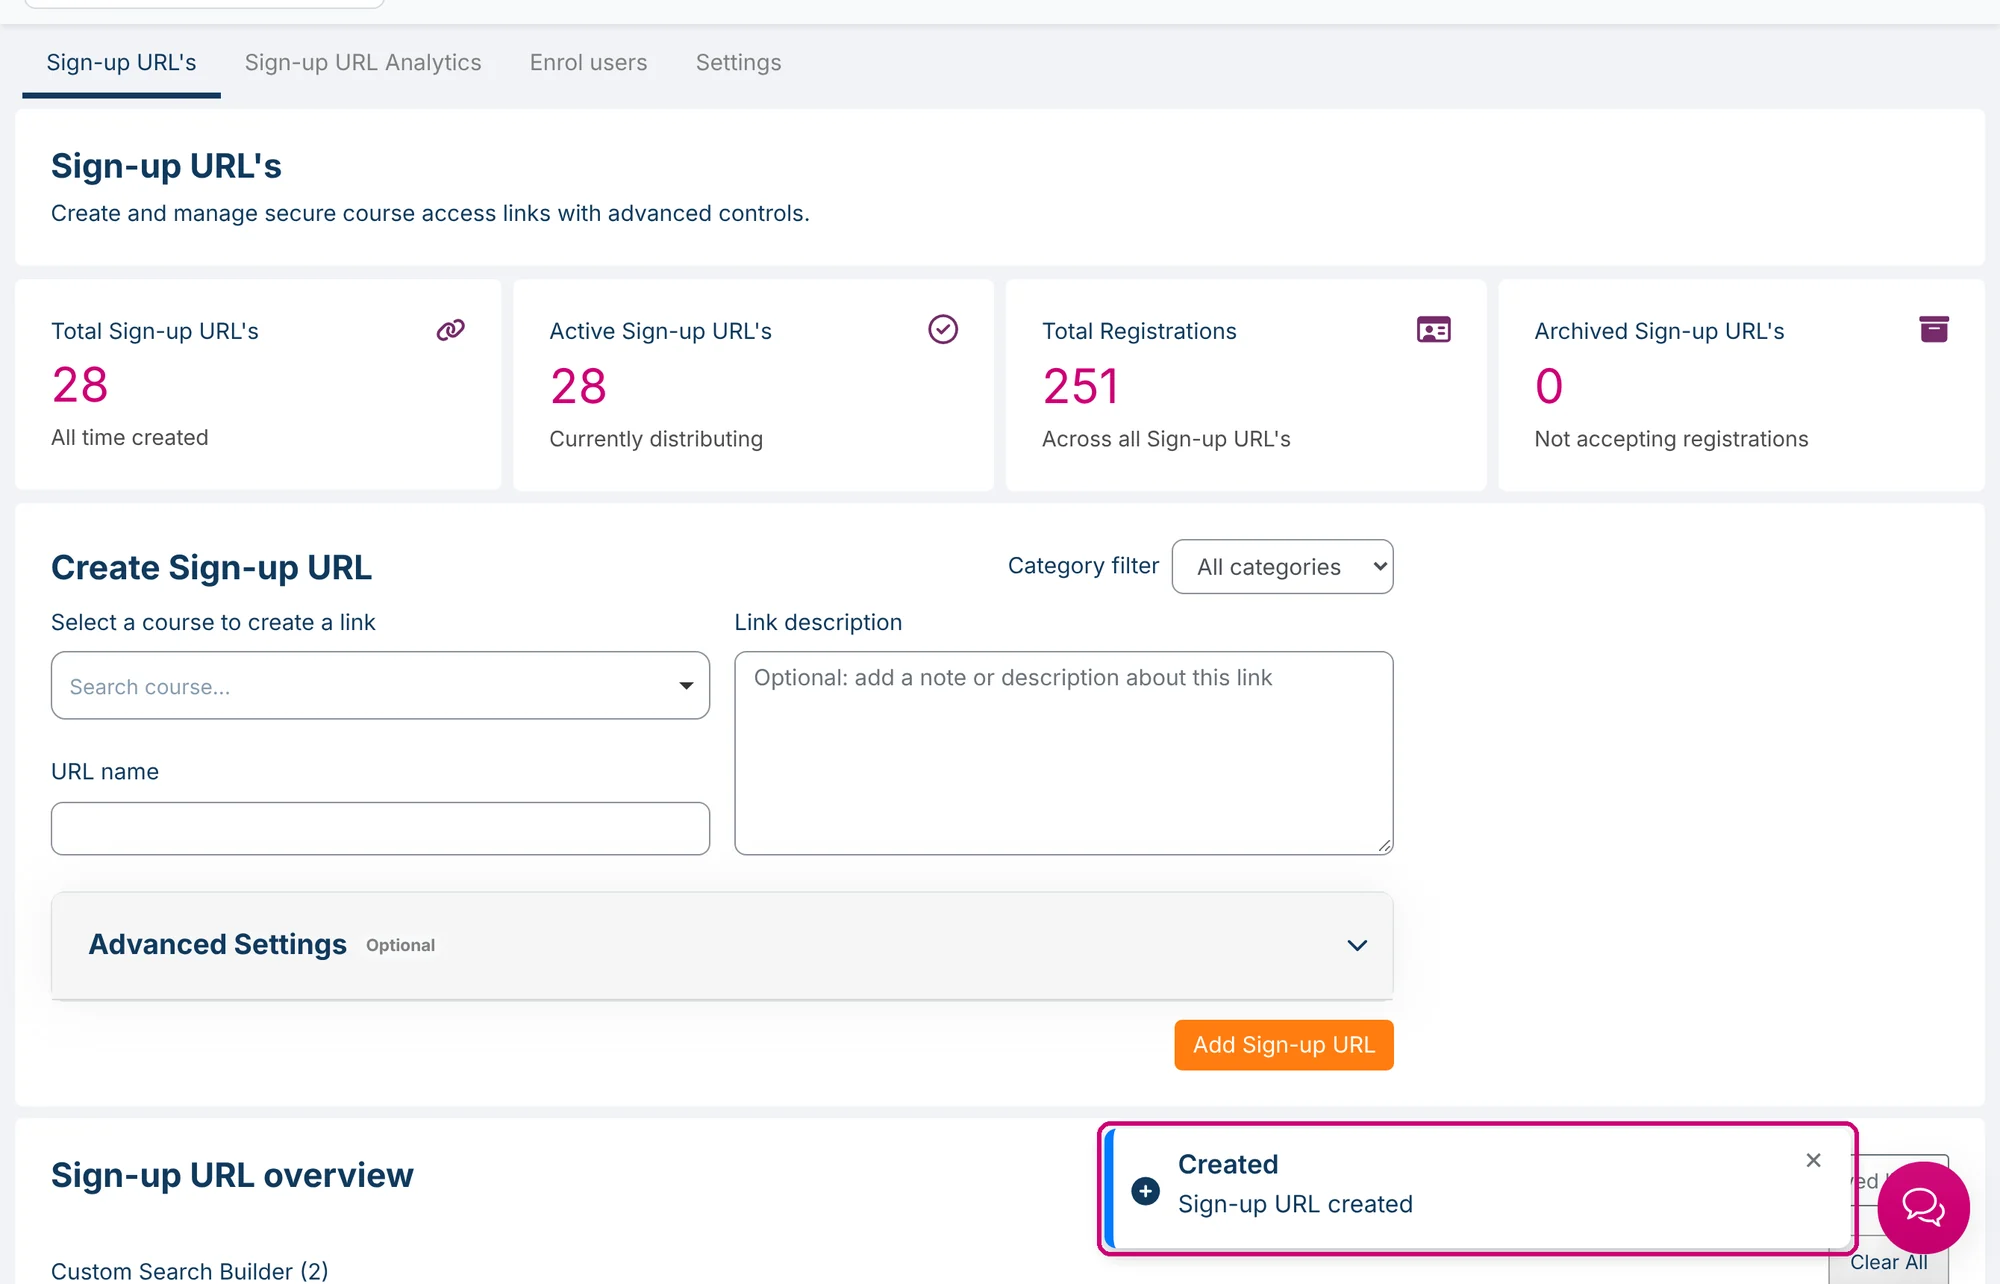
4. Add the sign-up URL
Click Add Sign-up URL. A message confirms that the sign-up URL was created, and the counters at the top go up.
5. Copy and share the URL
Find the URL in the Sign-up URL overview, for example with the search field. Click Copy URL and send the link to your client or learners by email or another channel. A sign-up URL looks like this: https://<your-platform-address>/magic/<code>.
The Registrations column shows how many learners have signed up so far, for example 0 / 25.

Next step
- What learners see when they open the link is explained in getting started with sign-up URLs.
- To edit, archive or delete a URL, see manage sign-up URLs.
- To enrol learners yourself instead of sharing the link, follow enrol users with an Excel file.
- To see how far your learners are, use Sign-up URL Analytics.