Customise learner emails
Customise the emails learners receive when they sign up, get enrolled or log in.
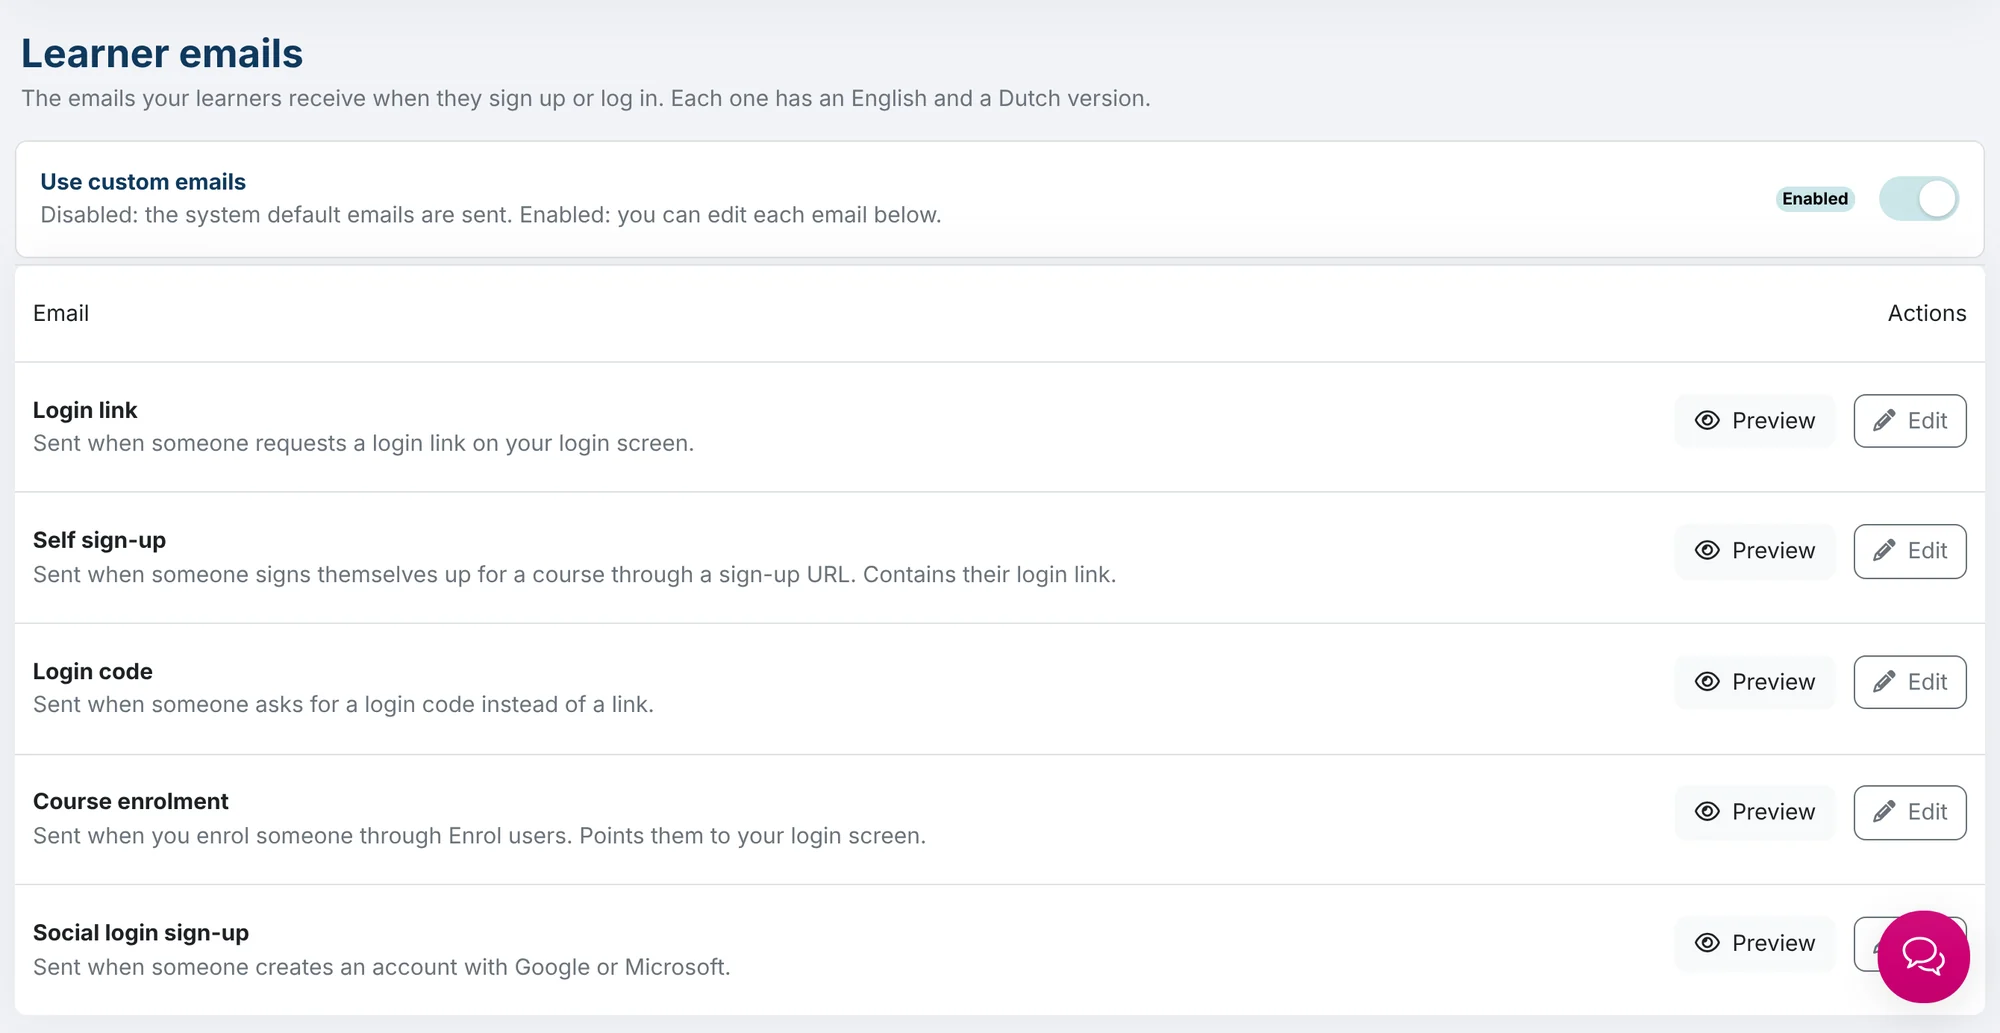
Linqur sends learners emails automatically, for example with their login link. You can keep those emails as they are or adapt them to your own tone and branding. Every email has an English and a Dutch version. You find them on the Settings tab under Learner emails.
Which emails are there?
| When is it sent? | |
|---|---|
| Login link | When someone requests a login link on your login screen |
| Self sign-up | When someone signs themselves up for a course through a sign-up URL. Contains their login link. |
| Login code | When someone asks for a login code instead of a link |
| Course enrolment | When you enrol someone through Enrol users. Points them to your login screen. |
| Social login sign-up | When someone creates an account with Google or Microsoft |
Step by step
1. Turn on custom emails
Turn on the Use custom emails switch. When it’s off, Linqur sends the system default emails. When it’s on, you can edit each email.
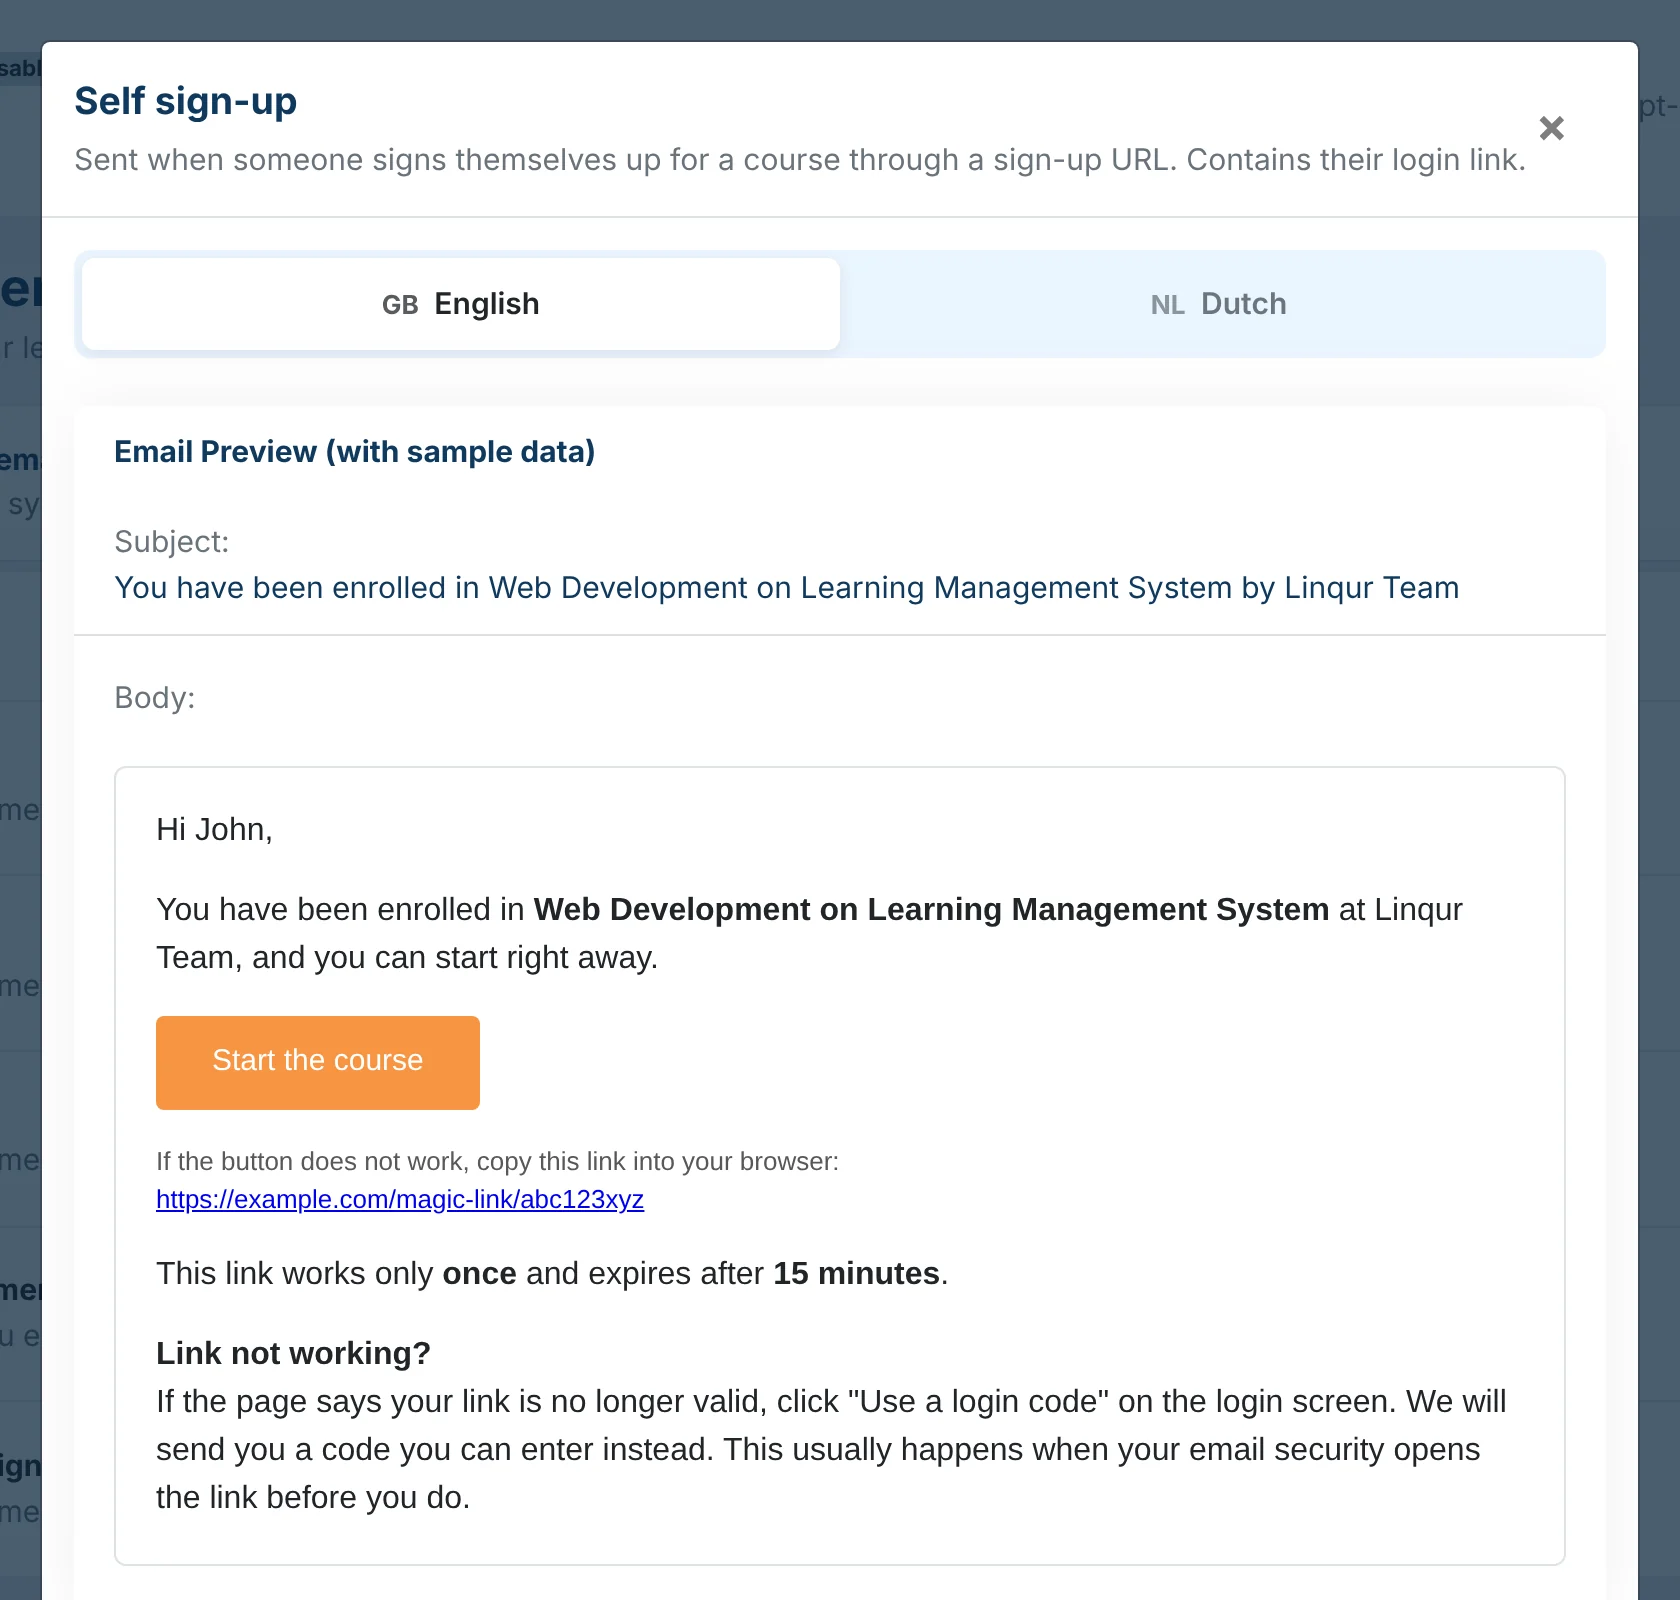
2. Check the preview
Click Preview next to an email. You see the subject and body with sample data, in English and in Dutch.
3. Change the subject and body
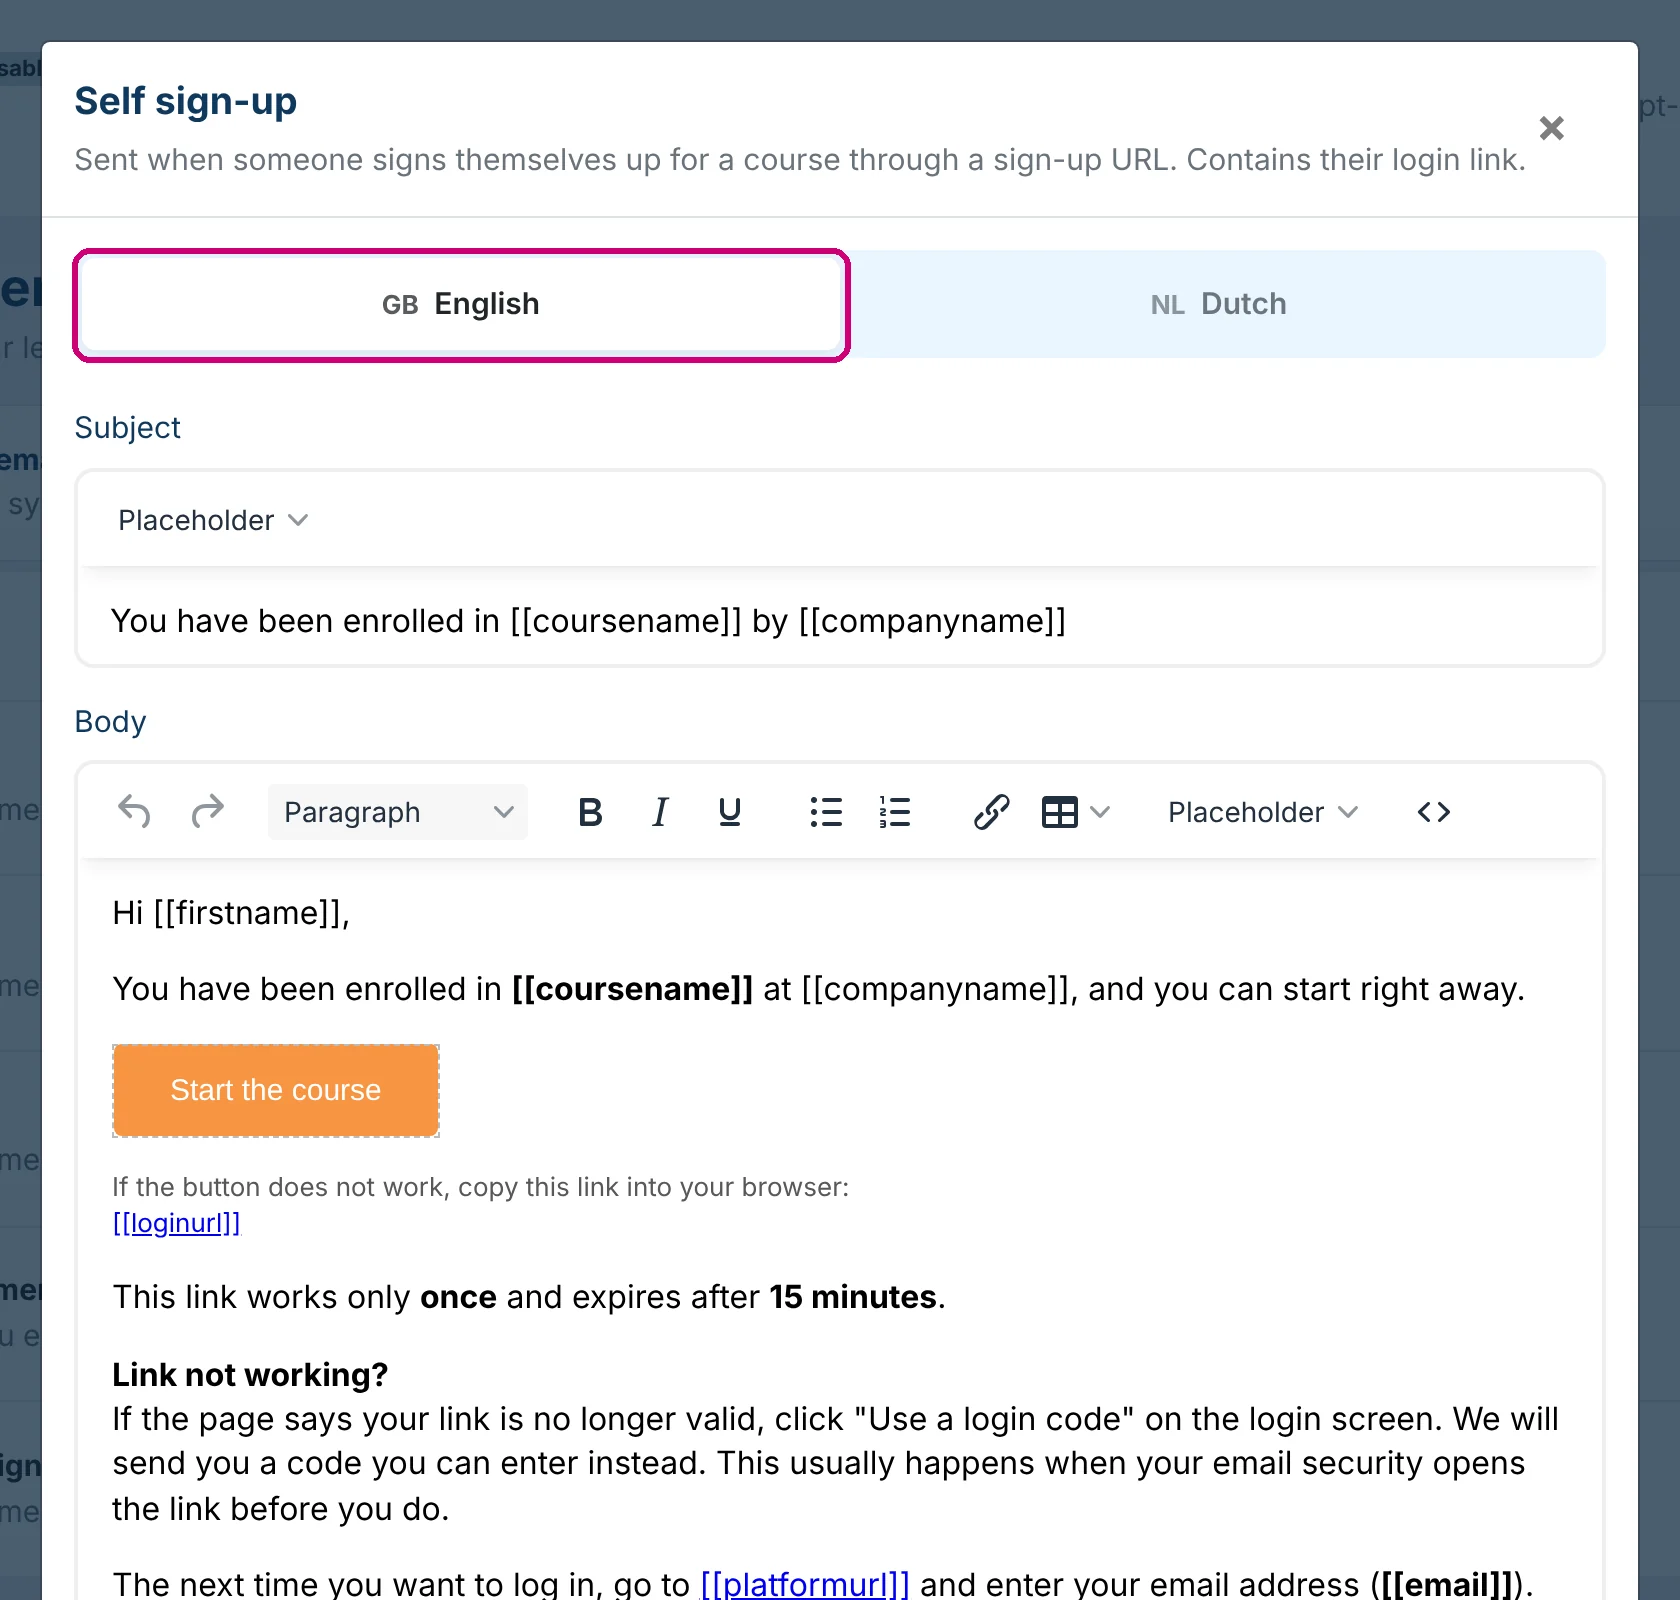
Click Edit and choose English or Dutch at the top. Change the subject and the body. The editor lets you add bold text, lists and links, or edit the HTML.
4. Use placeholders
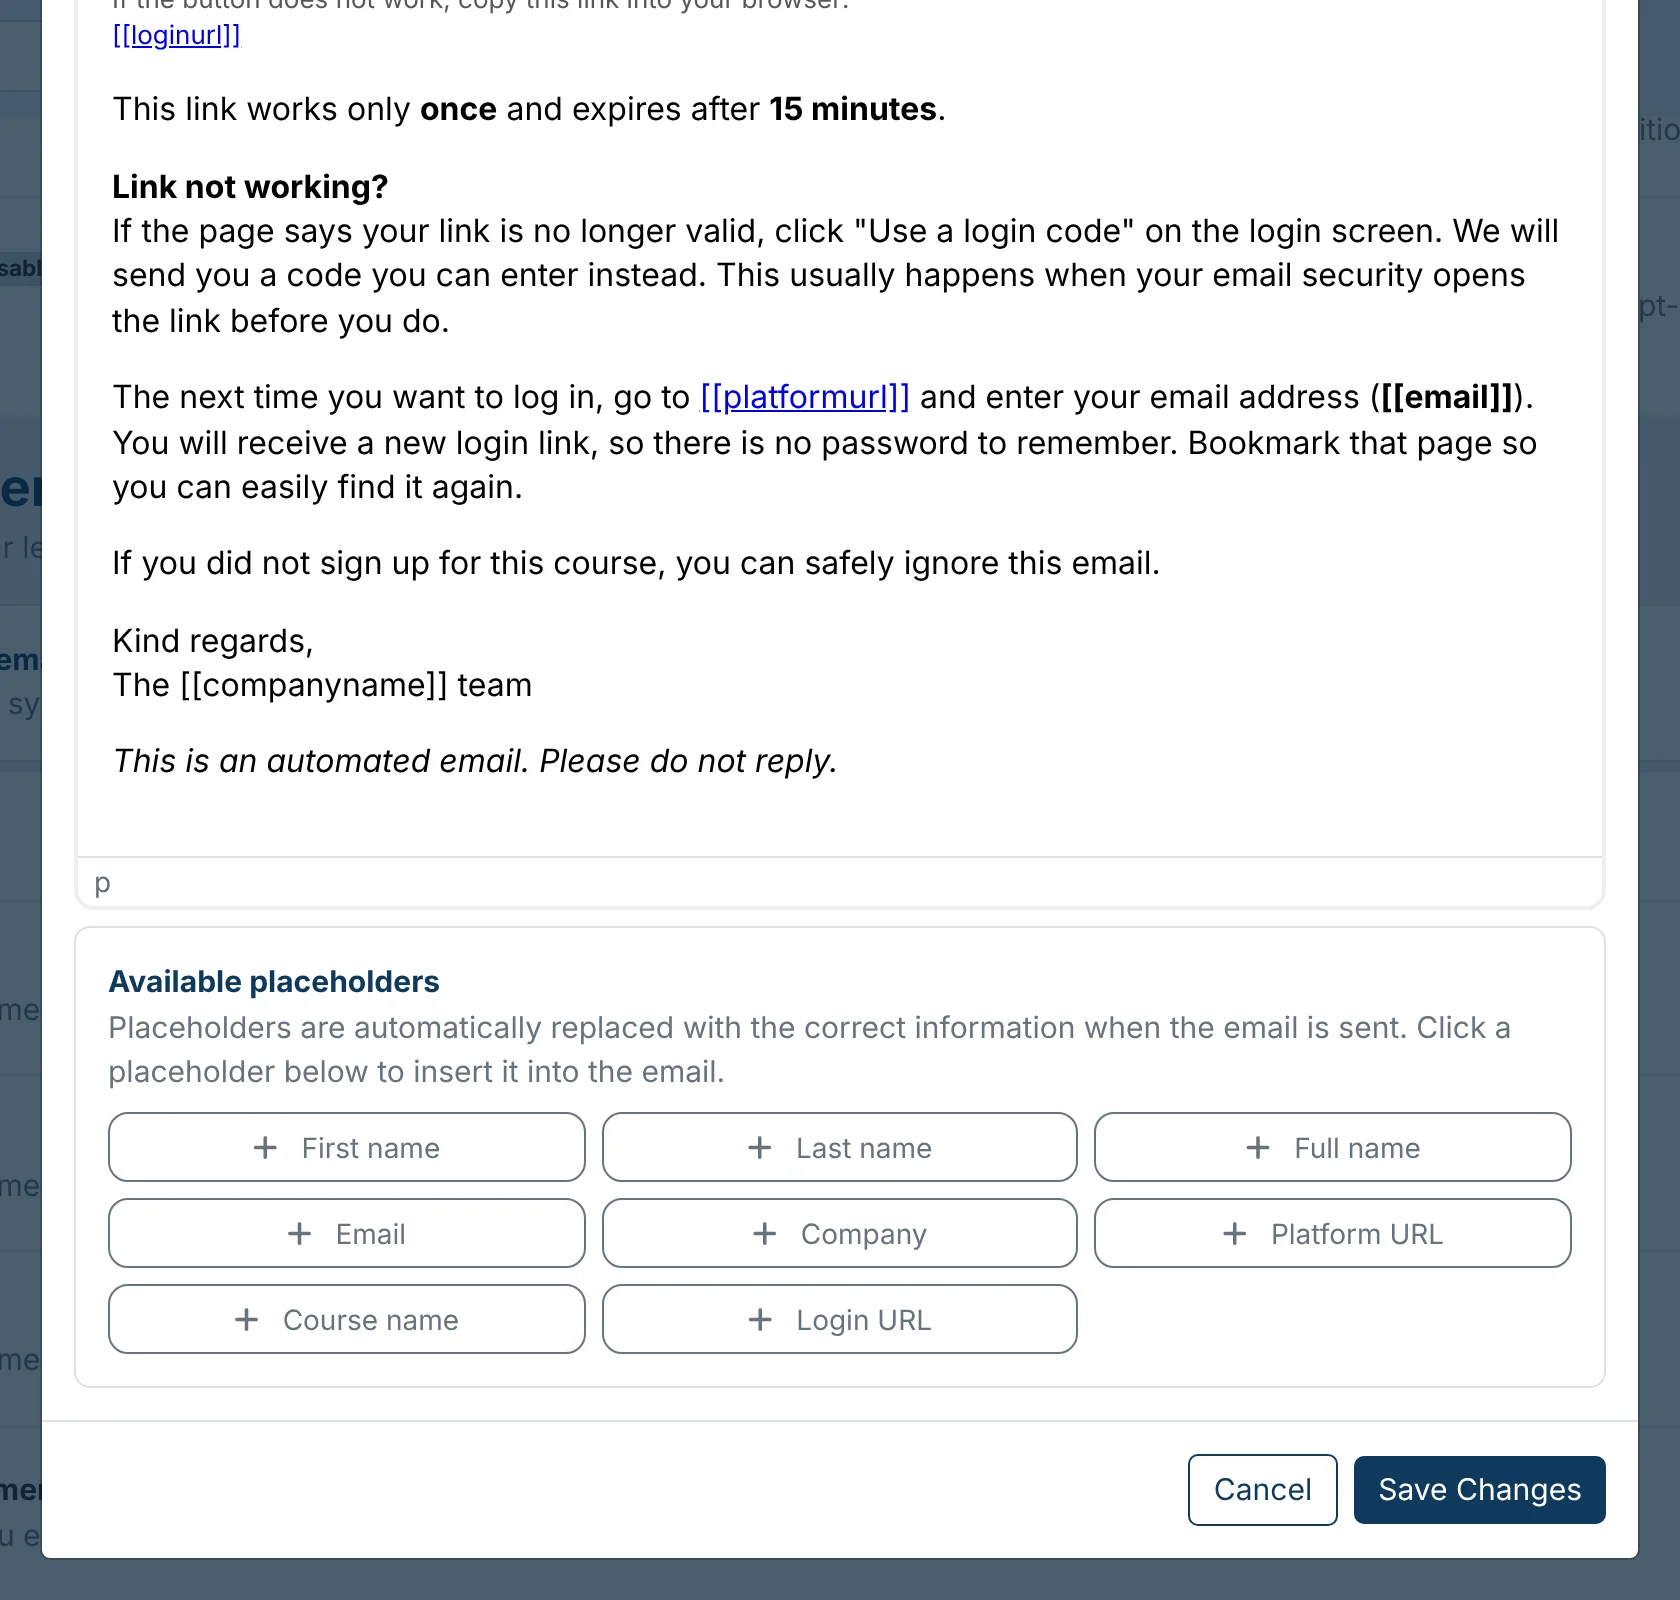
Placeholders are replaced with the real details when the email is sent. Click a button under Available placeholders to insert it, or use the Placeholder menu in the editor. The available placeholders differ per email.
| Placeholder | Replaced with |
|---|---|
[[firstname]], [[lastname]], [[fullname]] | The learner’s name |
[[email]] | The learner’s email address |
[[companyname]] | Your organisation’s name |
[[platformurl]] | Your platform address |
[[coursename]] | The course name |
[[loginurl]] | The link the learner logs in with |
[[loginkey]] | The login code (in the Login code email) |
In emails with a login link, keep the link or the button, or the learner can’t log in.
5. Save
Edit both languages, then click Save Changes. This saves the English and the Dutch version together. With Enrol users, the Language column in the Excel file decides which version a learner gets.