Manage course categories
Add, rename or delete a category in the category bar above your courses.
Categories group the courses in your course overview. Every course belongs to one category; you choose it when you add a new course.
Where to find categories
Click Courses in the menu on the left (1). The category bar sits above the course cards (2). All Courses shows every course. Each other button shows only the courses in that category, and the number on it is the number of courses.
When you open Courses again later, Linqur shows the category you picked last. Click All Courses to see everything.

Add a category
- Click + at the end of the category bar (1).
- Type the name in the Category name field (2).
- Click the check mark (3).

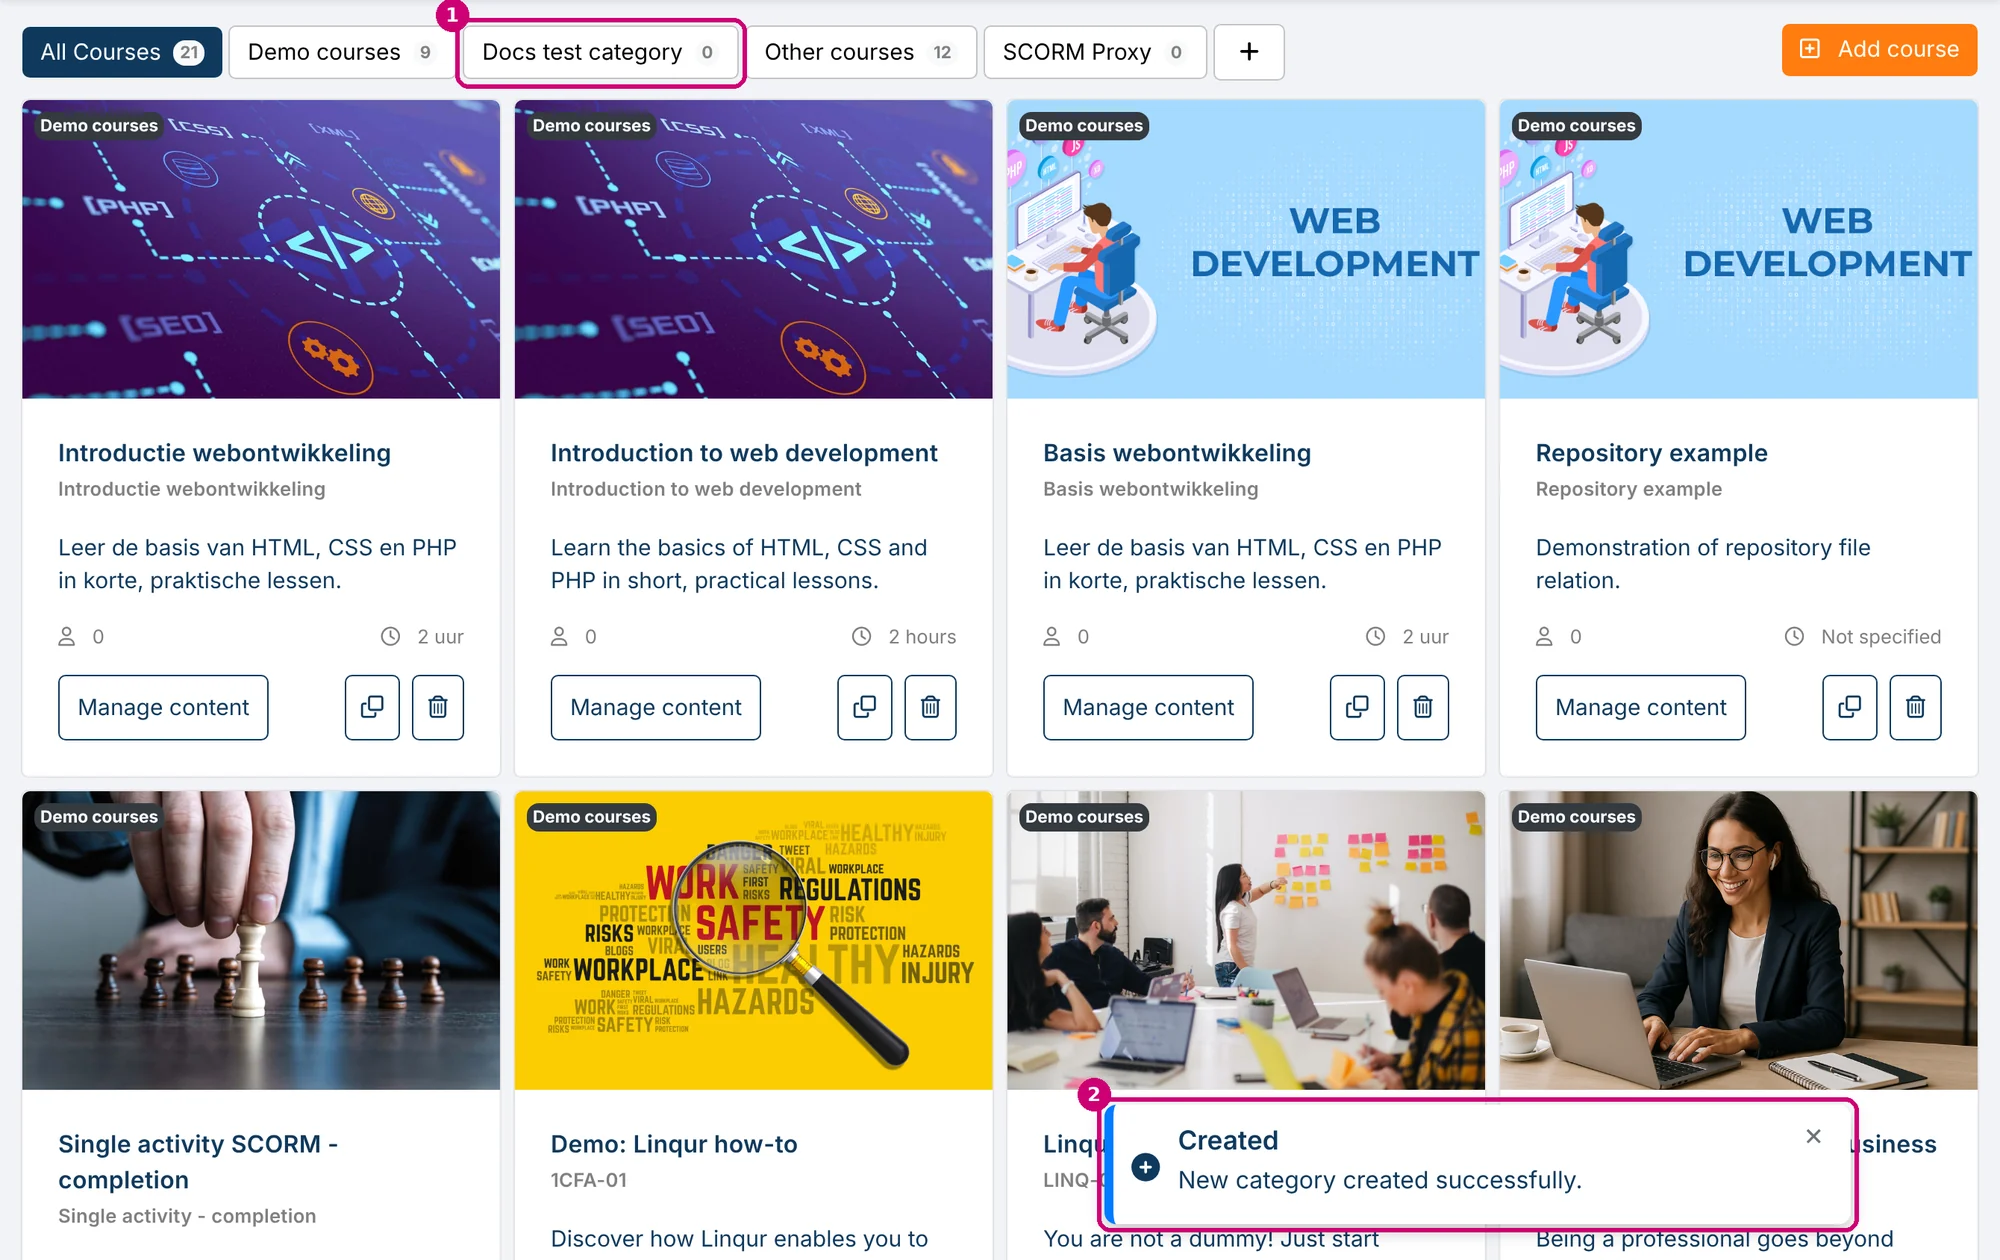
The new category appears in the bar with 0 courses (1), and Linqur shows New category created successfully. (2)
Rename a category
Click the category in the bar (1). A pencil (2) and a trash can (3) appear next to +.

Click the pencil. A field with the current name appears below the bar.
Type the new name (1) and click the save icon (2).

Linqur shows Category name updated successfully.
Delete a category
- Click the category in the bar.
- Click the trash can.
- Confirm in the dialog that your browser shows. You can’t undo this.
Linqur shows Category deleted successfully. and returns to All Courses.

Move a course to another category
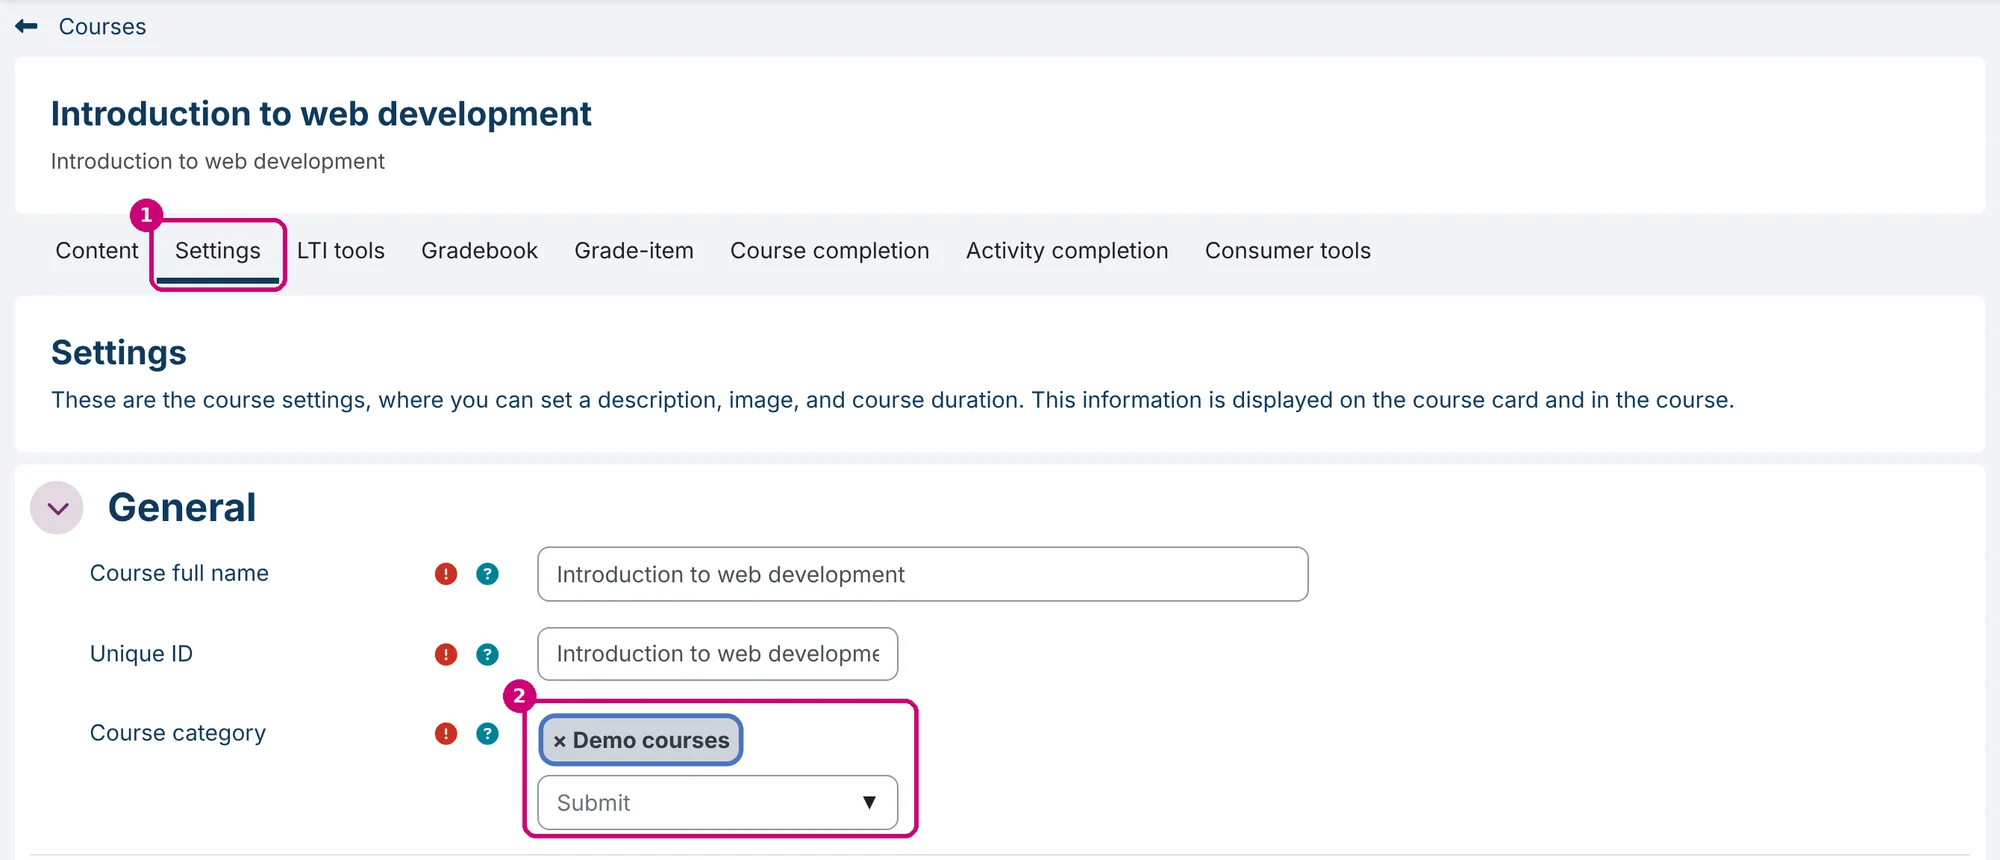
Click Manage content on the course card and open the Settings tab (1). Under Course category (2), remove the current category with the × and choose another one from the list below it. Then save the settings.
Where categories show up
- On the course cards in the course overview, as a label at the top left.
- In the Category field when you add a new course.
- As Category filter when you create a sign-up URL.
- On the sign-up page that learners see, next to the other course details. See getting started with sign-up URLs.
Next step
Add a new course to your category.