Manage files in the file repository
Keep the packages you use in several courses in one place, and upload new versions there.
The file repository holds SCORM and xAPI packages. When you add a SCORM package or an xAPI activity to a course, you can pick a file from the repository instead of uploading it again from your computer. If an activity links to a file in the repository, you update the package in one place: you upload the new version here, not in every activity.
Upload a file
- Click File repository in the menu.
- Click Upload File.
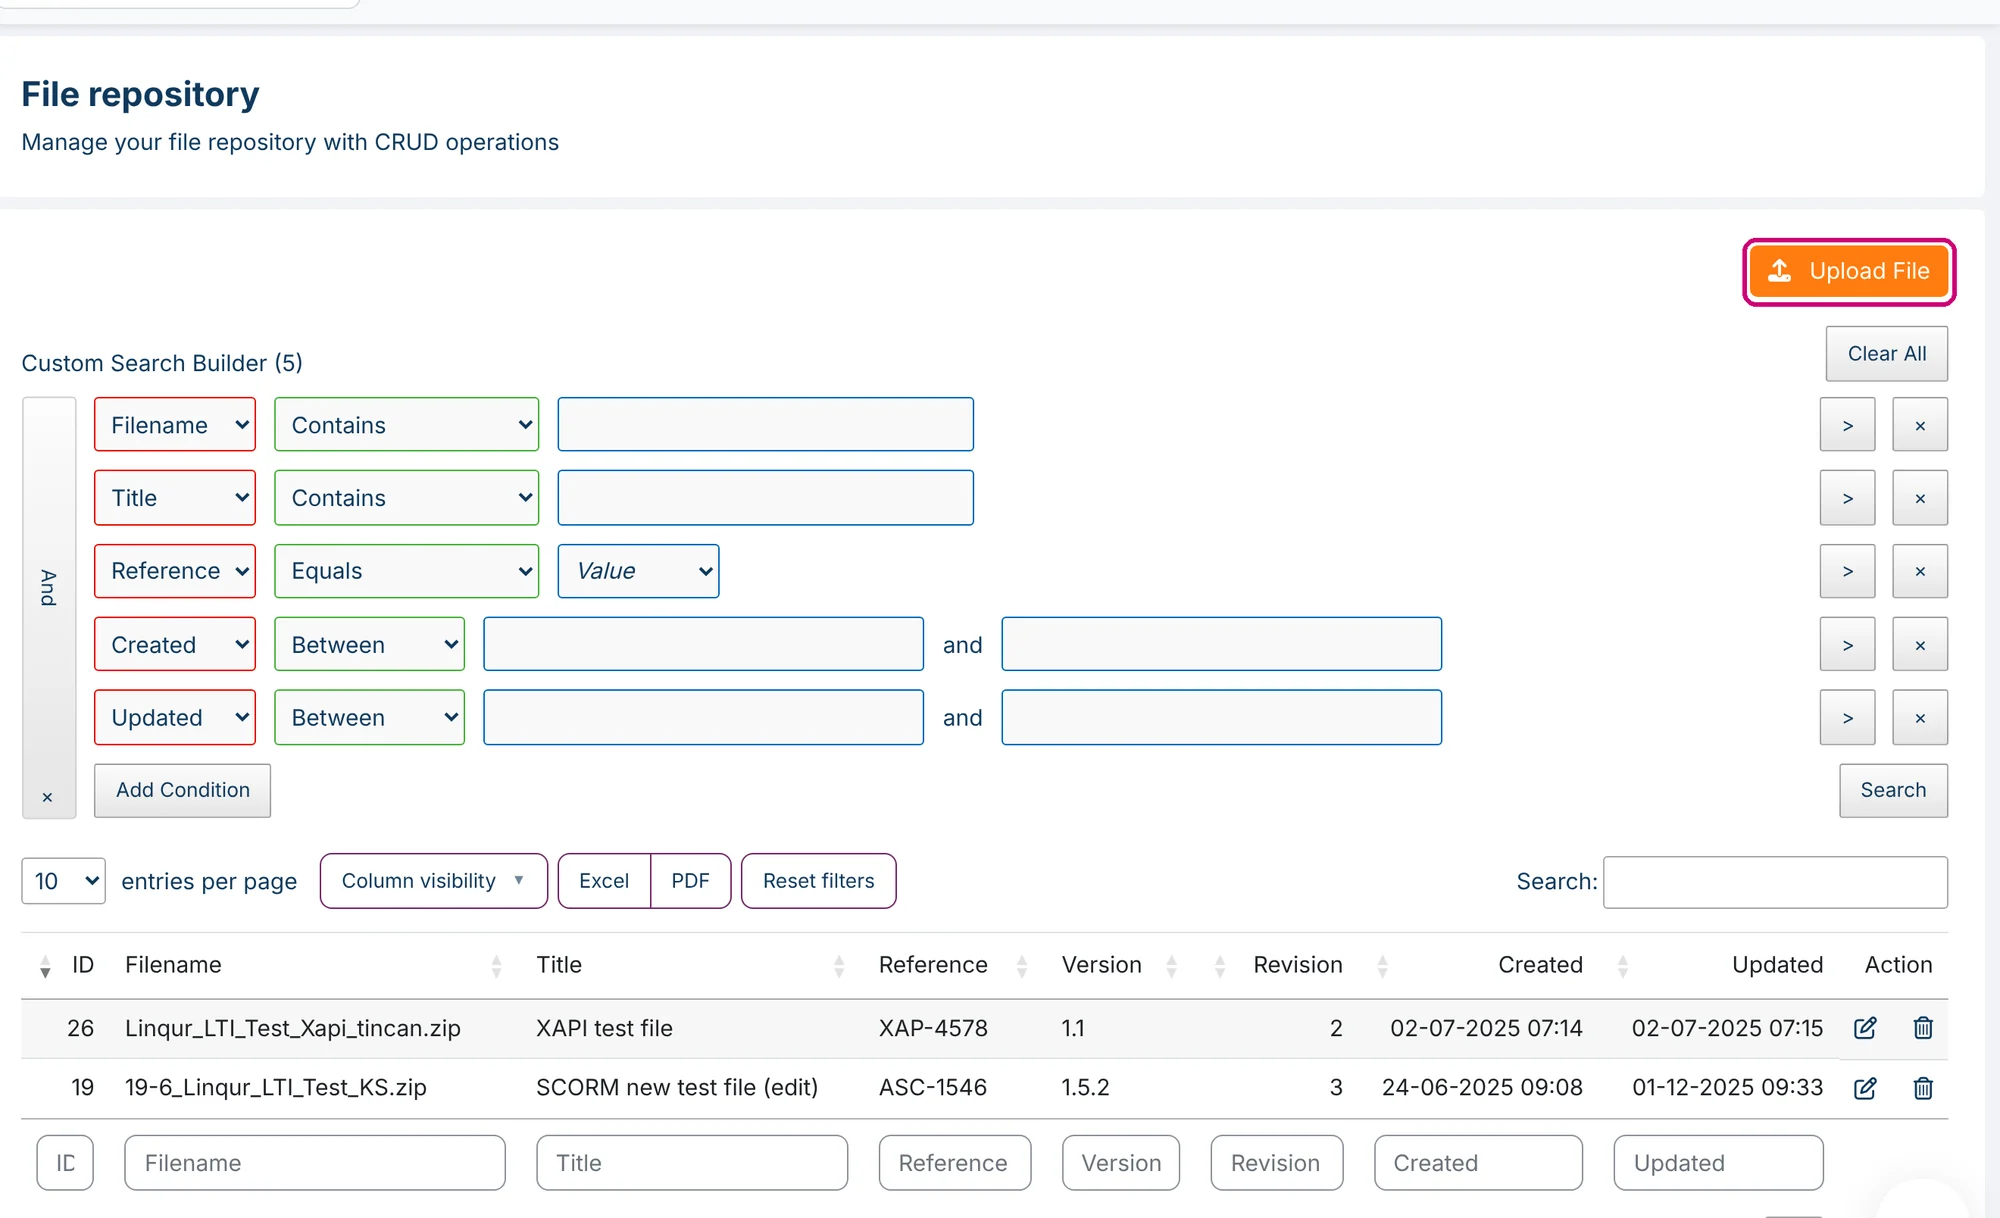
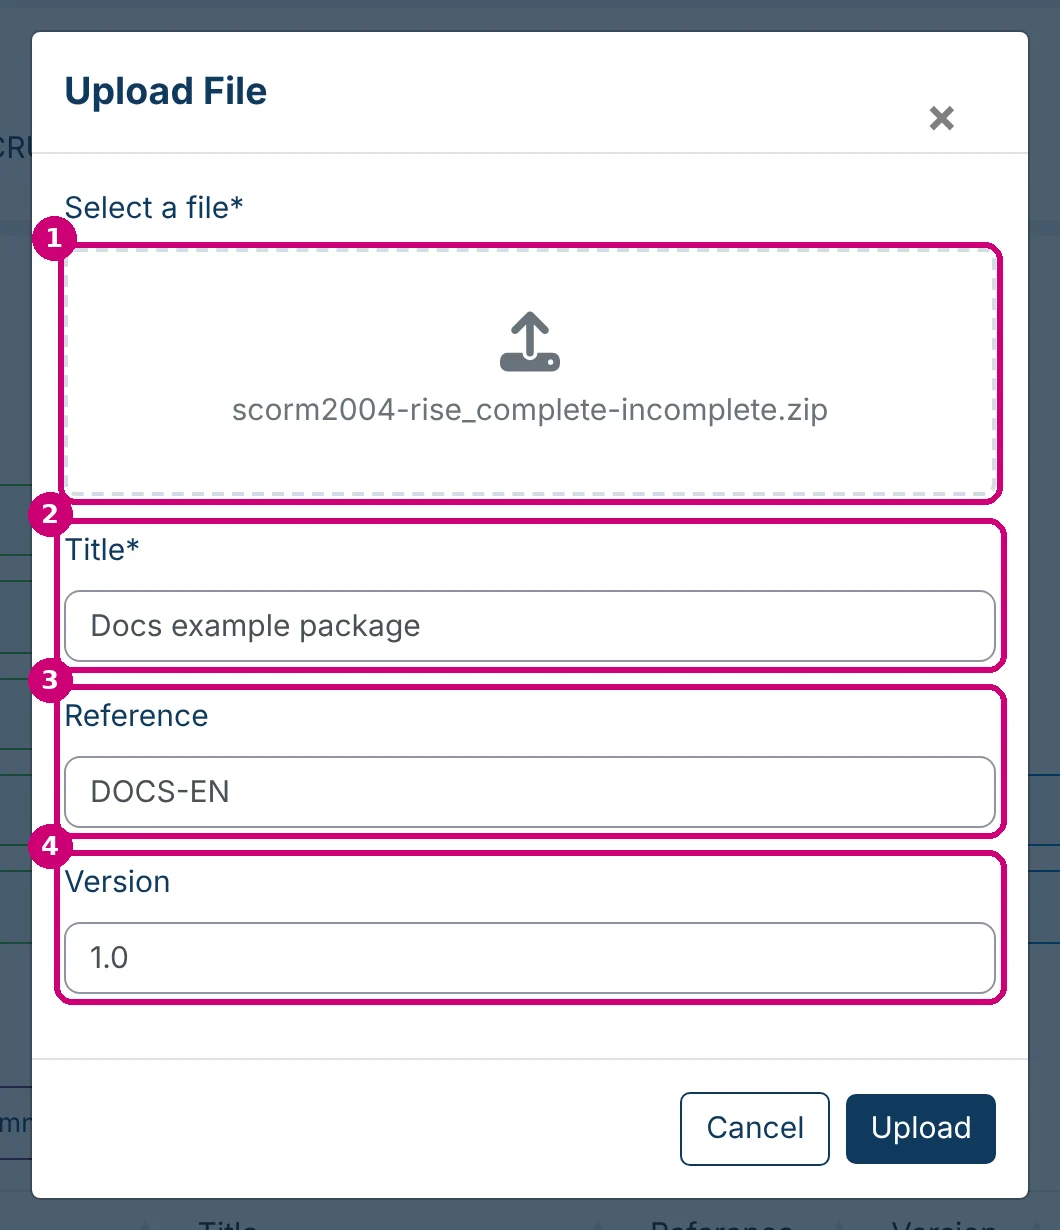
- Fill in the fields and click Upload.
| Field | What to enter |
|---|---|
| Select a file* (1) | The package. Click the box and choose the zip file. |
| Title* (2) | The name of the file in the list. |
| Reference (3) | Optional. Your own code, for example an article number or a client code. |
| Version (4) | Optional. Your own version label, for example 1.0. |
Linqur shows File uploaded successfully. and the file is at the top of the list.
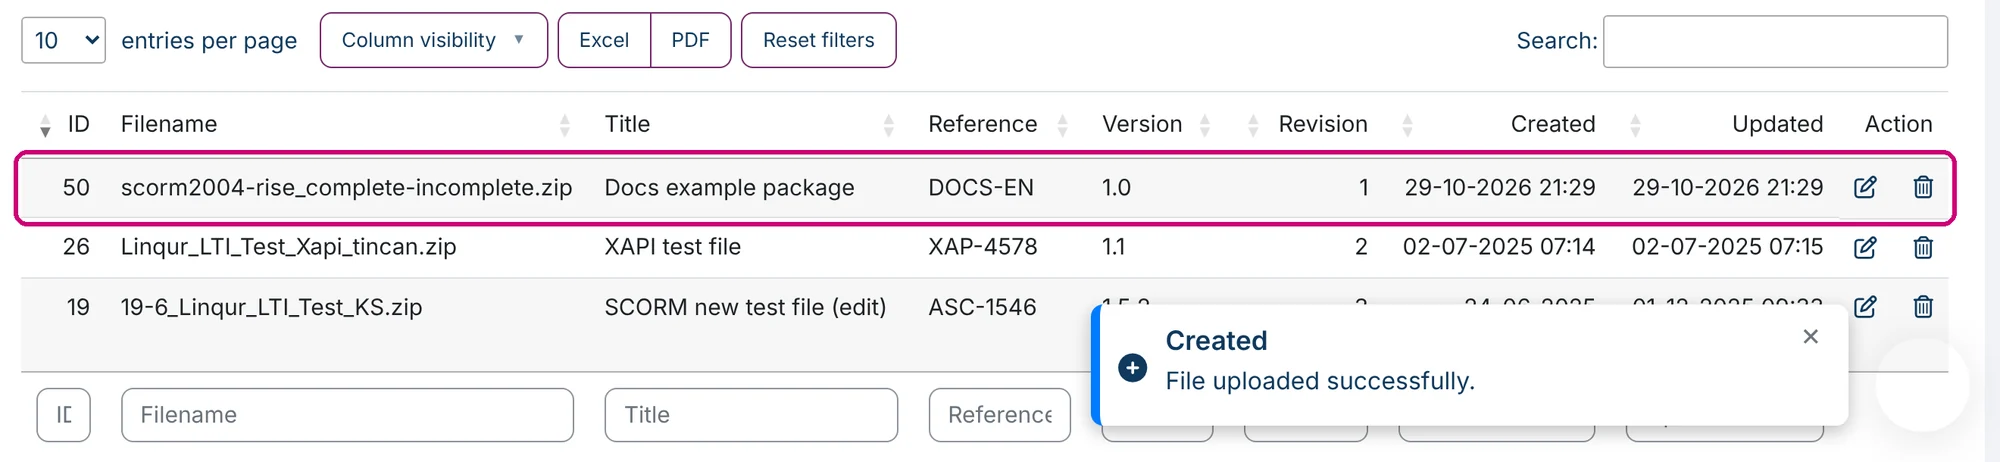
The list
| Column | What it shows |
|---|---|
| ID | The number Linqur gives the file. |
| Filename | The name of the zip file. |
| Title, Reference, Version | What you filled in. |
| Revision | A counter kept by Linqur. It starts at 1 and goes up each time you save the file, also when you only change the version label. |
| Created, Updated | When you uploaded the file and when you last saved it. |
| Action | The pencil icon to edit the file and the trash icon to delete it. |
So Version is a label you choose yourself, and Revision shows how often the file was saved.
Change the title, reference or version
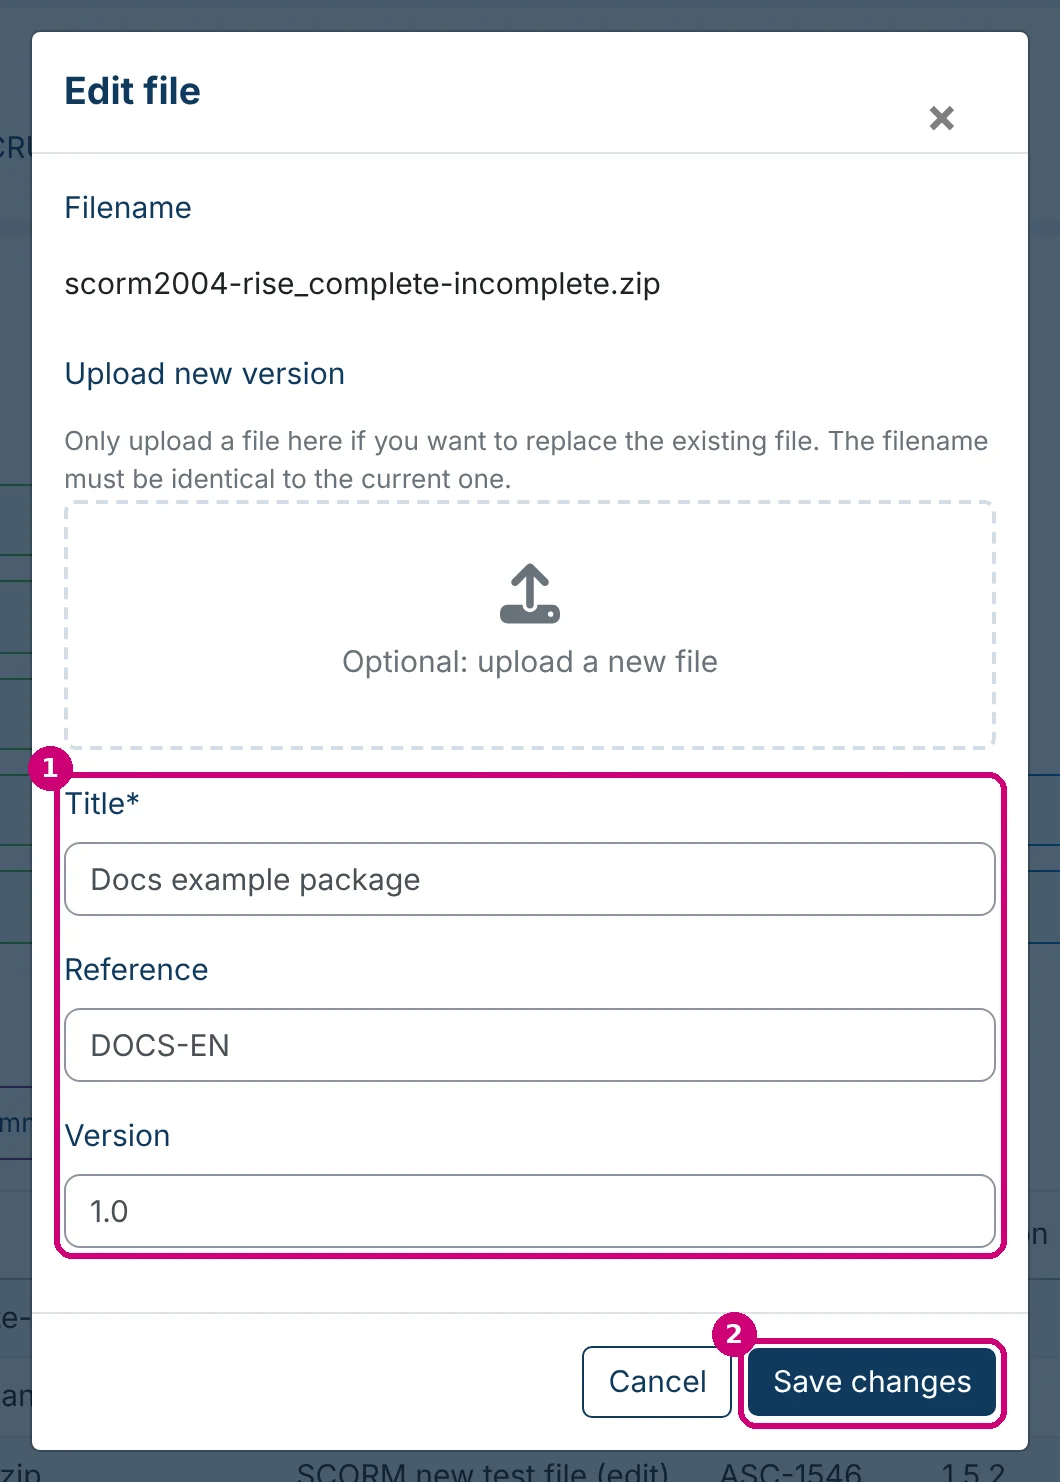
Click the pencil icon in the Action column. In Edit file, change Title, Reference or Version (1) and click Save changes (2).
Upload a new version
- Click the pencil icon of the file.
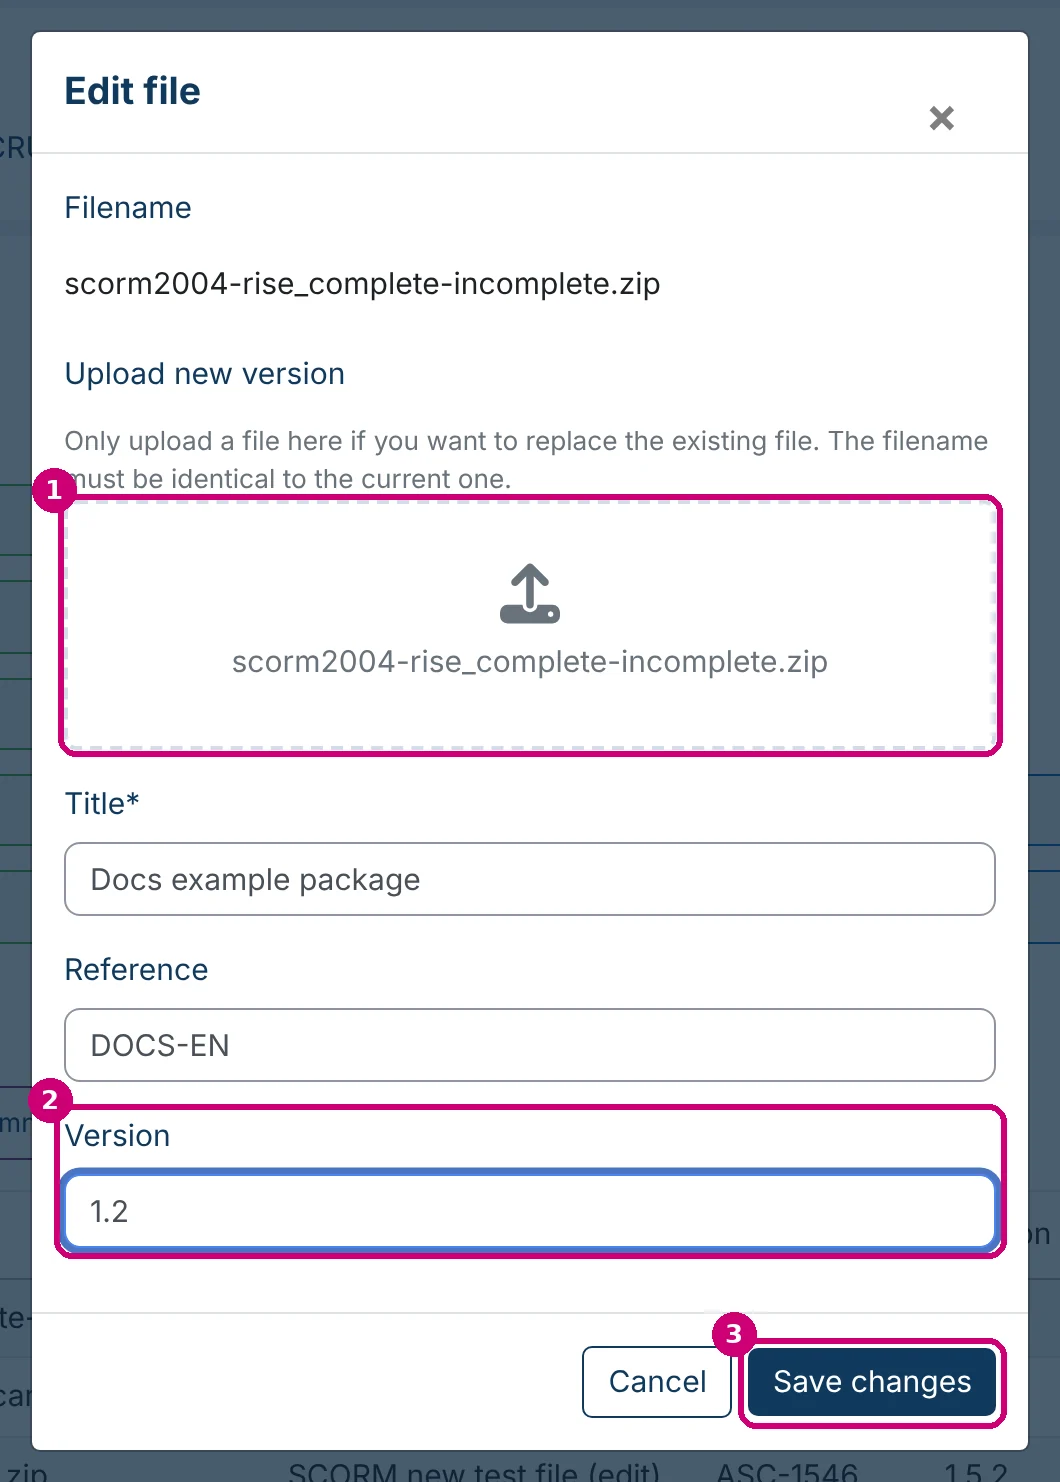
- Under Upload new version (1), choose the new package. Its filename must be exactly the same as the current one, which you see under Filename.
- Change Version (2) if you like, and click Save changes (3).
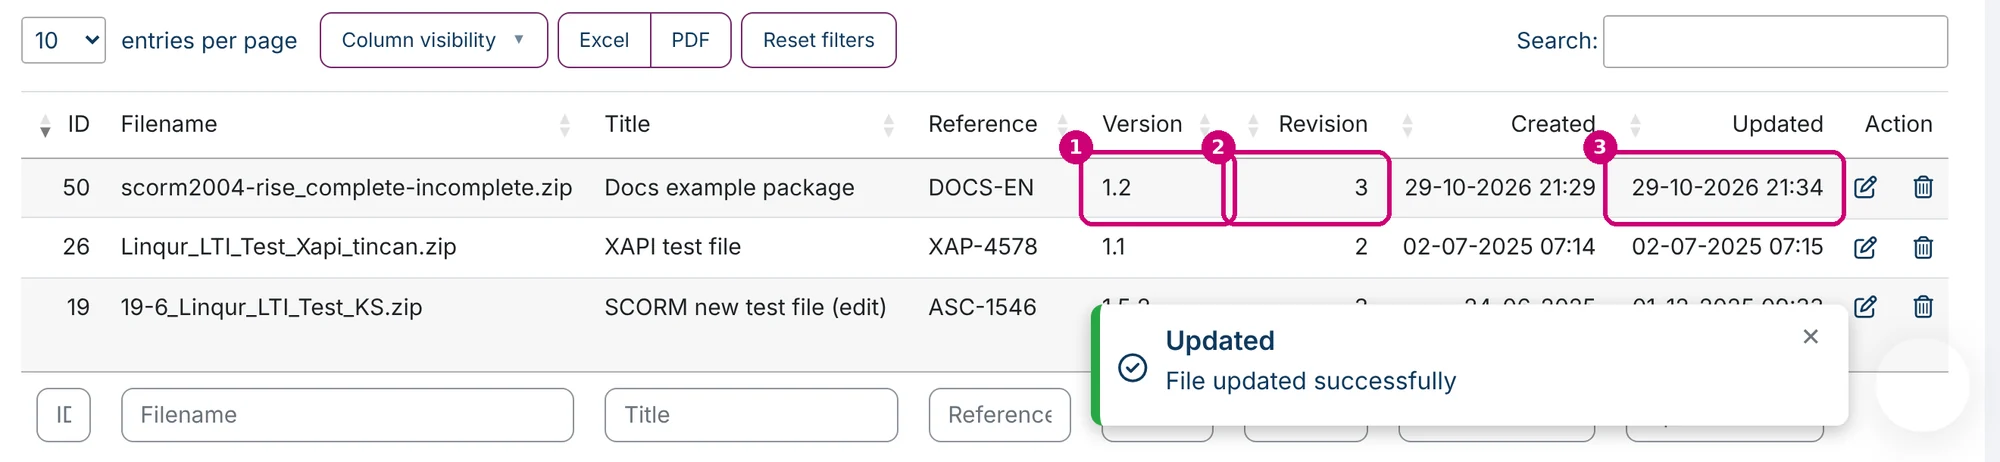
Linqur shows File updated successfully. The row shows your new version label (1), a higher revision (2) and the time of the upload under Updated (3).
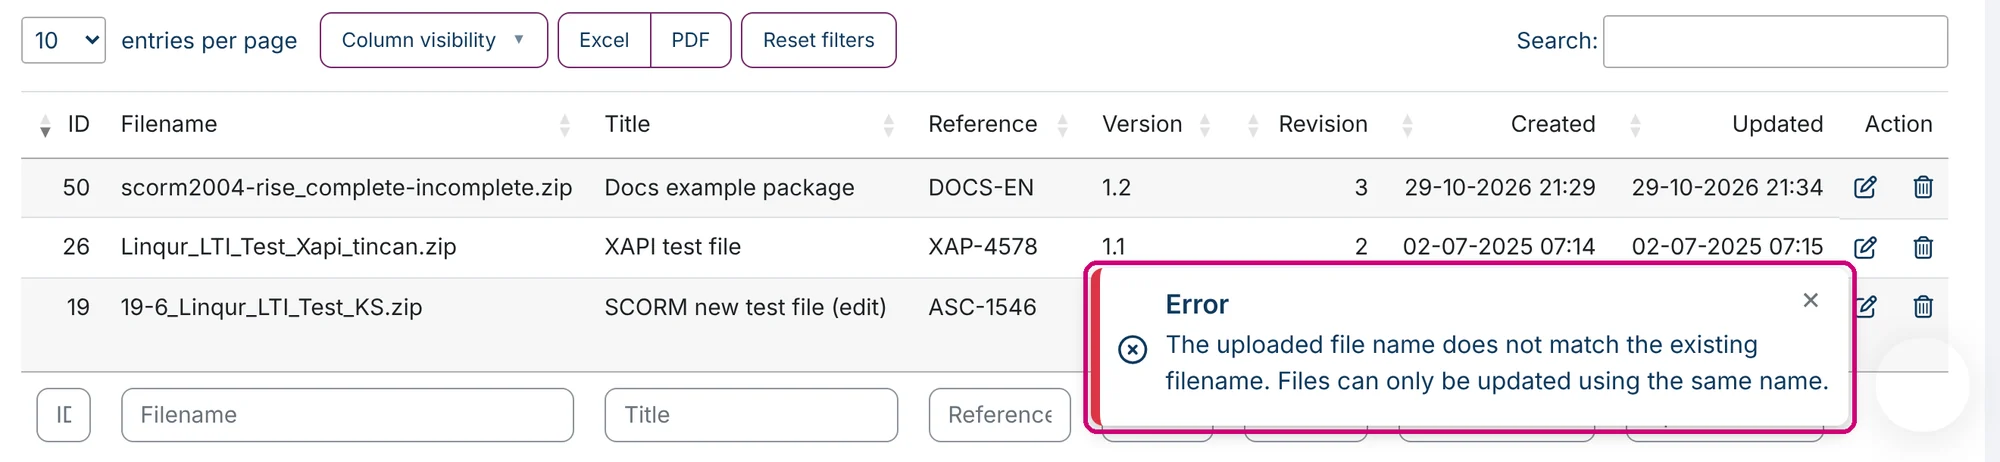
If the filename is different, Linqur refuses the file with the message “The uploaded file name does not match the existing filename. Files can only be updated using the same name.” Rename the new package to the current filename and upload it again.
An activity that links to the file shows the time of the new upload in its file details. How to check that is explained in add a SCORM package from the file repository.
Find and export files
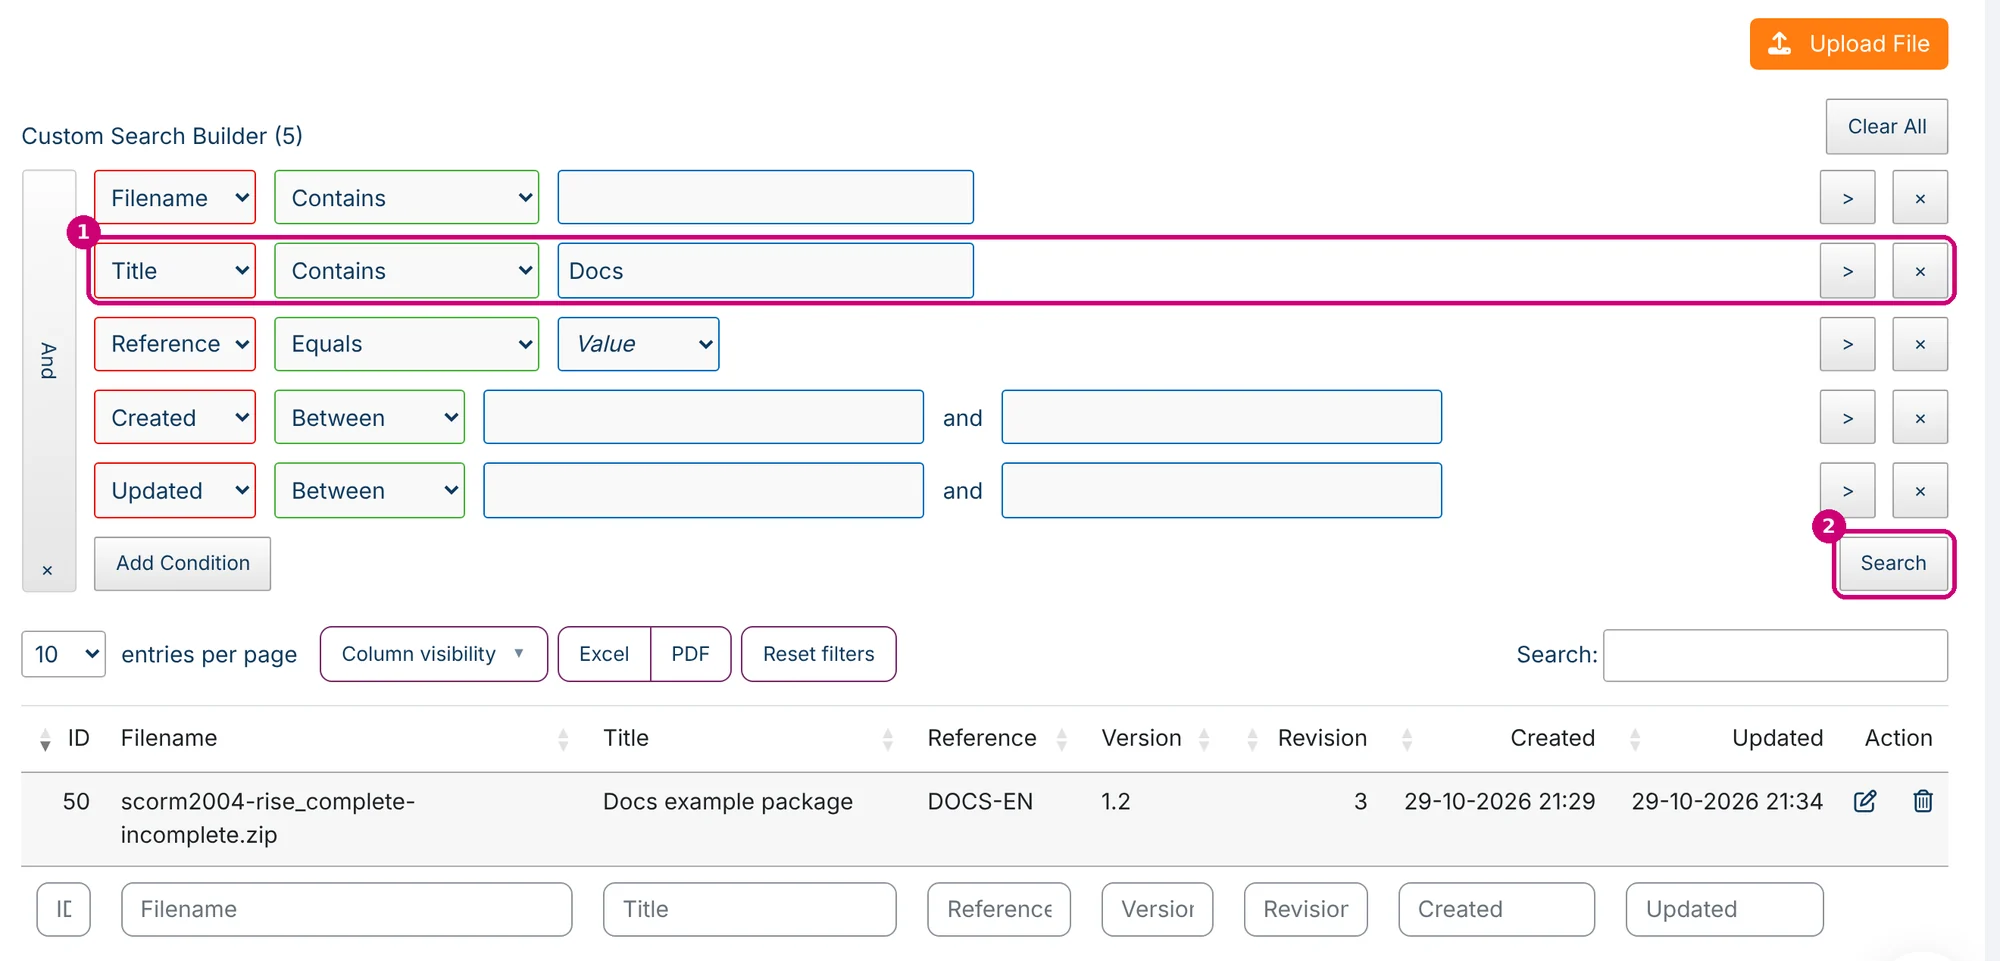
- In the Custom Search Builder, five conditions are ready: Filename, Title, Reference, Created and Updated. Fill in a value, for example “Docs” for Title (1), and click Search (2). Add Condition adds a condition and Clear All clears them.
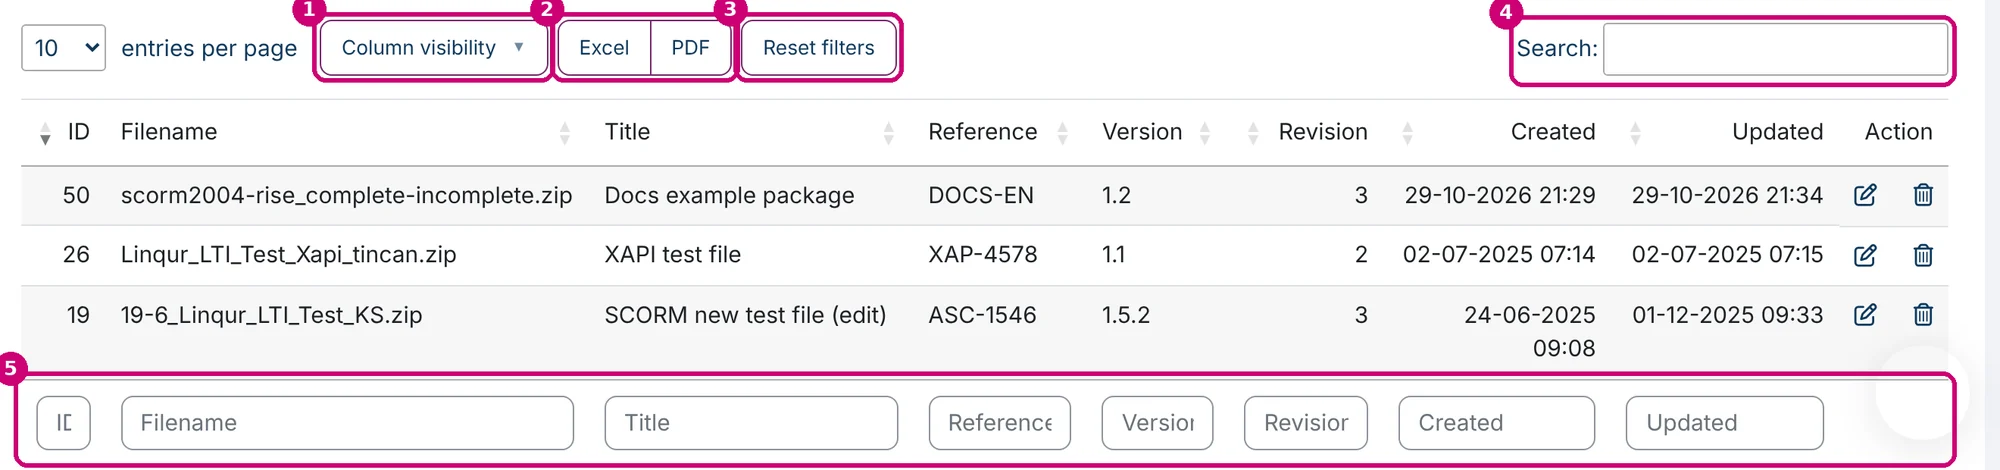
- Column visibility (1) shows or hides columns. Excel and PDF (2) export the list. Reset filters (3) clears all filters.
- Search: (4) searches the list, and under the table every column has its own filter field (5).
- Next to entries per page you choose how many files you see per page.
Delete a file
- Click the trash icon in the Action column.
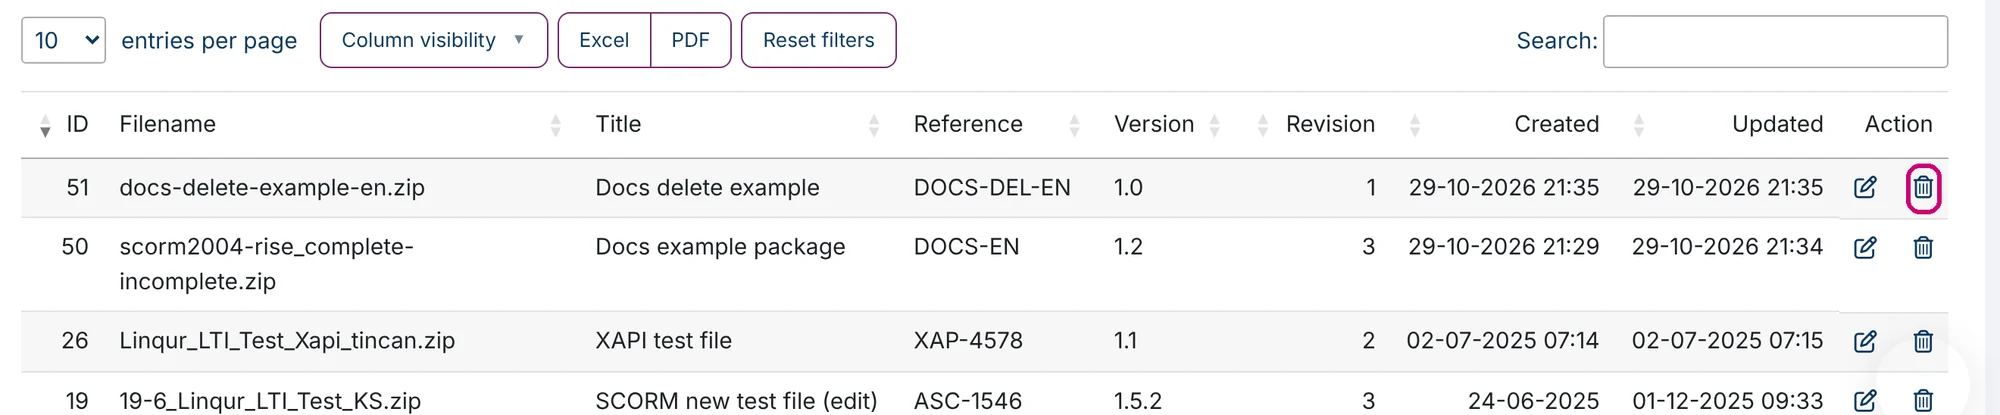
- Your browser asks: “Warning: Deleting this file will break any course activity that uses it. Only delete if it is no longer in use.” Confirm.
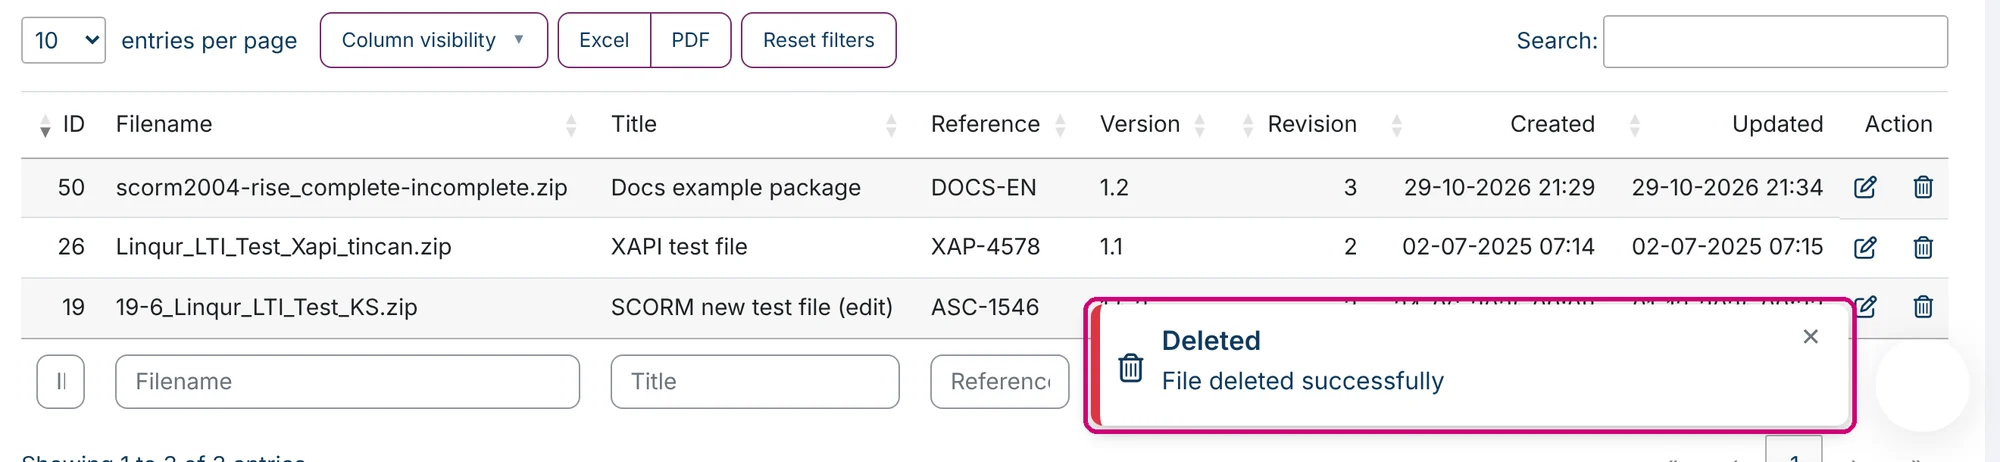
- Linqur shows File deleted successfully and the file is gone from the list. The list has no option to restore it.
Through the API
The Linqur API has endpoints for the file repository too. You find them under Files in Swagger, see the API documentation.
Next step
- Use a file from the repository in a course: add a SCORM package from the file repository.
- Did you upload a package straight into an activity? Then replace it there: how to update a SCORM package.
- Updating packages for many clients at once through SCORM Proxy and LTI is described in the blog Managing SCORM packages at scale.