Publish a SCORM package as an LTI tool
Create an LTI tool for a SCORM package or a complete course, so a client can open it from their own LMS.
An LTI tool is the link between content in Linqur and the LMS that opens it. You create the tool inside the course that holds the content. Linqur then gives you the launch details your client needs. One course can have as many LTI tools as you like, for example one per client.
Before you start
The course needs at least one SCORM package. If it doesn’t have one yet, follow how to add a SCORM package first.
Step by step
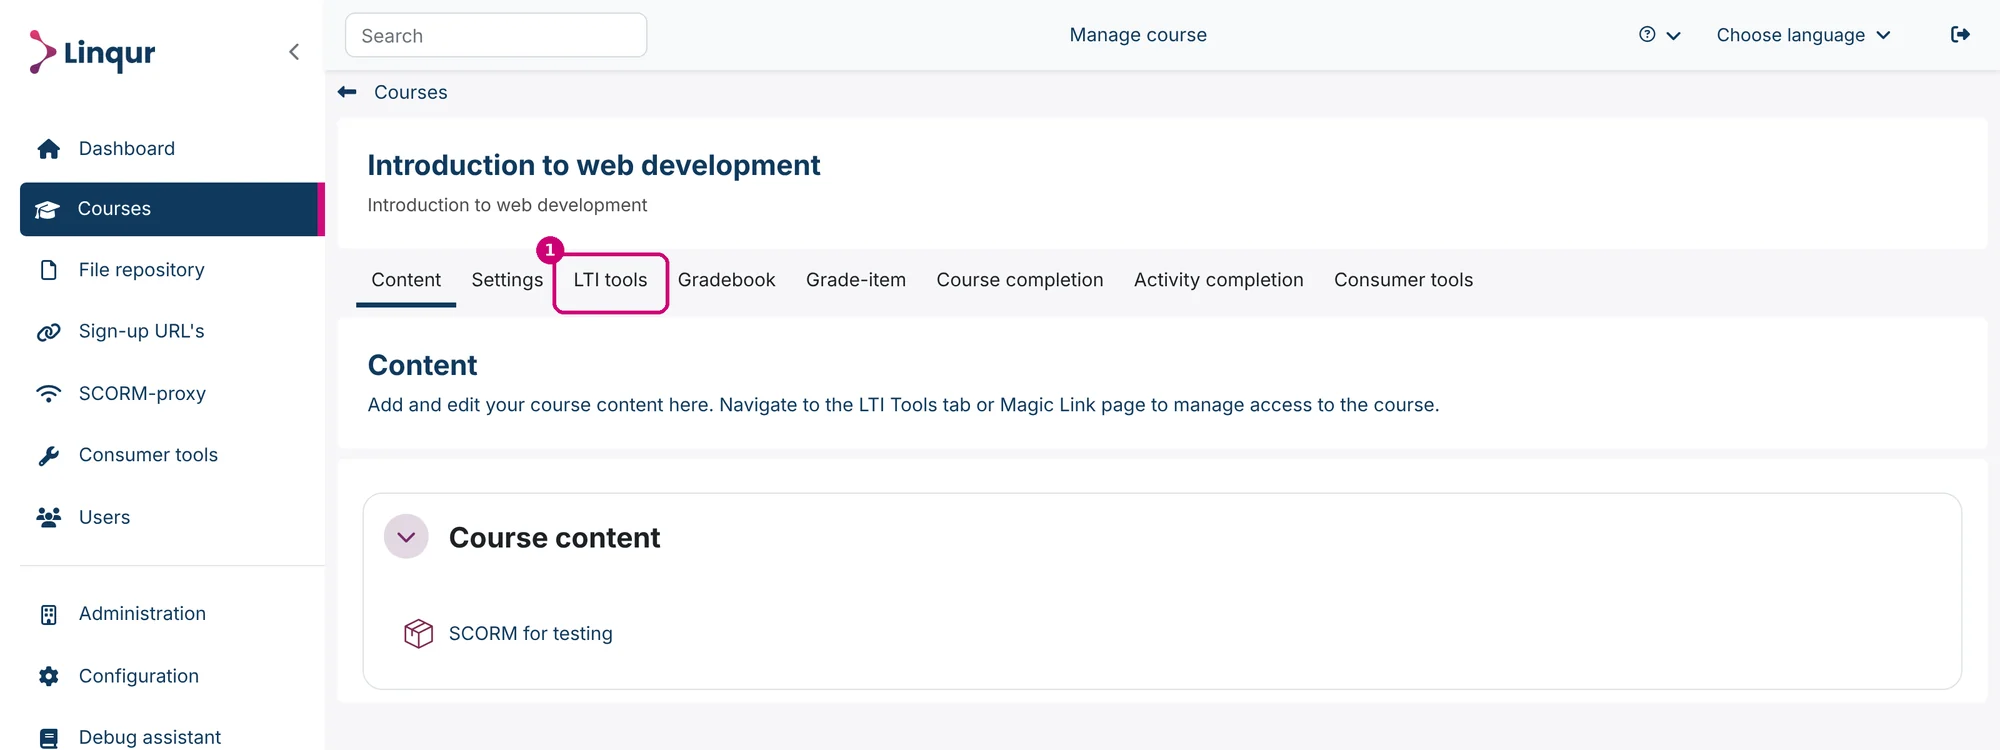
1. Open the LTI tools tab
Click Courses in the menu, then Manage content for the course that holds the package. Click the LTI tools tab.
2. Click Add LTI tool
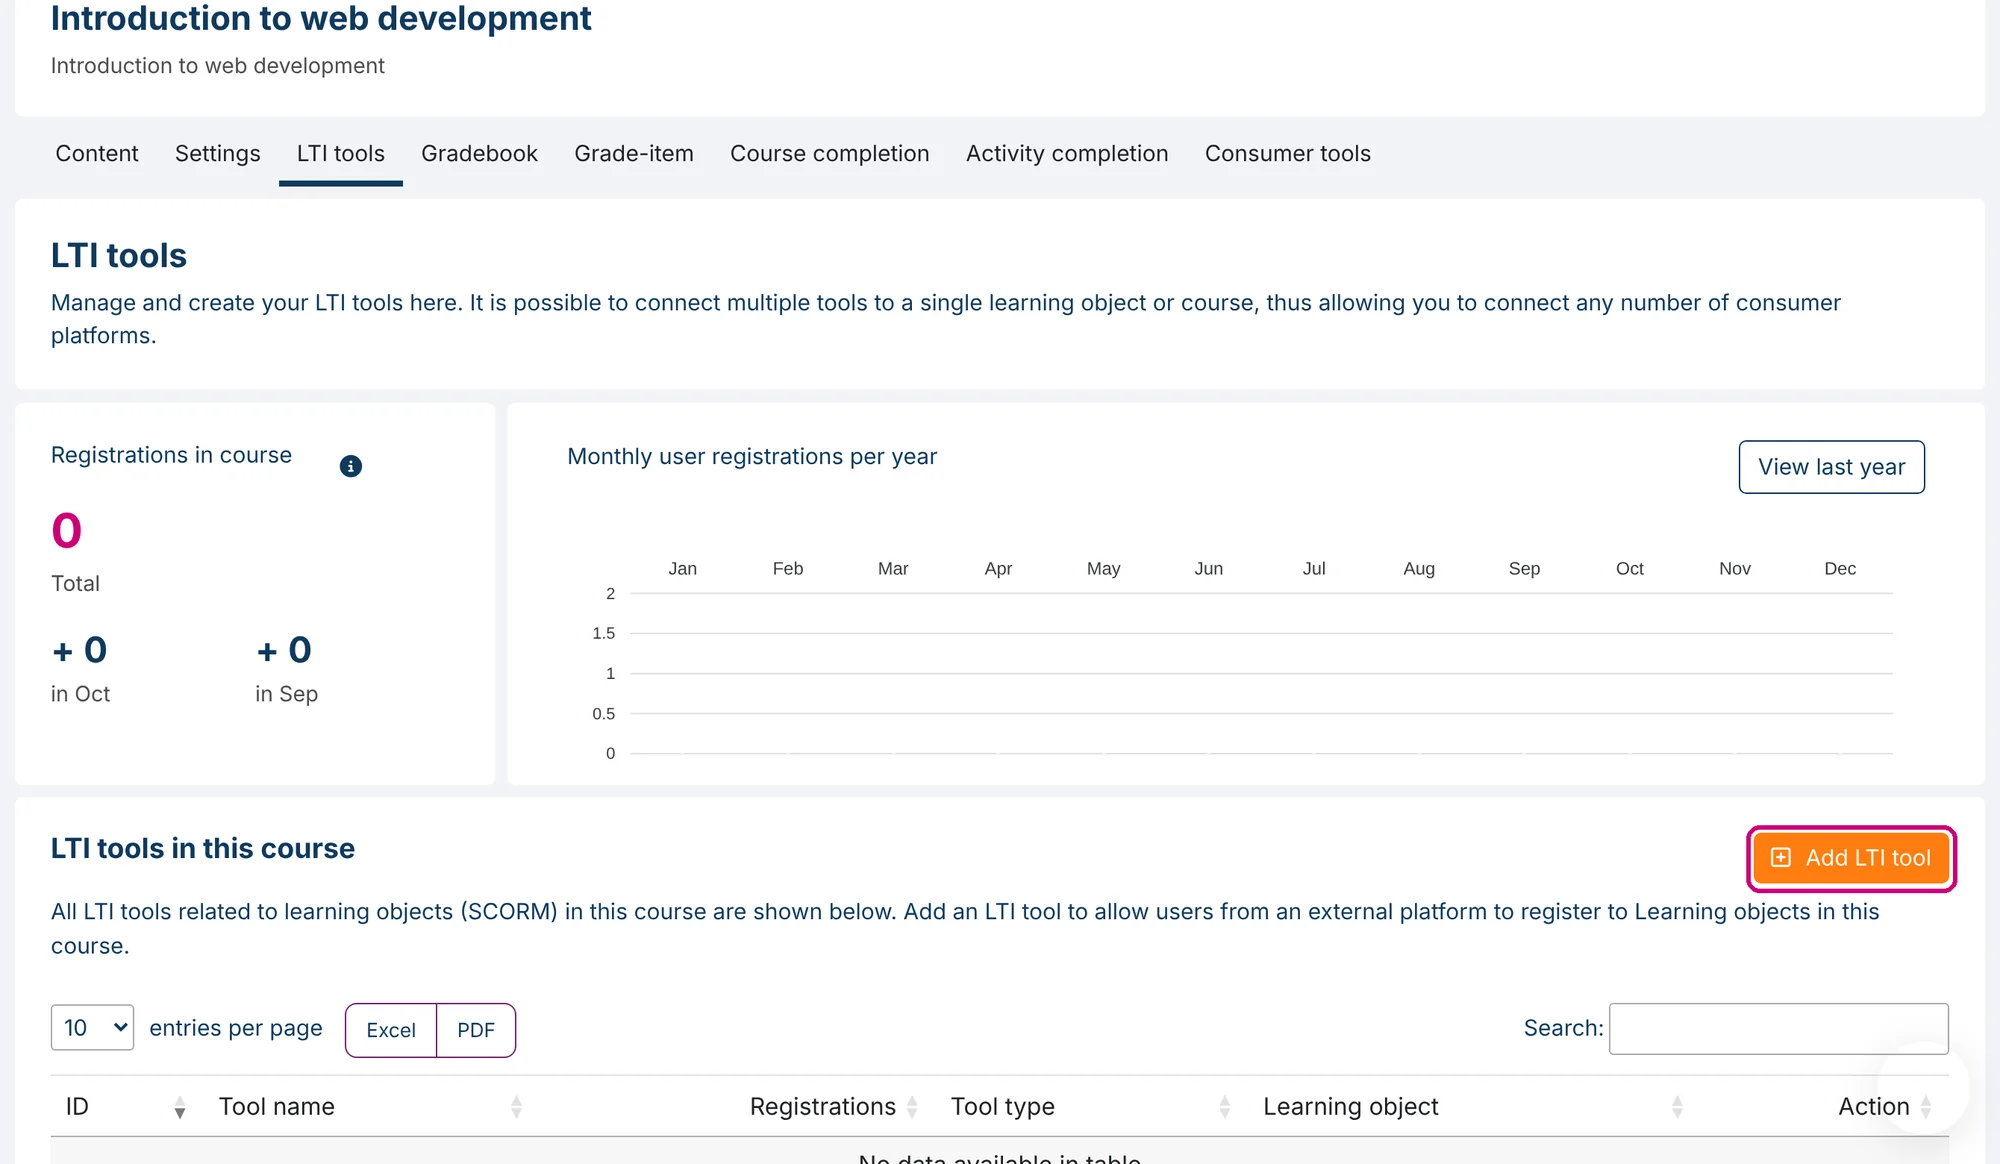
The tab shows the registrations in this course and the tools that already exist. Click Add LTI tool.
3. Name the tool and choose the LTI version
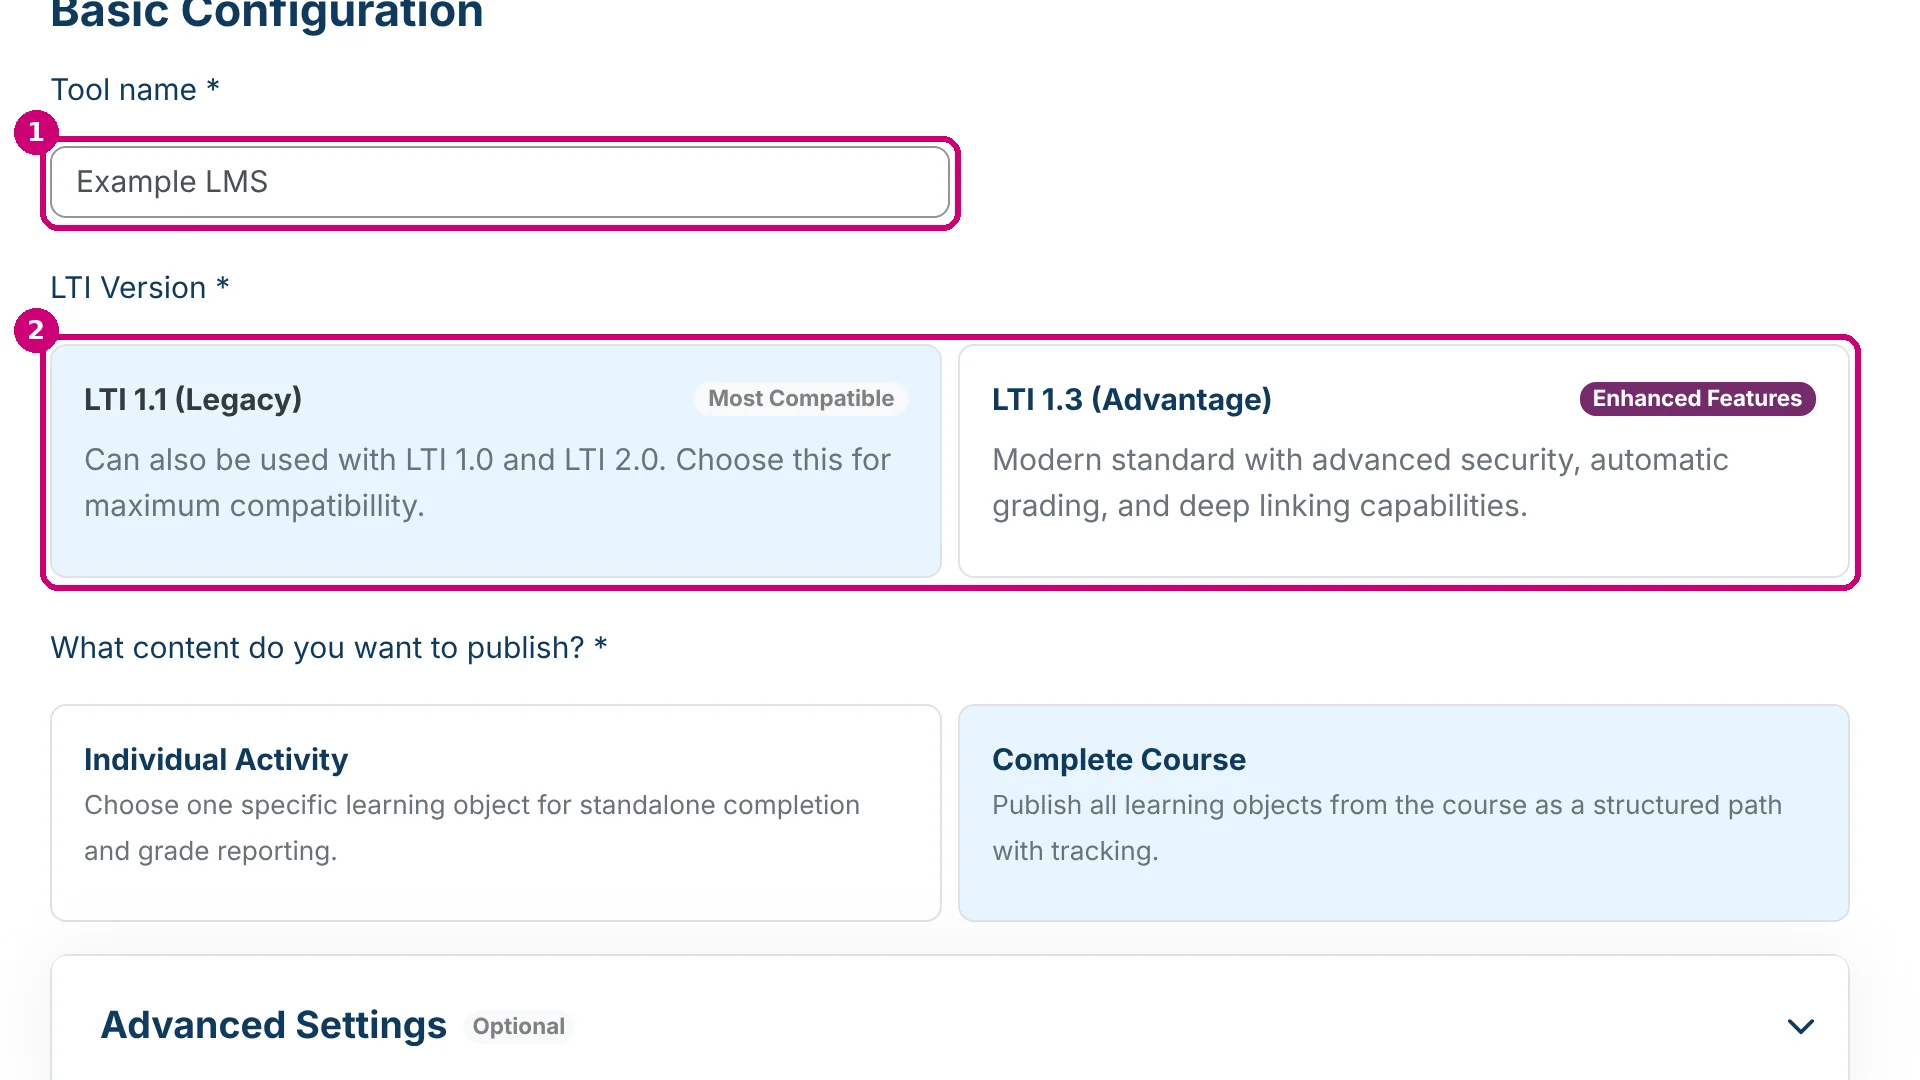
- Tool name (1): the name is for your own overview, so use something you recognise, for example the name of the client.
- LTI Version (2): choose LTI 1.1 (Legacy) or LTI 1.3 (Advantage).
| Version | When to choose it |
|---|---|
| LTI 1.1 (Legacy) | Works with almost every LMS, including older ones that use LTI 1.0 or 2.0. Your client only needs the Launch URL and the Secret. This is the default. |
| LTI 1.3 (Advantage) | The current standard, with grade services and deep linking. Your client’s LMS has to be registered as a platform in Linqur first. See register an LTI 1.3 platform for how that works. |
Not sure which one your client supports? Ask them, or start with LTI 1.1. You can change the version later in the tool settings.
4. Choose what you publish
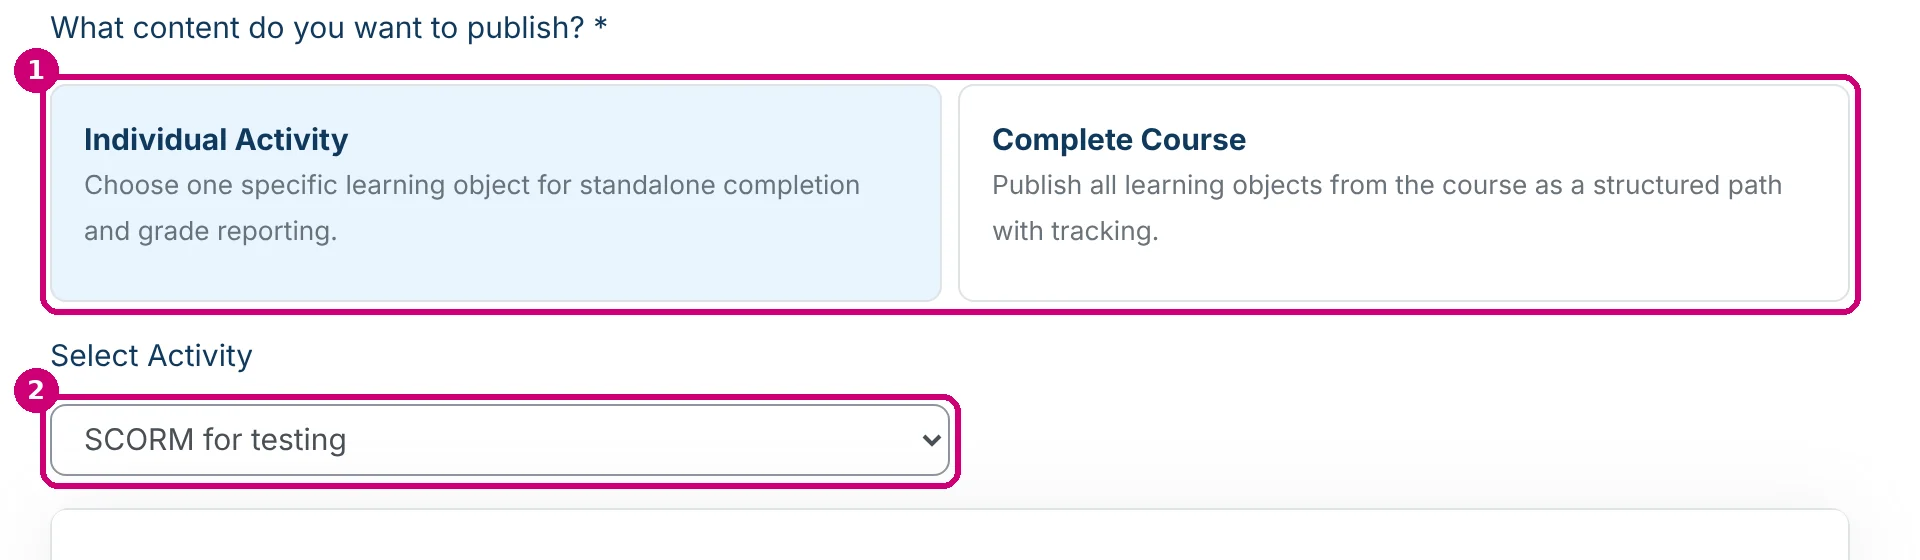
- Individual Activity (1): one learning object, such as a SCORM package. Choose it under Select Activity (2). The learner’s completion and grade come from that one package.
- Complete Course: all learning objects of the course, as one learning path with progress tracking.

5. Set the advanced settings (optional)
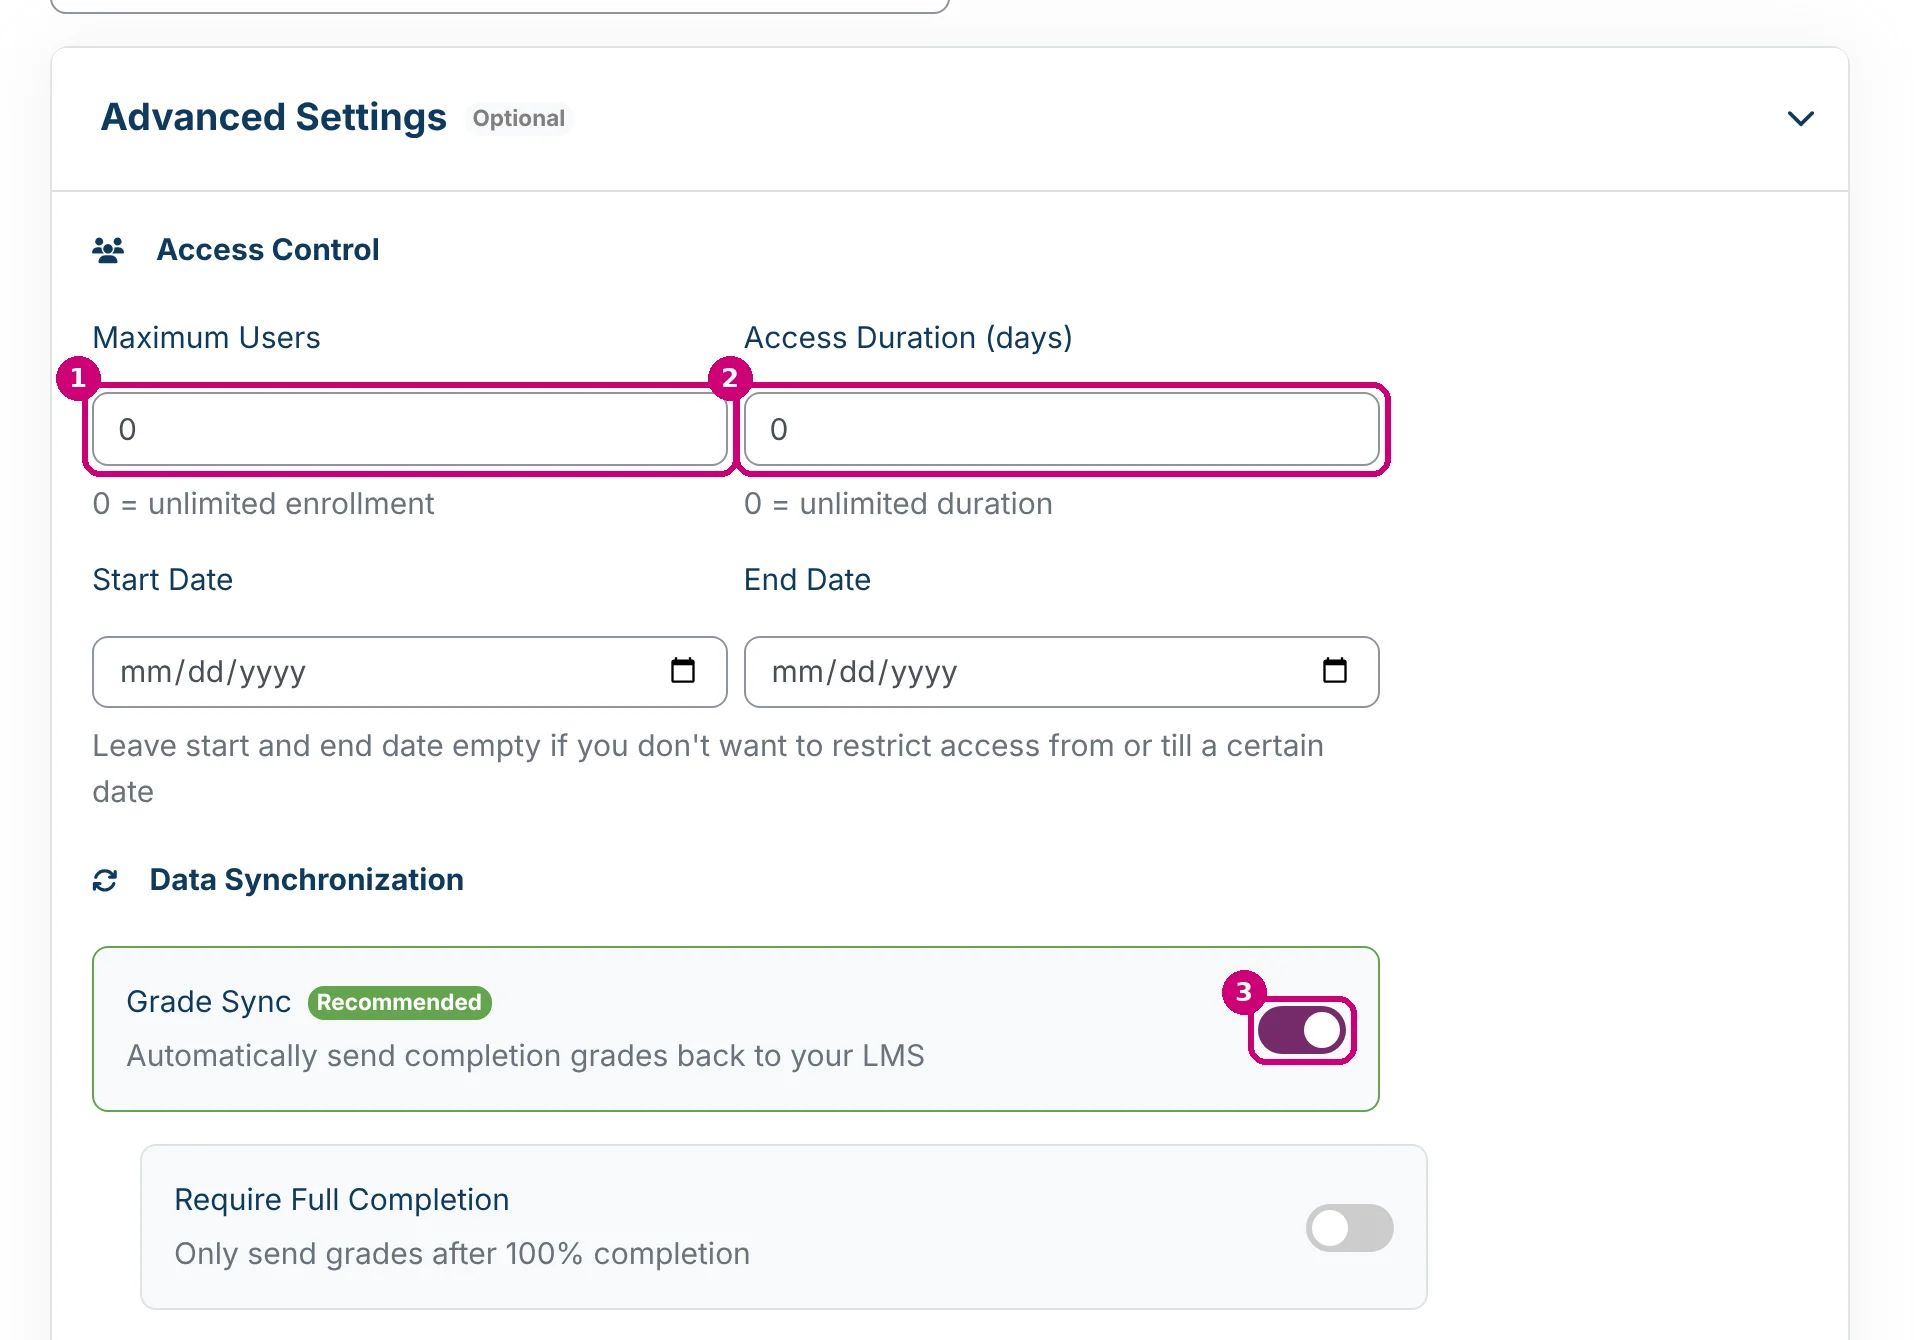
Click Advanced Settings. Every field has a default, so you can skip this step.
| Field | What it does |
|---|---|
| Maximum Users (1) | The maximum number of learners that can register through this tool. 0 means unlimited. |
| Access Duration (days) (2) | How many days a learner keeps access after the first launch. 0 means unlimited. |
| Start Date and End Date | Learners can only launch the tool within this period. Leave both empty for no limit. |
| Grade Sync (3) | Sends the grade back to the LMS. On by default. |
| Require Full Completion | Only sends the grade once the learner has completed the content. |
| Member Sync (4) | Lets the LMS enrol and unenrol learners automatically. When you turn it on, choose how under Synchronization Behavior. |
All of these settings are explained in more detail in LTI tool settings explained.
6. Create the tool
Click Create LTI tool.
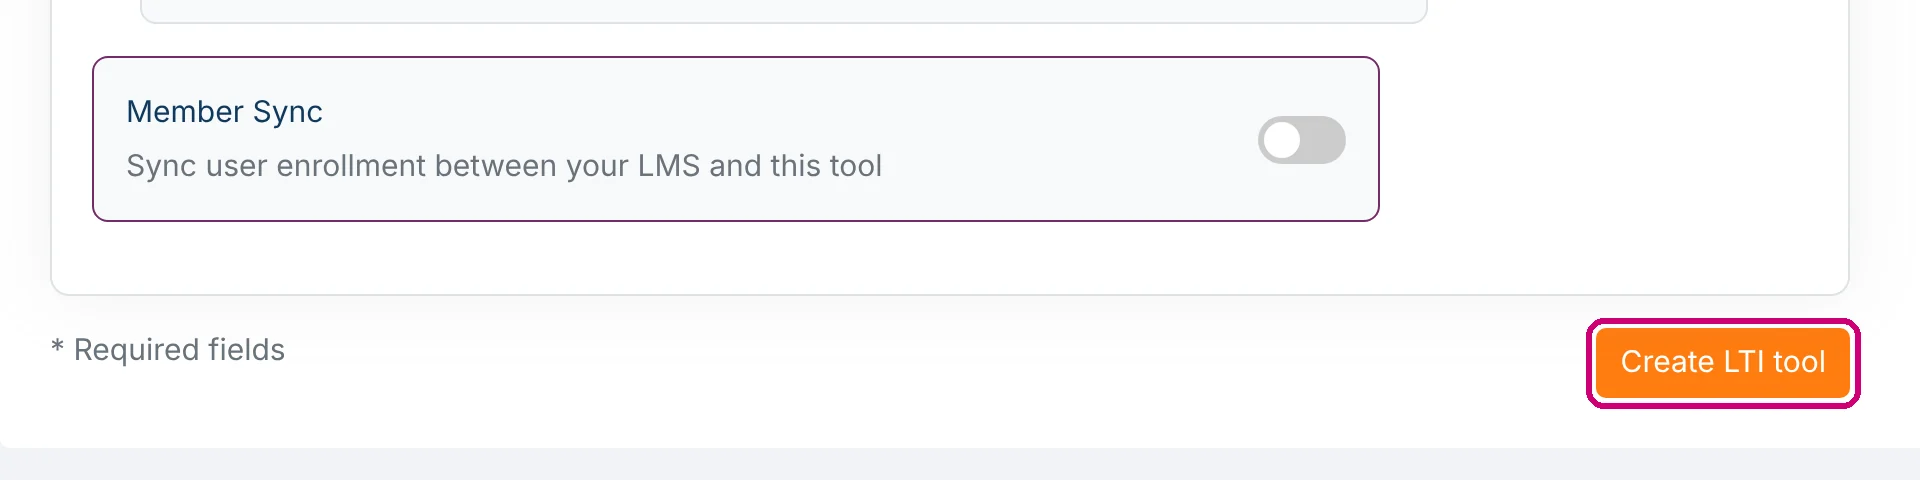
Linqur confirms that the tool was added and opens the tool details.
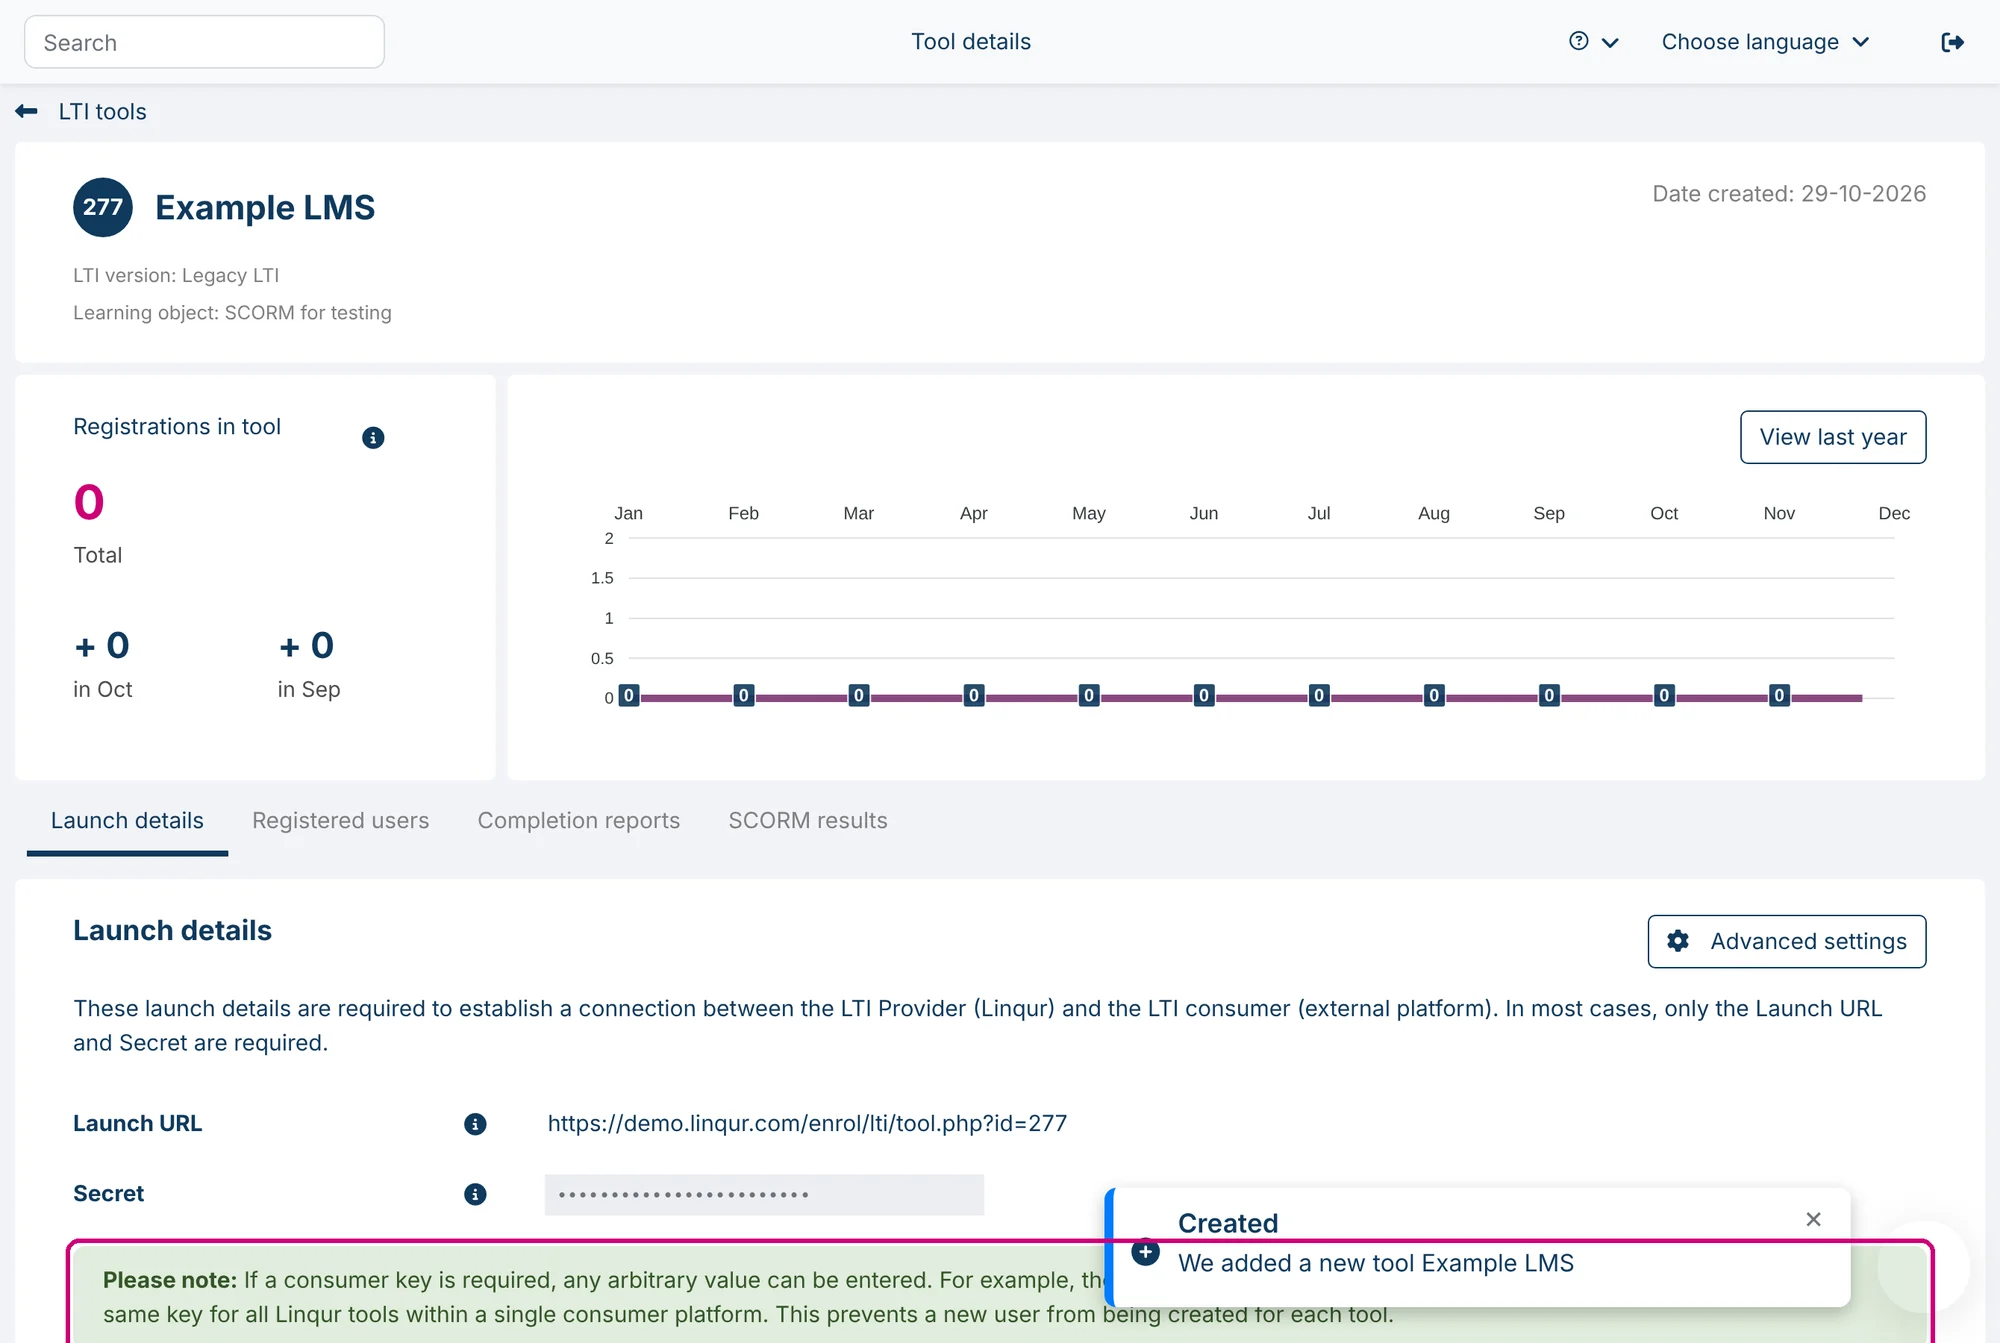
7. Share the launch details
Under Launch details you find the Launch URL and the Secret. Your client needs both to add the tool in their LMS. How to find and send them is explained in share the launch details of an LTI tool.
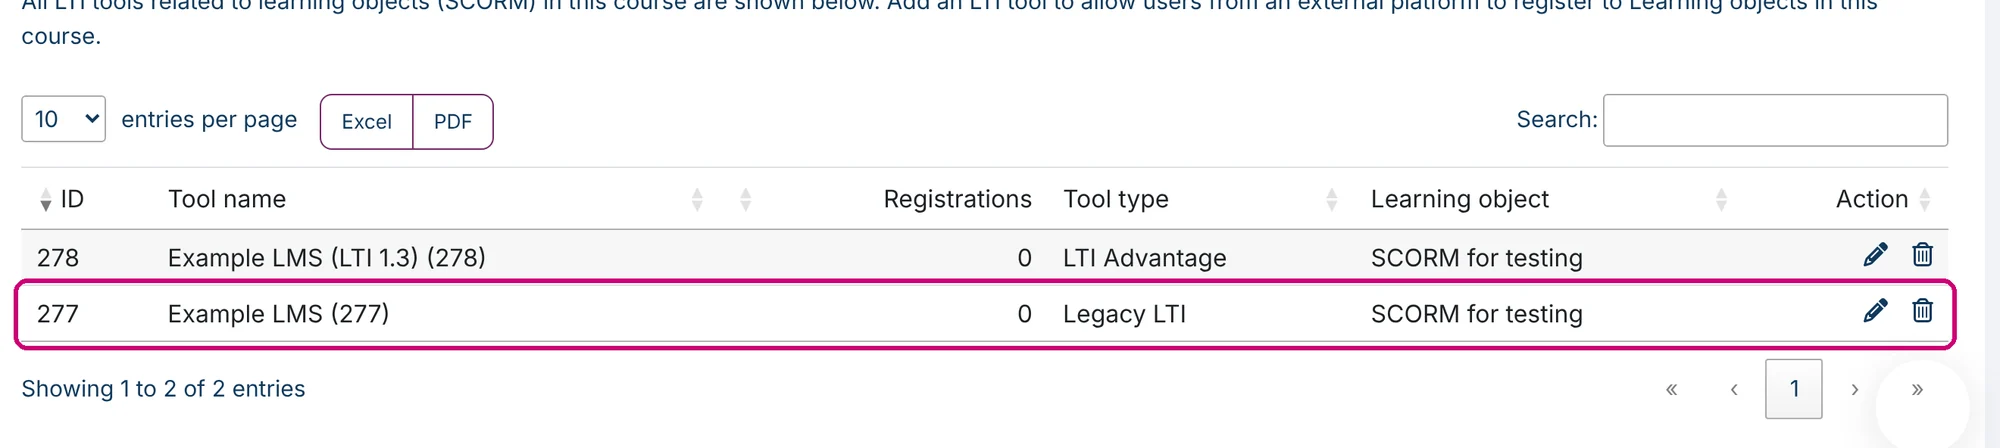
Back on the LTI tools tab, the new tool is in the list. Click the row to open it again.
Next step
- Send the Launch URL and Secret to your client: share the launch details of an LTI tool.
- Change a setting later: edit the settings of an LTI tool.
- Test the tool before your client does: LTI tool testing with Saltire.
- If the launch fails in the LMS, check the list of LTI errors and their solutions.