Register an LTI 1.3 platform
Register your client’s LMS as a platform in Linqur, so learners can launch your LTI 1.3 tools from that LMS.
An LTI 1.3 (Advantage) tool doesn’t use a secret. Instead, Linqur needs to know the LMS that launches the tool: you register that LMS as a platform. You create the registration in Linqur, and the administrator of the LMS completes it on their side. LTI 1.1 tools don’t need a platform registration.
Before you start
- You have an LTI 1.3 tool in Linqur. If not, follow publish a SCORM package as an LTI tool and choose LTI 1.3 (Advantage).
- You are in touch with the administrator of your client’s LMS. They complete the registration in the LMS.
Step by step
1. Open Registered platforms
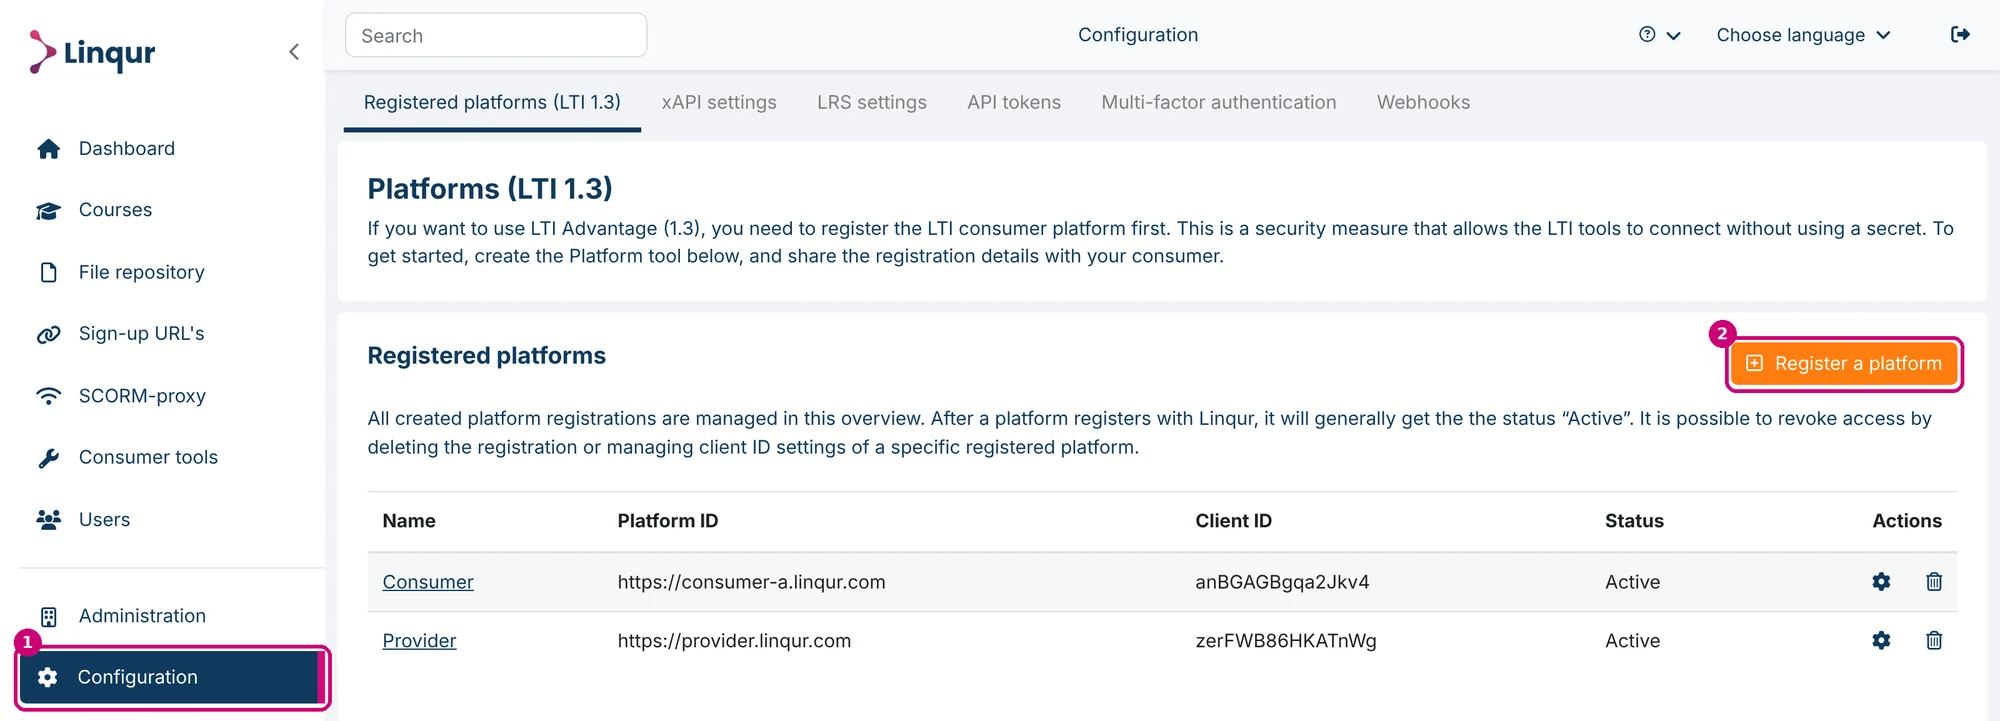
Click Configuration in the menu (1). The Registered platforms (LTI 1.3) tab opens with all registrations, their Platform ID, Client ID and status. Click Register a platform (2).
2. Name the registration
Enter a Platform name (1), for example the name of your client or their LMS. You can change the name later. Click Continue (2).

Linqur creates the registration and opens the Tool details tab. Until the details of the LMS are in, the overview shows the registration with the status Pending. How you continue depends on the LMS: dynamic registration (step 3) or manual registration (step 4).
3. Dynamic registration: share the Registration URL
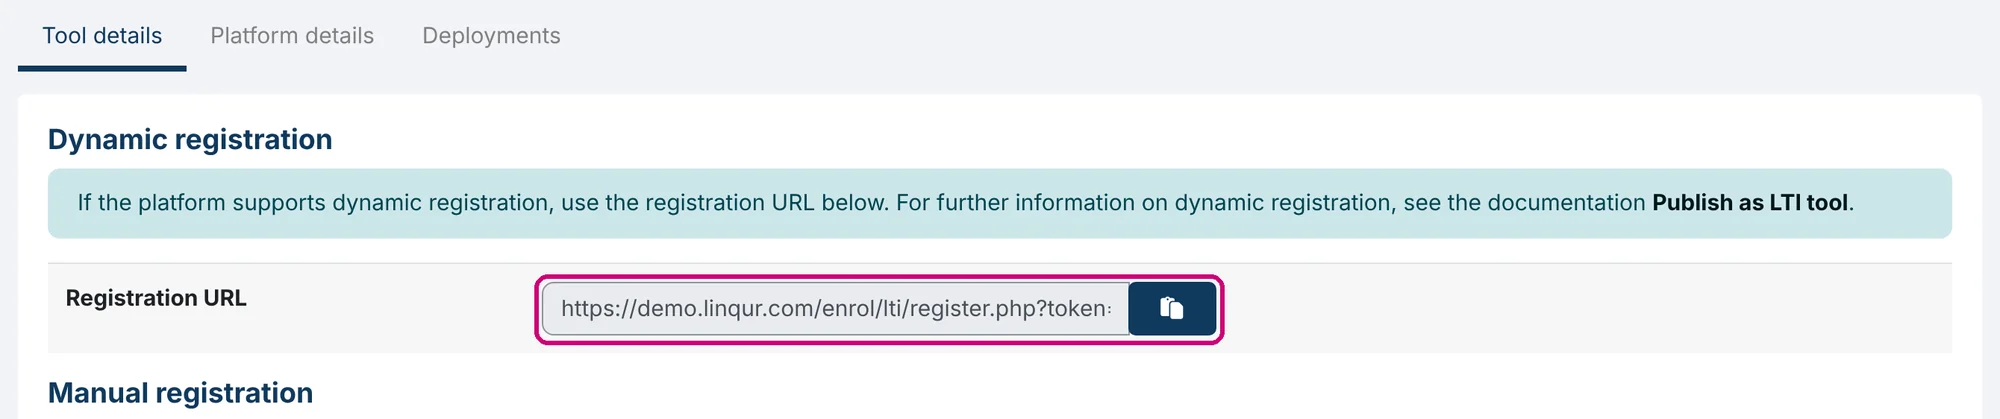
Under Dynamic registration, click the copy button next to the Registration URL. Linqur confirms that the URL was copied. Give the URL to the administrator of the LMS, who pastes it in the LMS. With dynamic registration, the details of the LMS are filled in automatically on the Platform details tab, so you don’t enter them yourself.
How the administrator adds the URL in Moodle is described in LTI Advantage consumer in Moodle.
4. Manual registration
Use this route if the LMS doesn’t support dynamic registration. It has three parts.
a. Give the tool endpoints to the LMS administrator. They’re under Manual registration on the Tool details tab. Each URL has a copy button.
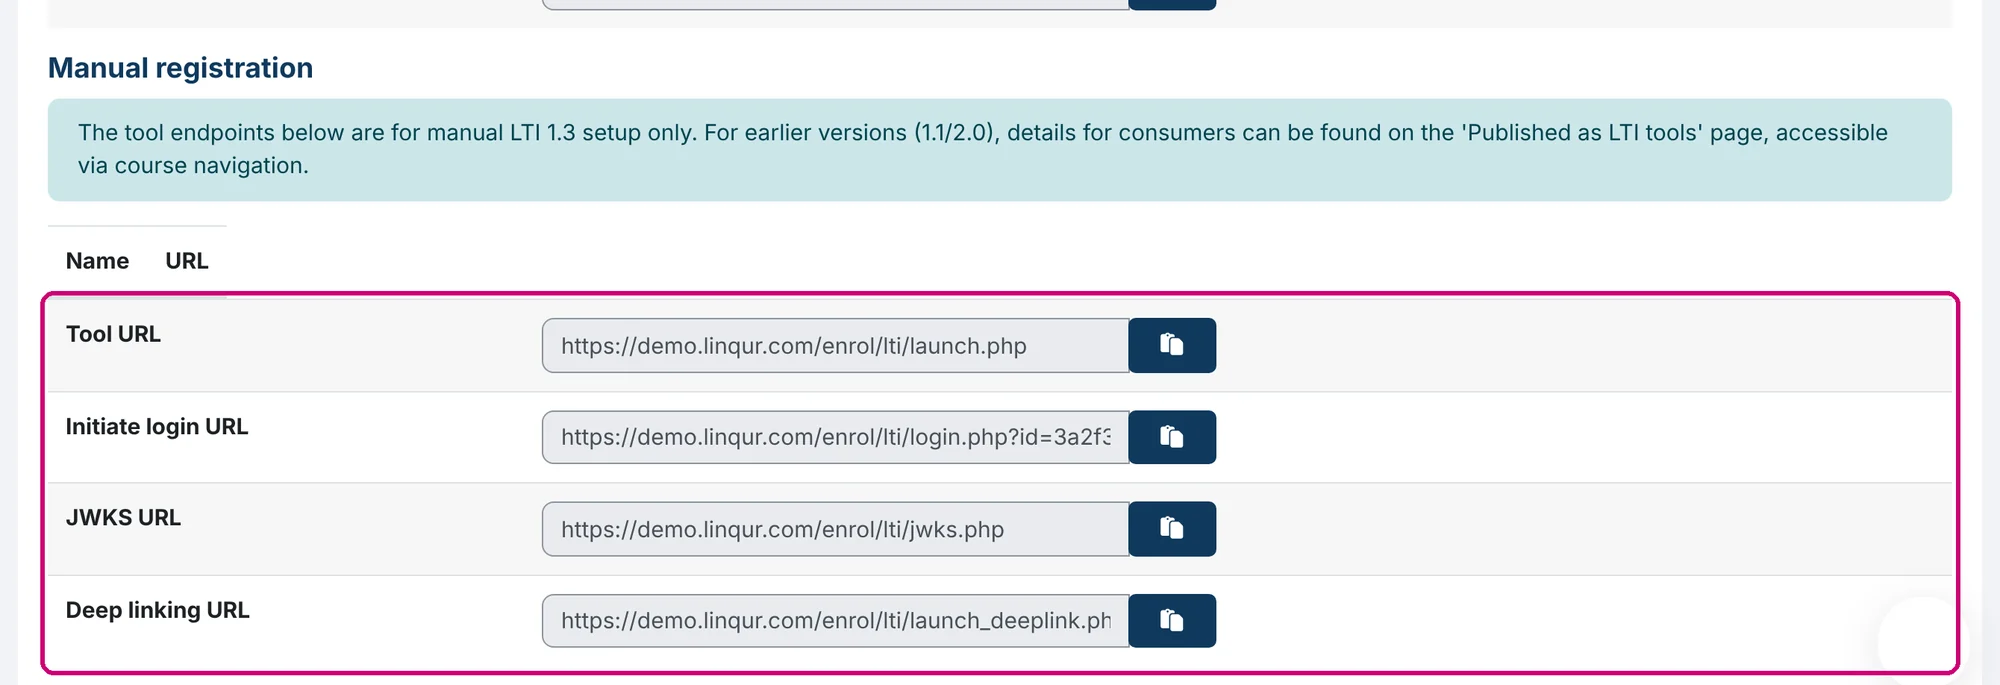
| Endpoint | What it is |
|---|---|
| Tool URL | The address the LMS uses to launch Linqur tools. |
| Initiate login URL | The login address for this registration. It ends with the id of this registration, so every registration has its own. |
| JWKS URL | The address where the LMS finds the public keys of Linqur. |
| Deep linking URL | Only fill this in if the LMS asks for a deep linking or content selection URL. |
b. Enter the platform details. When the administrator has added the tool in the LMS, they give you the details of the LMS. Open the Platform details tab and click Edit platform details.
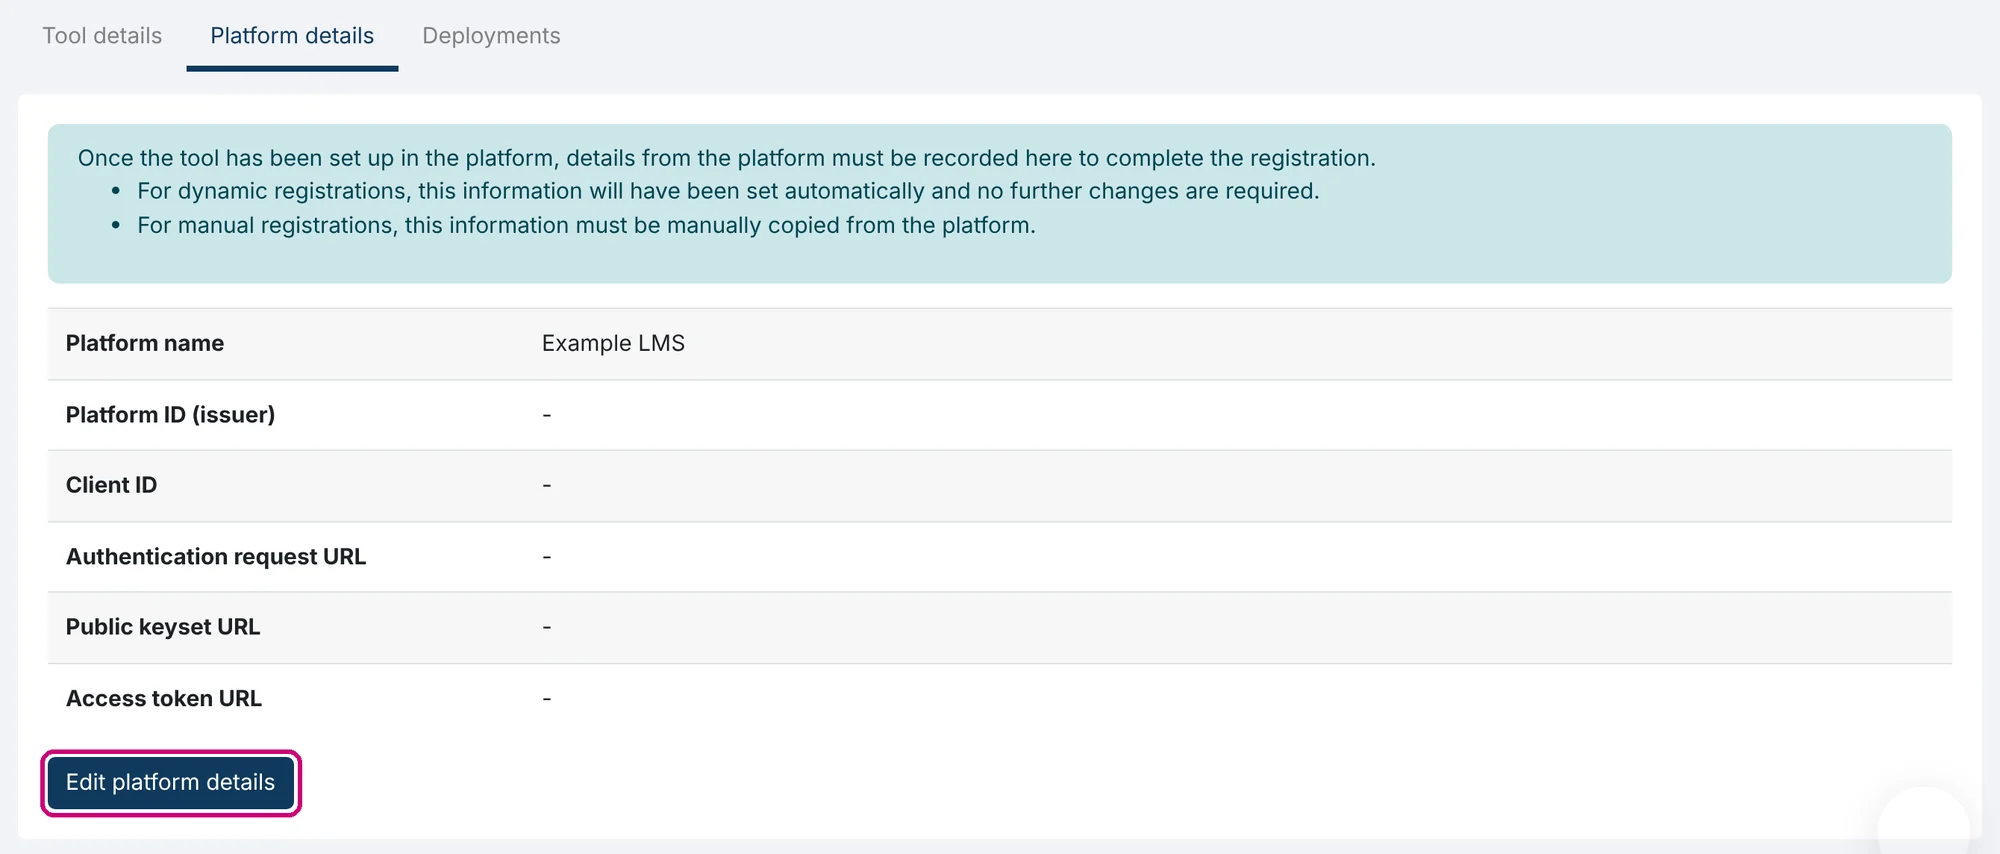
Fill in all fields (1). They’re all required. Click Save changes (2).
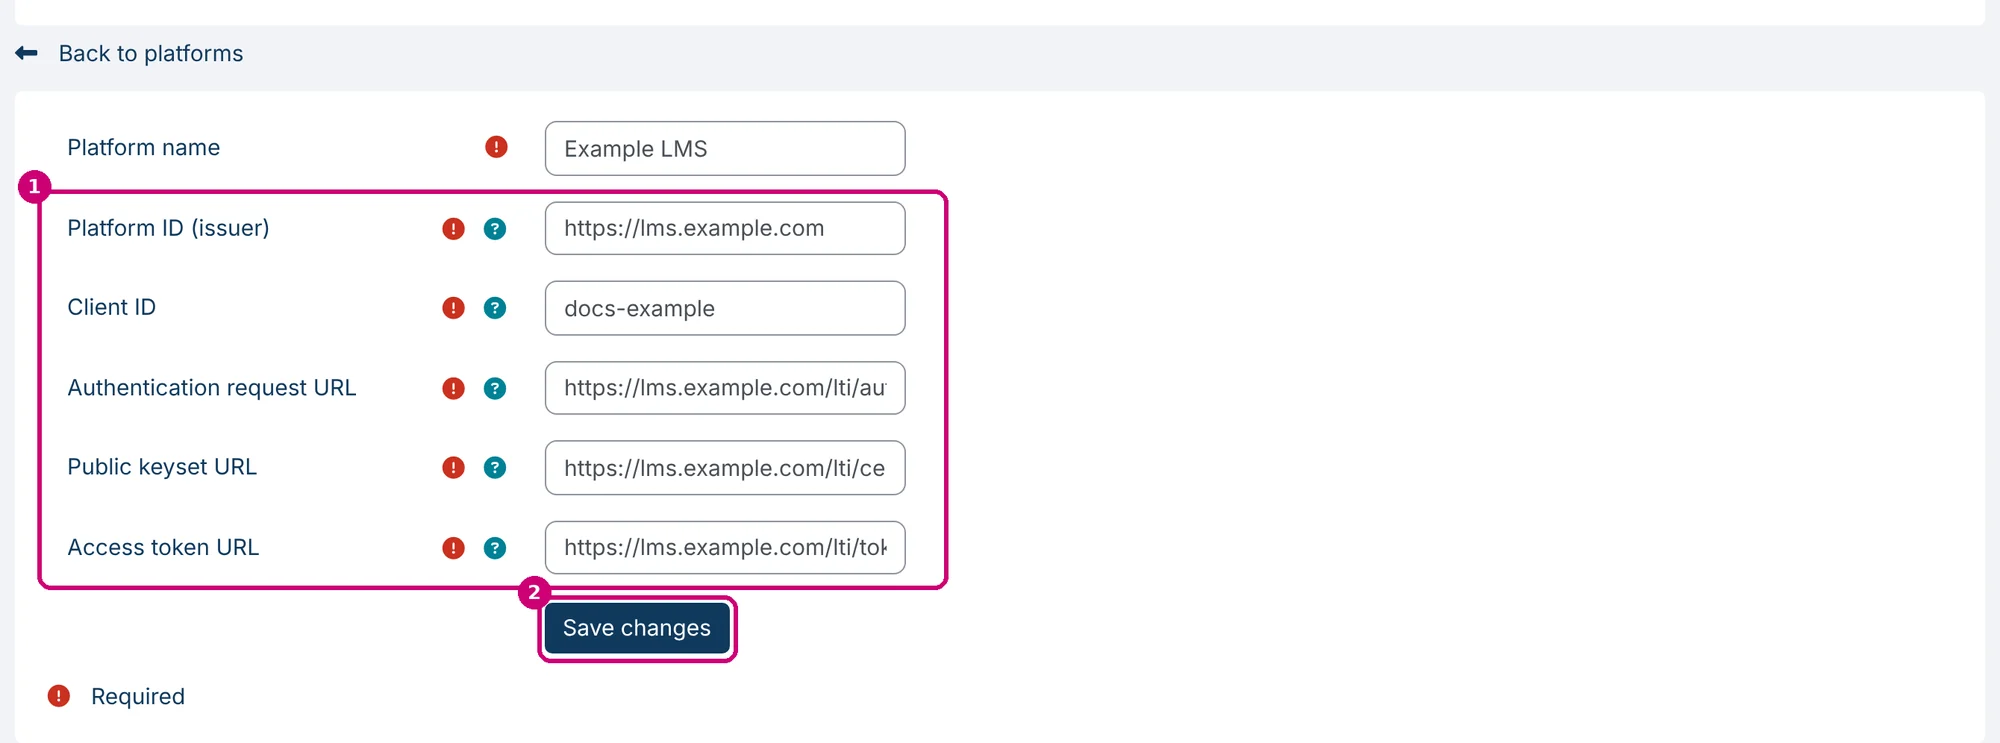
| Field | What to enter |
|---|---|
| Platform name | The name from step 2. You can change it here. |
| Platform ID (issuer) | The address that identifies the LMS, for example https://lms.example.com. |
| Client ID | The client ID the LMS gave to the Linqur tool. |
| Authentication request URL | The address where Linqur sends the login request to the LMS. |
| Public keyset URL | The address where Linqur finds the public keys of the LMS. |
| Access token URL | The address where Linqur requests access tokens from the LMS. |
A combination of Platform ID and Client ID can only be registered once. If it already exists, the form shows an error under Client ID and doesn’t save.
Linqur shows Platform registration updated, and the Platform details tab shows the details you entered.
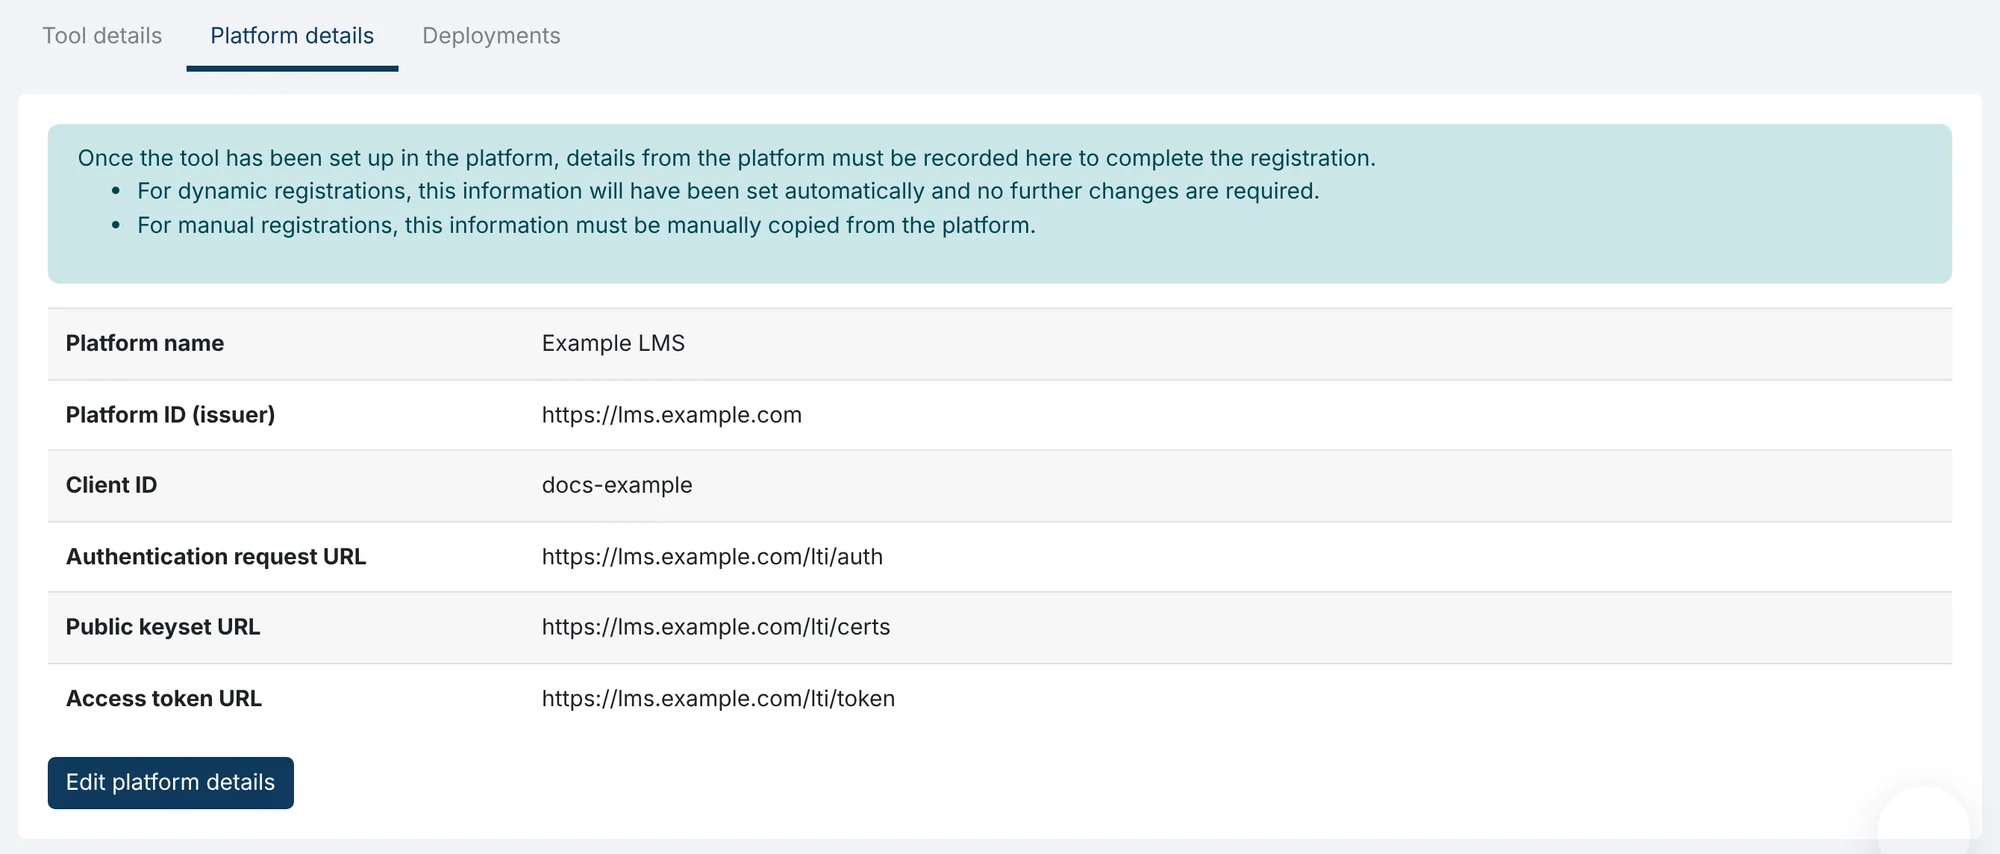
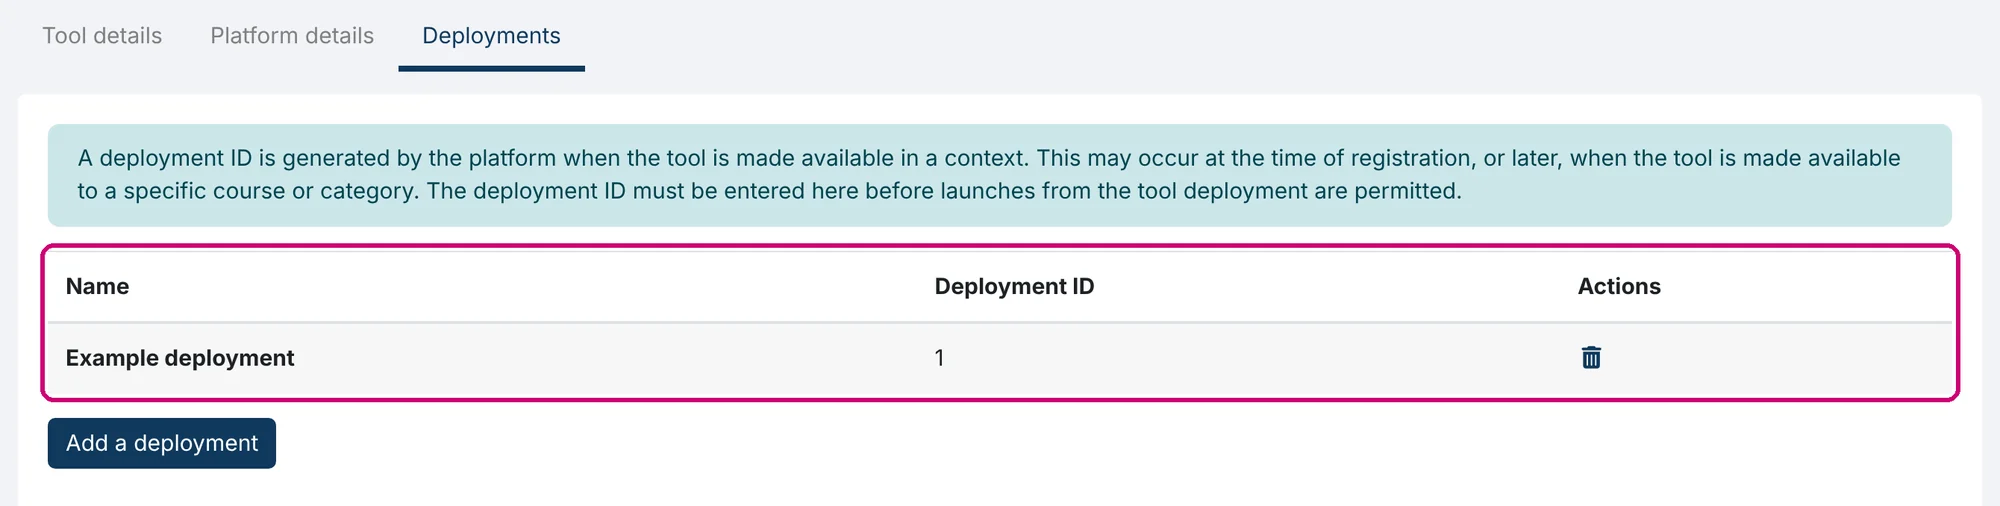
c. Add a deployment. The LMS generates a deployment ID when the tool is made available, at registration or later for a course or category. Launches only work once that deployment ID is in Linqur. Open the Deployments tab and click Add a deployment. Fill in a Deployment name and the Deployment ID from the LMS (1), and click Save changes (2).

Linqur shows Deployment added. The deployment is now in the list, with a trash can to delete it.
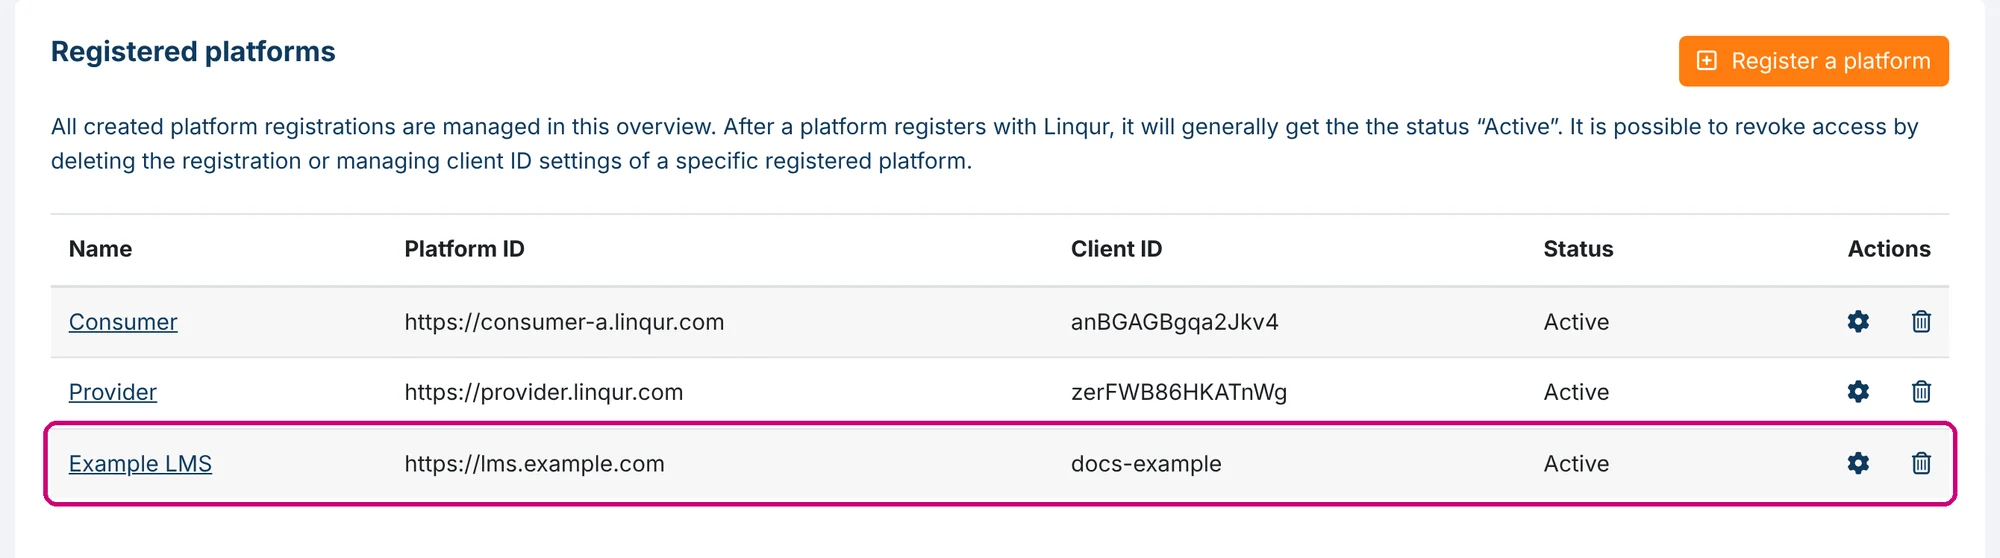
5. Check the status
Click Back to platforms or Configuration in the menu. When the registration is complete, it has the status Active, with its Platform ID and Client ID.
6. Add the tool in the LMS
For every LTI 1.3 tool, your client needs the Launch URL and the Custom Properties from the tool’s Launch details tab. How to find and send them is explained in share the launch details of an LTI tool.
Manage registrations
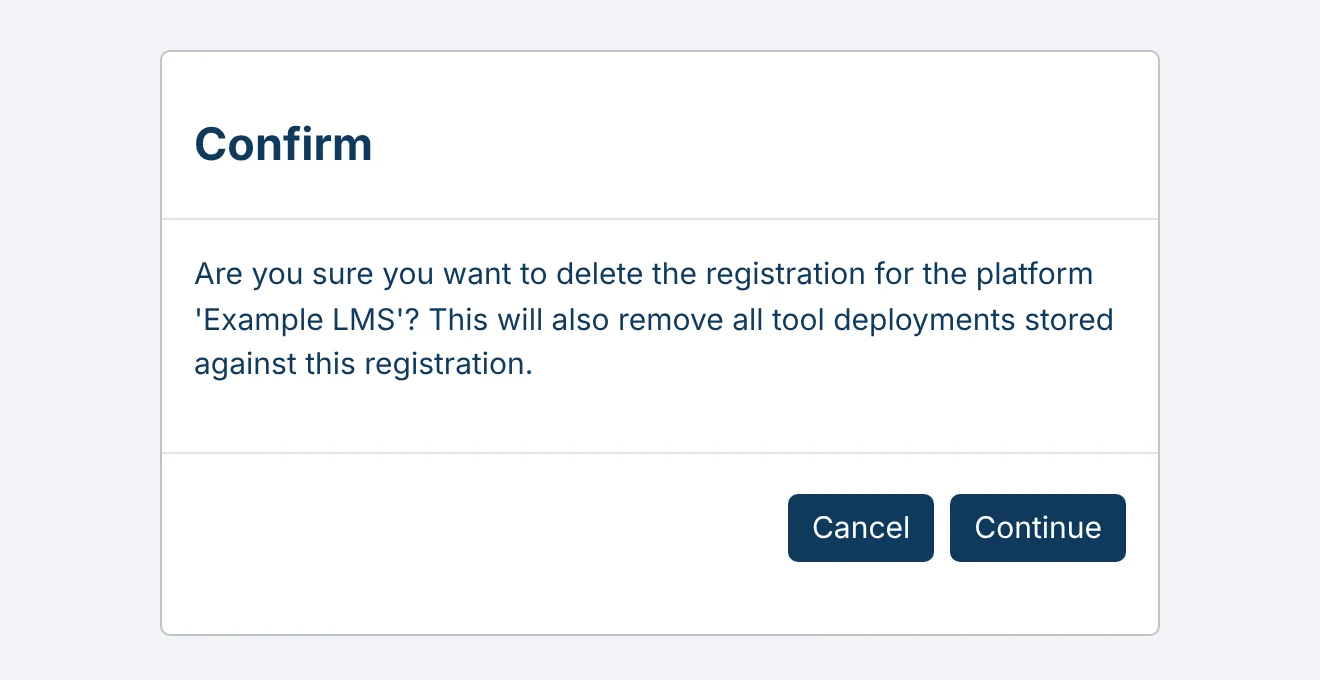
In the overview, the gear icon or the name of a registration opens it, on the Tool details tab. The trash can deletes the registration. Linqur asks for confirmation first, and warns that this also removes all tool deployments of the registration. Click Continue to delete or Cancel to keep it. According to the overview, deleting a registration is one way to revoke the access of that LMS.
Not to be confused with
Under Consumer tools, Add LTI Advantage works the other way round: there Linqur uses an external LTI 1.3 tool. To let an LMS use your tools in Linqur, you register the LMS here, under Registered platforms (LTI 1.3).
Next step
- Send the Launch URL and Custom Properties to your client: share the launch details of an LTI tool.
- Set up the LMS side in Moodle: LTI Advantage consumer in Moodle.
- If the launch fails, check the list of LTI errors and their solutions.