
A step by step guide to add a SCORM-package as LTI consumer in Moodle LMS 4.x with Linqur via LTI Advantage (1.3).
A step by step instruction
1. Create a course in Linqur. Tutorial here.
2. Add a SCORM package. Tutorial here.
3. Add a LTI Advantage tool in Linqur.
After creating your course and adding a SCORM, go to the course and open the “LTI tools” page. Here you select “Add LTI tool”.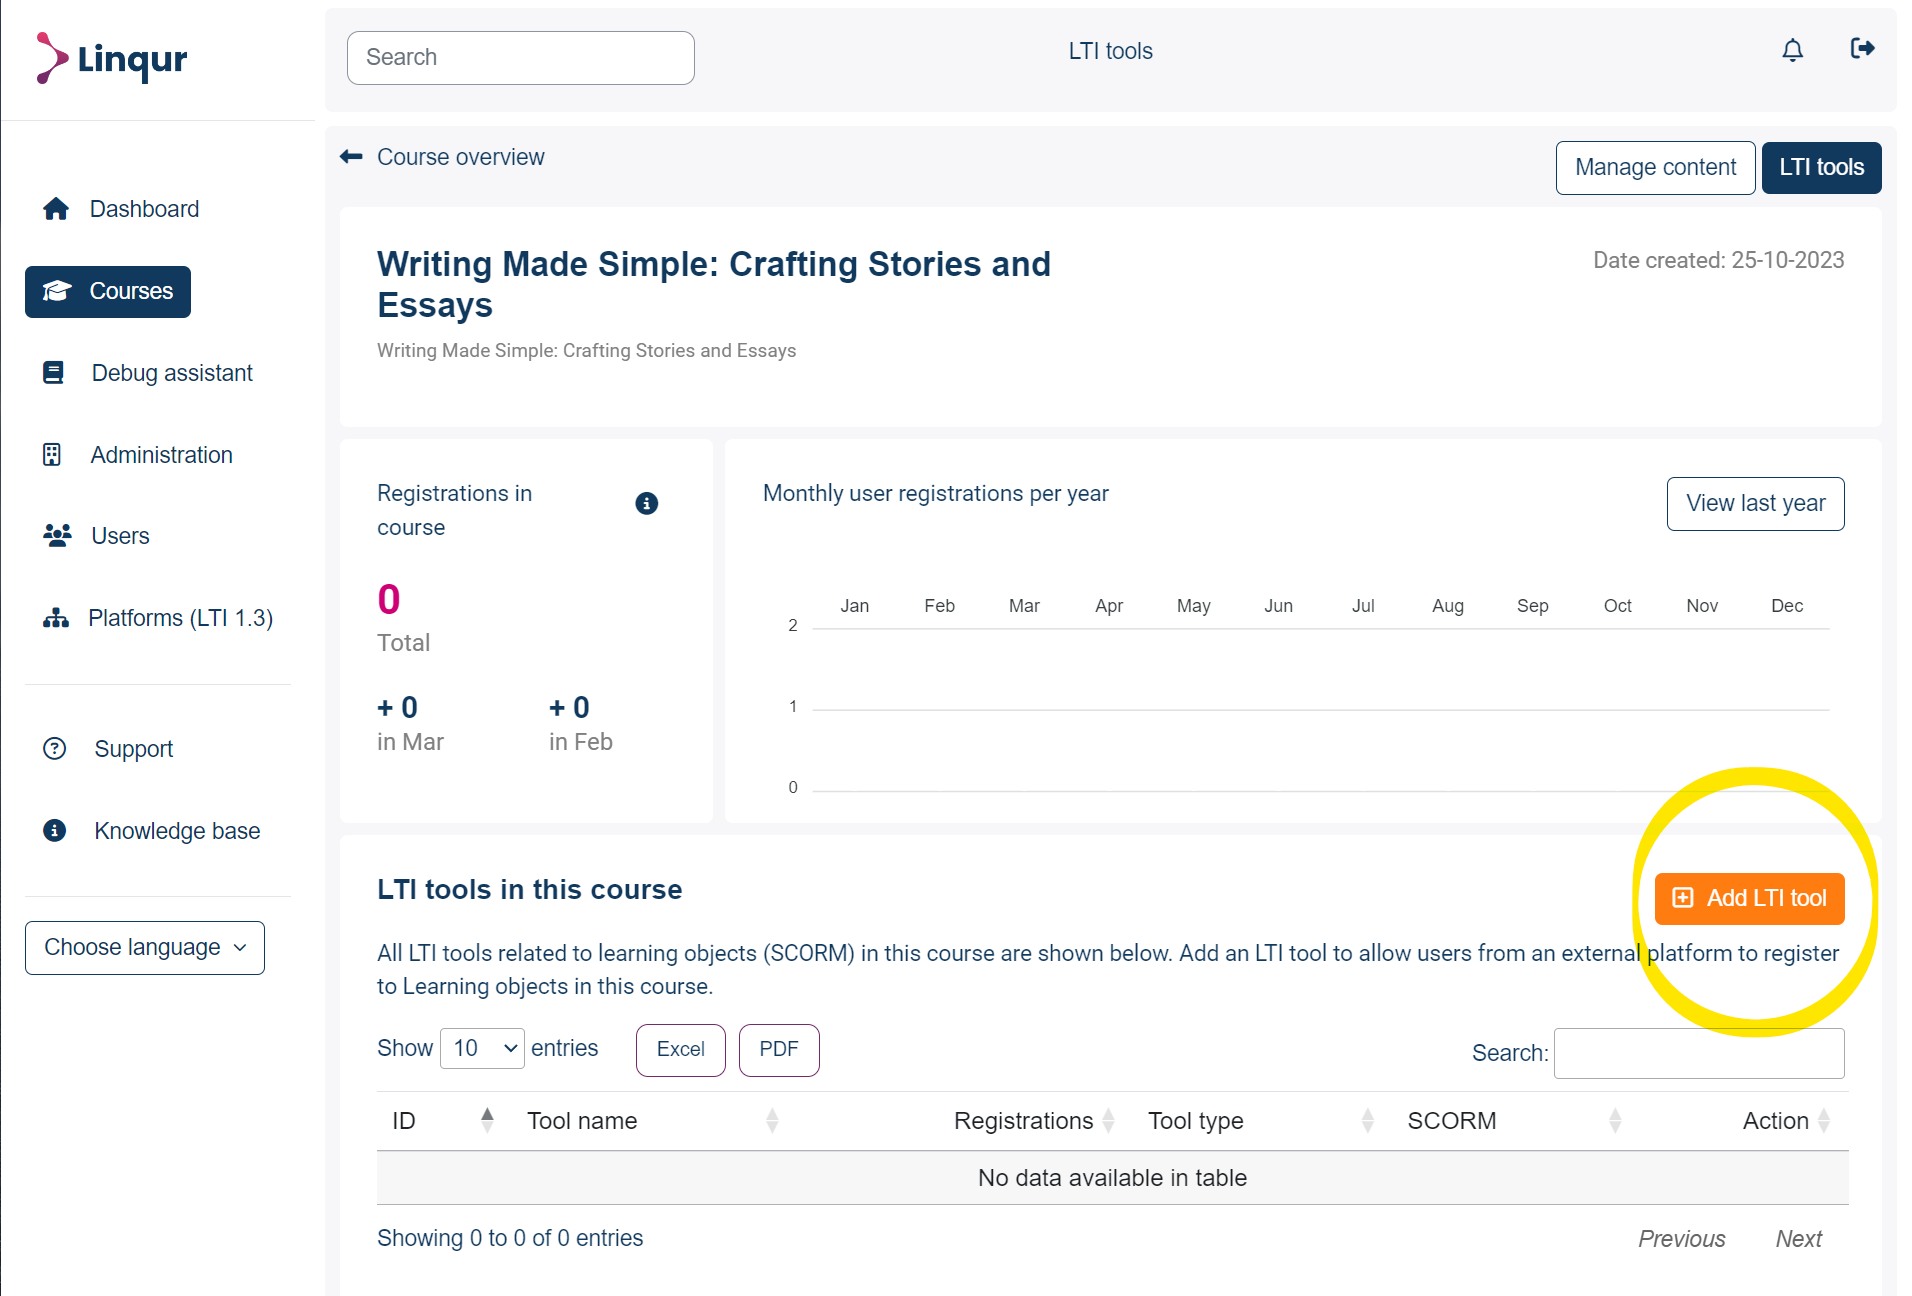
4. Give your tool a name, select LTI Advantage and select your added SCORM package. When done click on the “Add tool” button.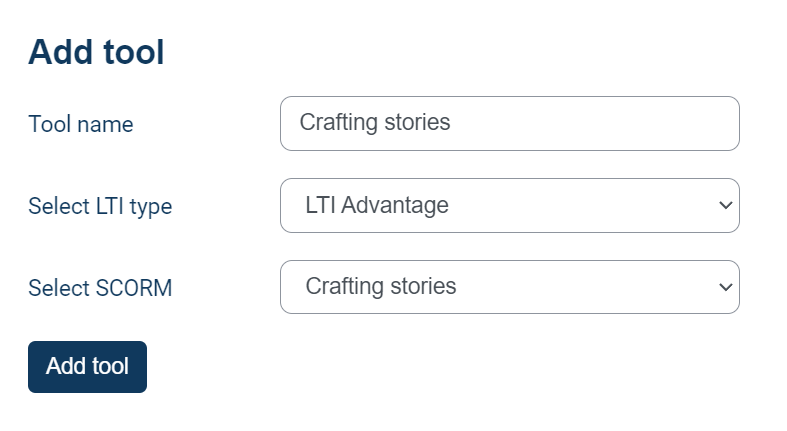
5. After adding the tool, you will be redirected to the “Tool details” page. This holds all the details you need to connect to this tool with an external Moodle platform. Look for the “Launch details” section. This is the information you need to connect to this tool.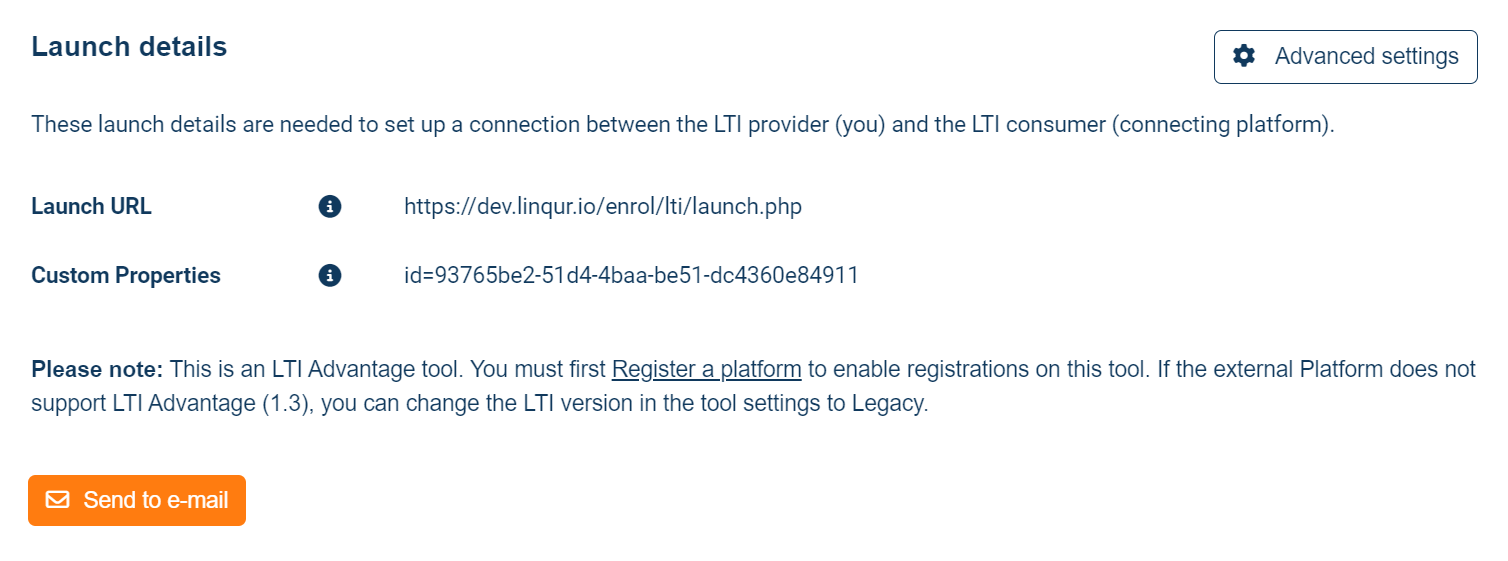
6. Next you will need to register the platform from which your users will connect to the tool in Linqur. Go to the “Platforms (LTI 1.3)” page from the sidebar.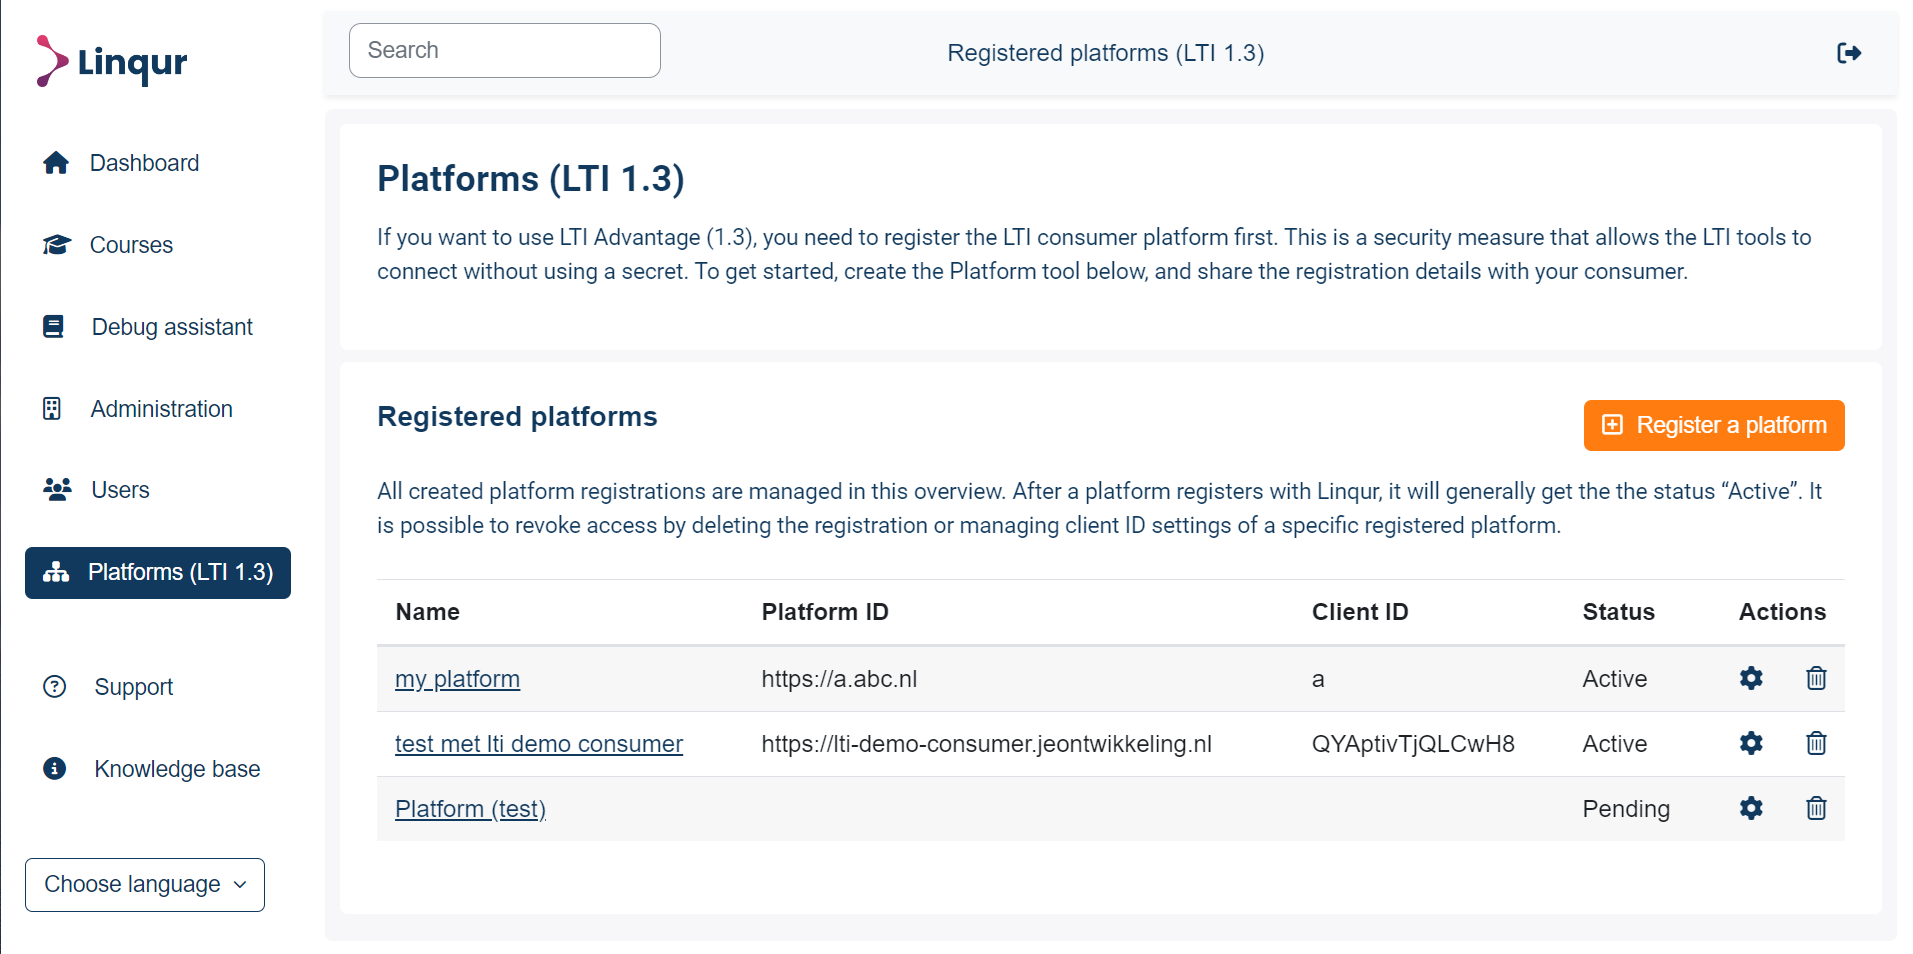
7. Click on the “Register a platform” button. Give your platform a name and click “continue”.
8. You will be presented with the tool details for this platform. Copy the “Registration URL”.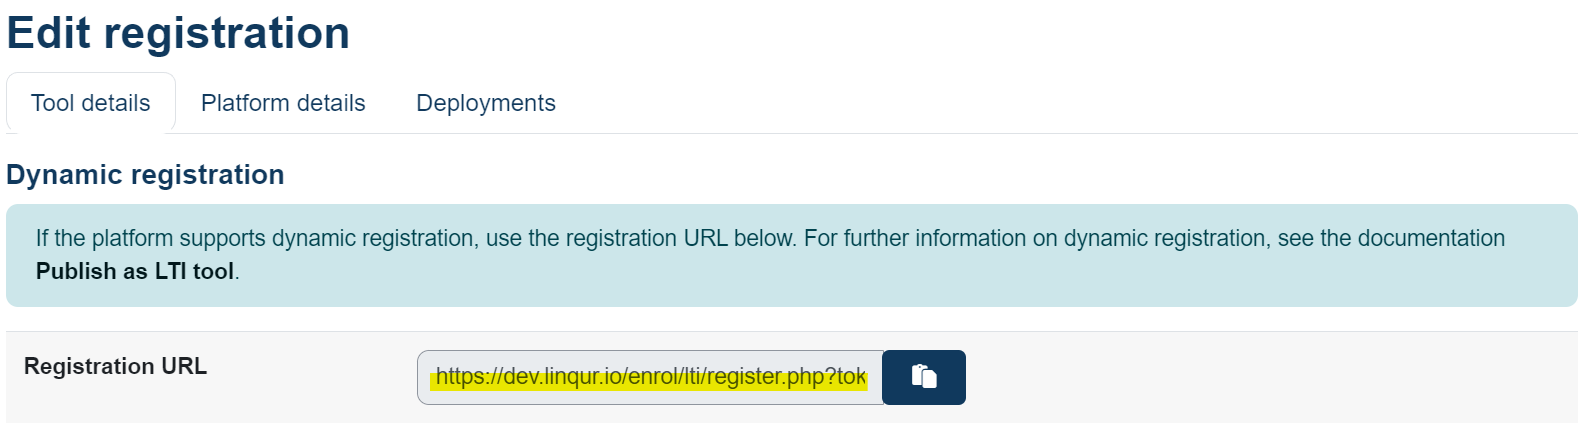
9. Log-in to the external Moodle platform. Go to “Site administration > Plugins > Activity modules > External tool > Manage tools”.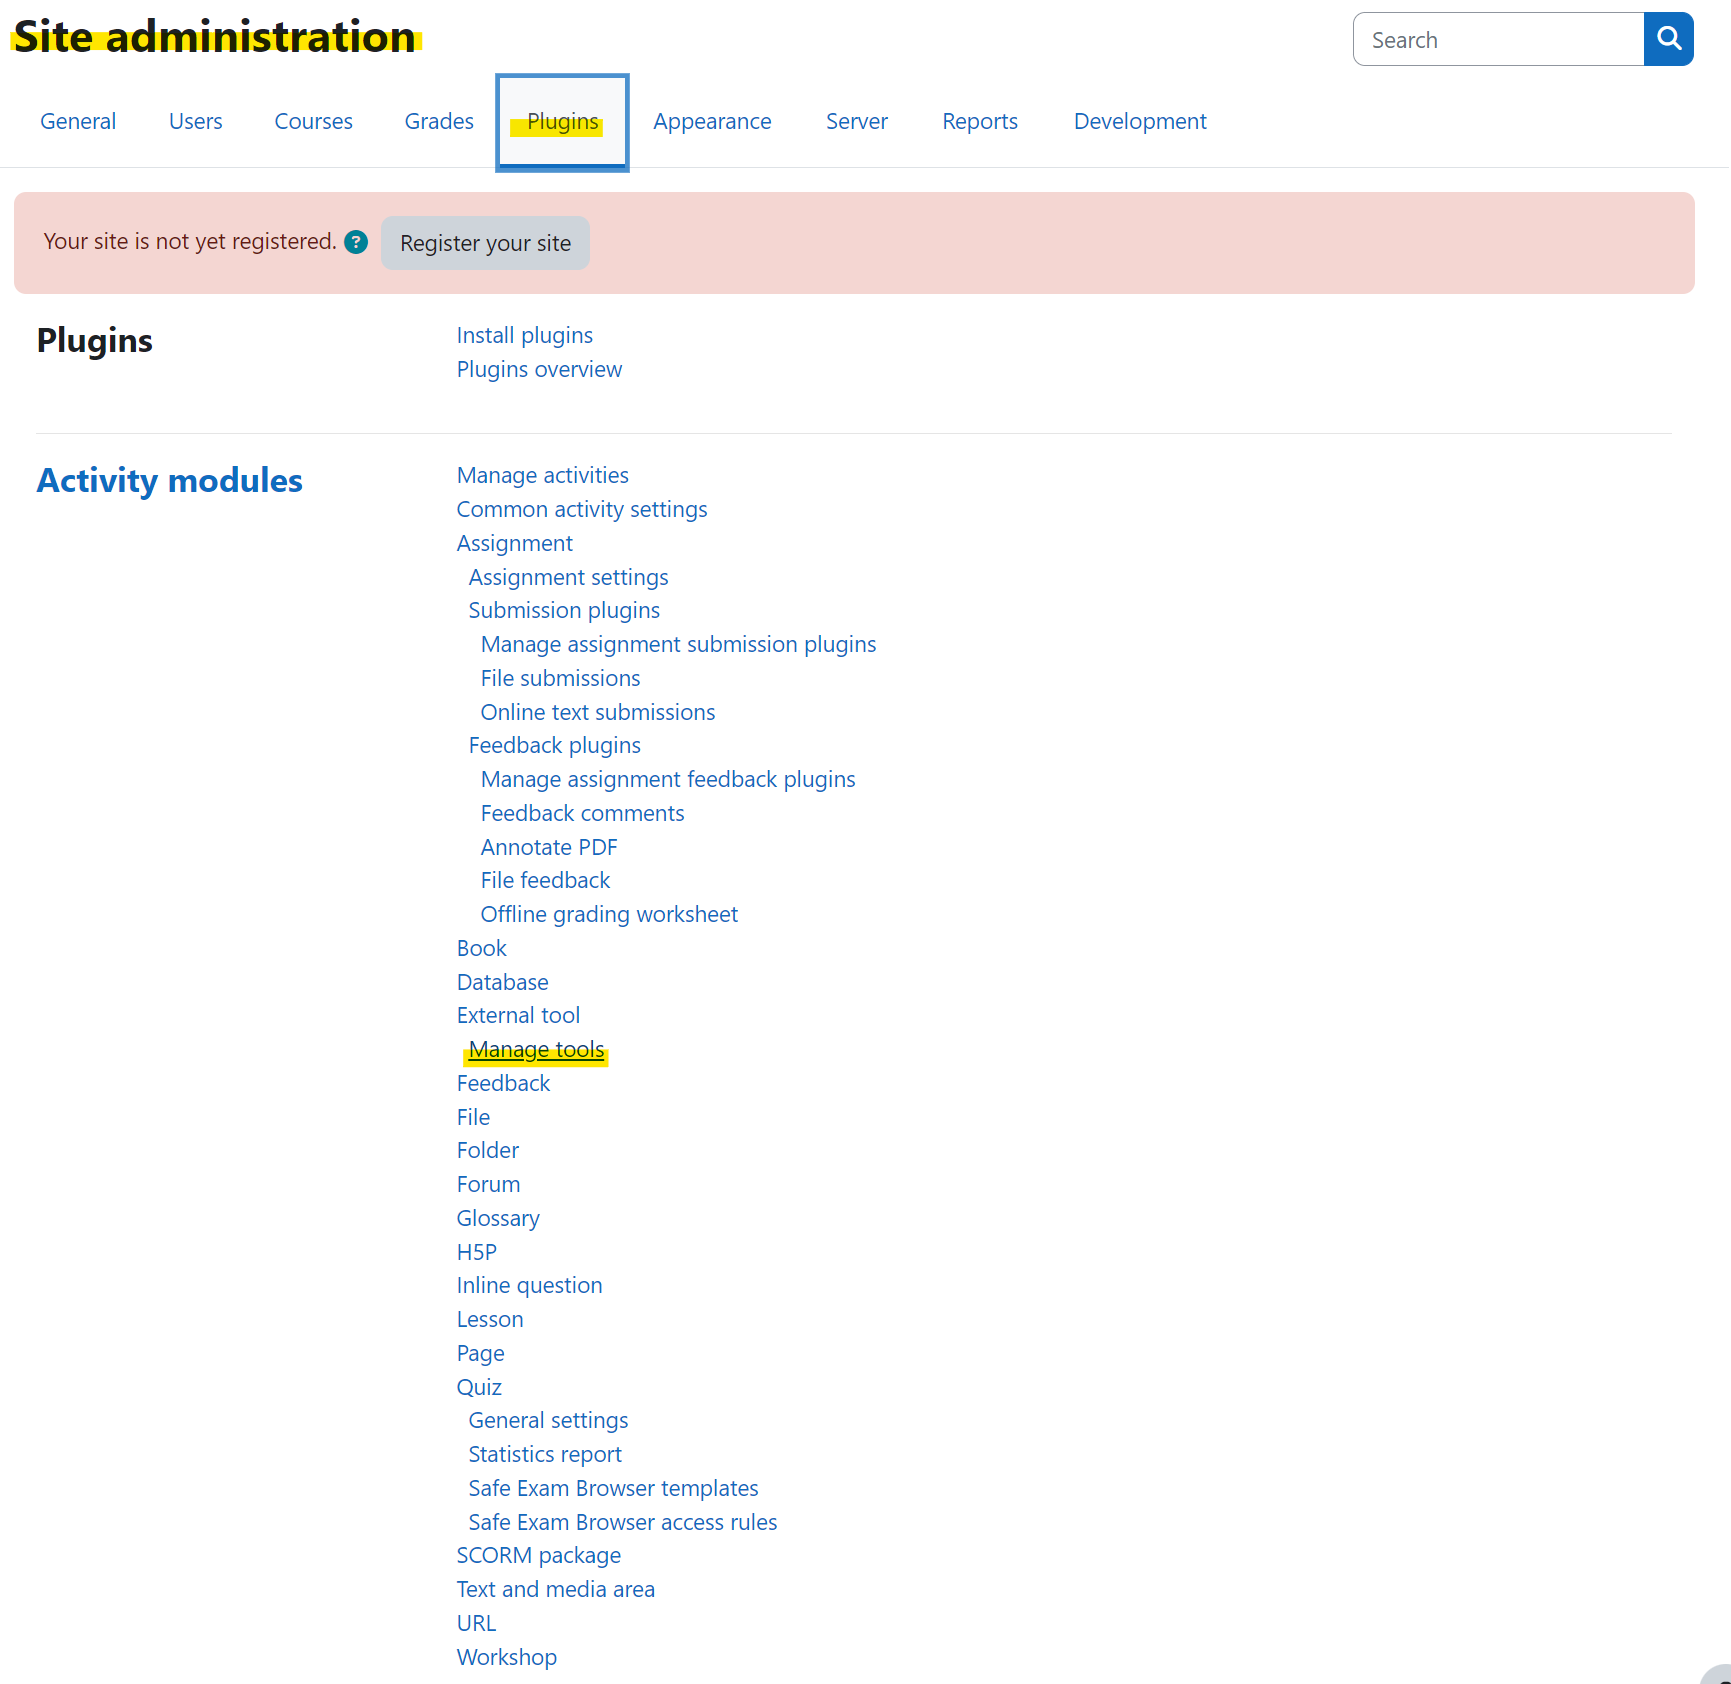
10. Paste the registration URL into the “Tool URL” field.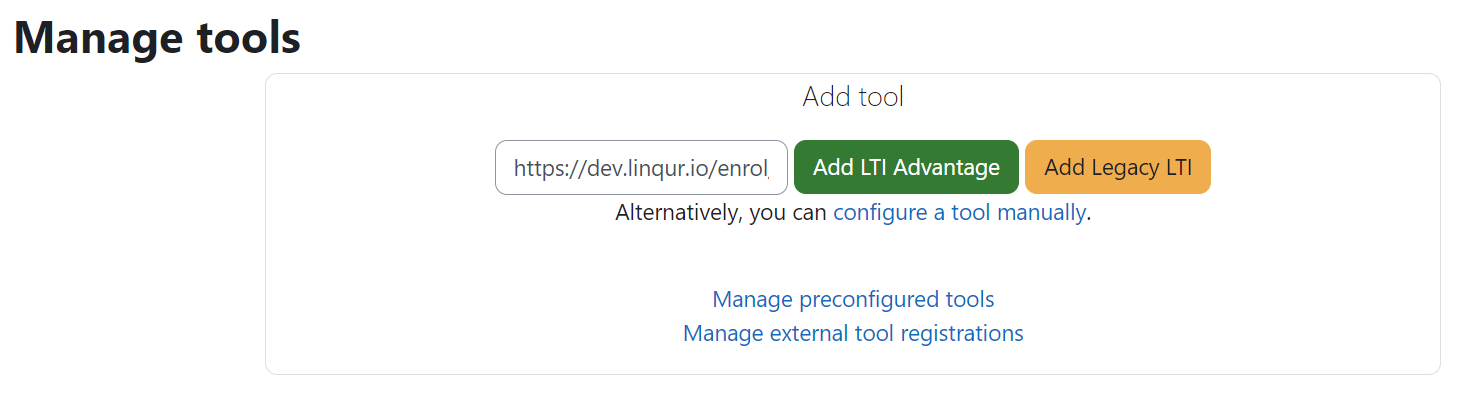
11. Click “Add LTI Advantage”.
12. The platform will be registered and now we only have to activate it. Go back to the “Manage tools” page. There will be a card that reads “Pending”, click on “Activate”.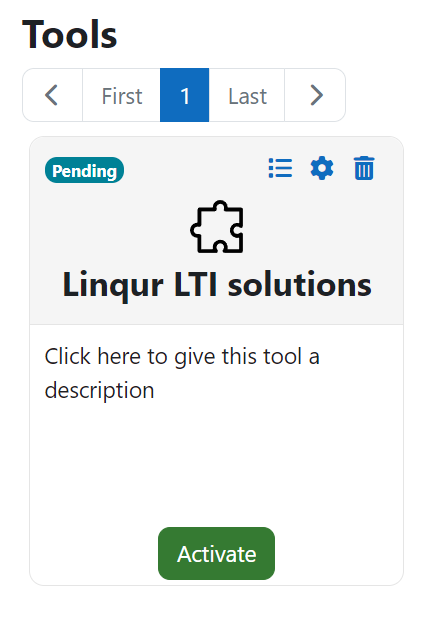
13. The tool will now be active. You can confirm this on Linqur. The platform will be set to “Active” and the Platform and Client ID’s are displayed.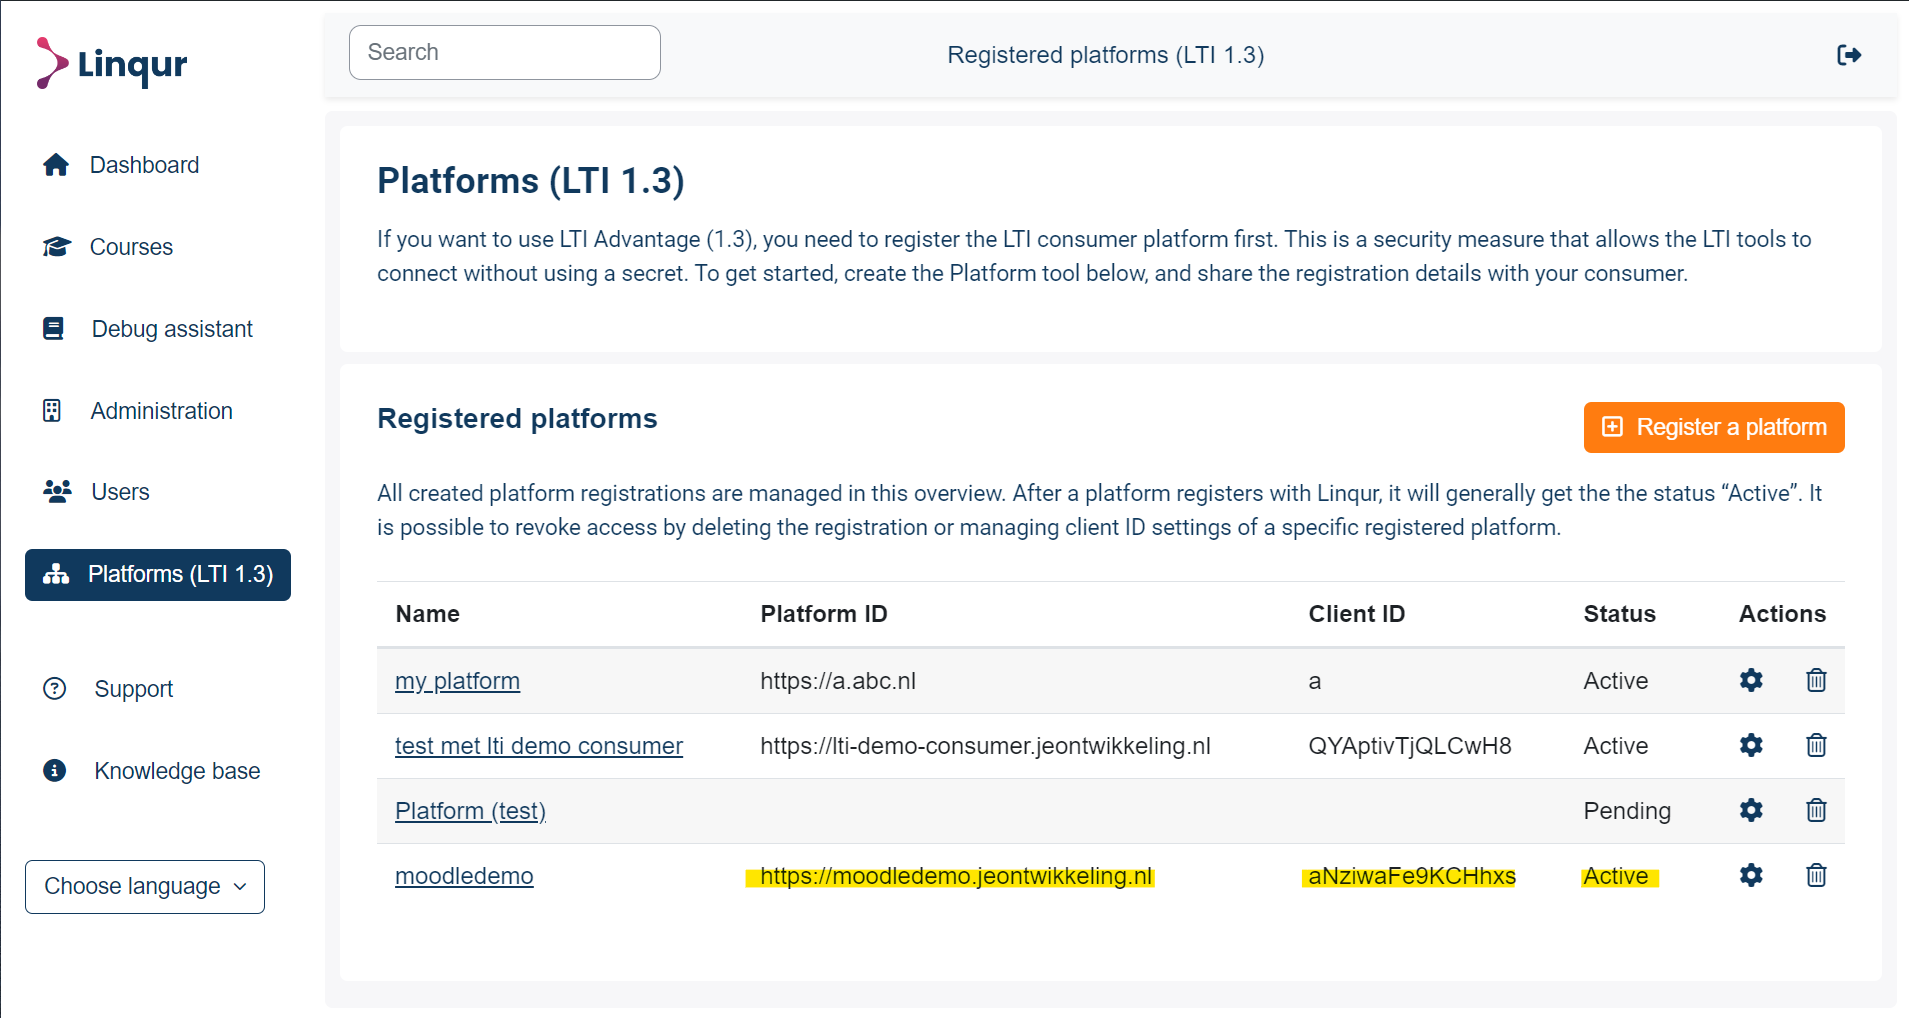
14. Now we can add the tool to a course. If you don’t have a course set-up go to “Site administration” / “Courses” / “Add a new course”. If you already have a course set-up proceed to step 16.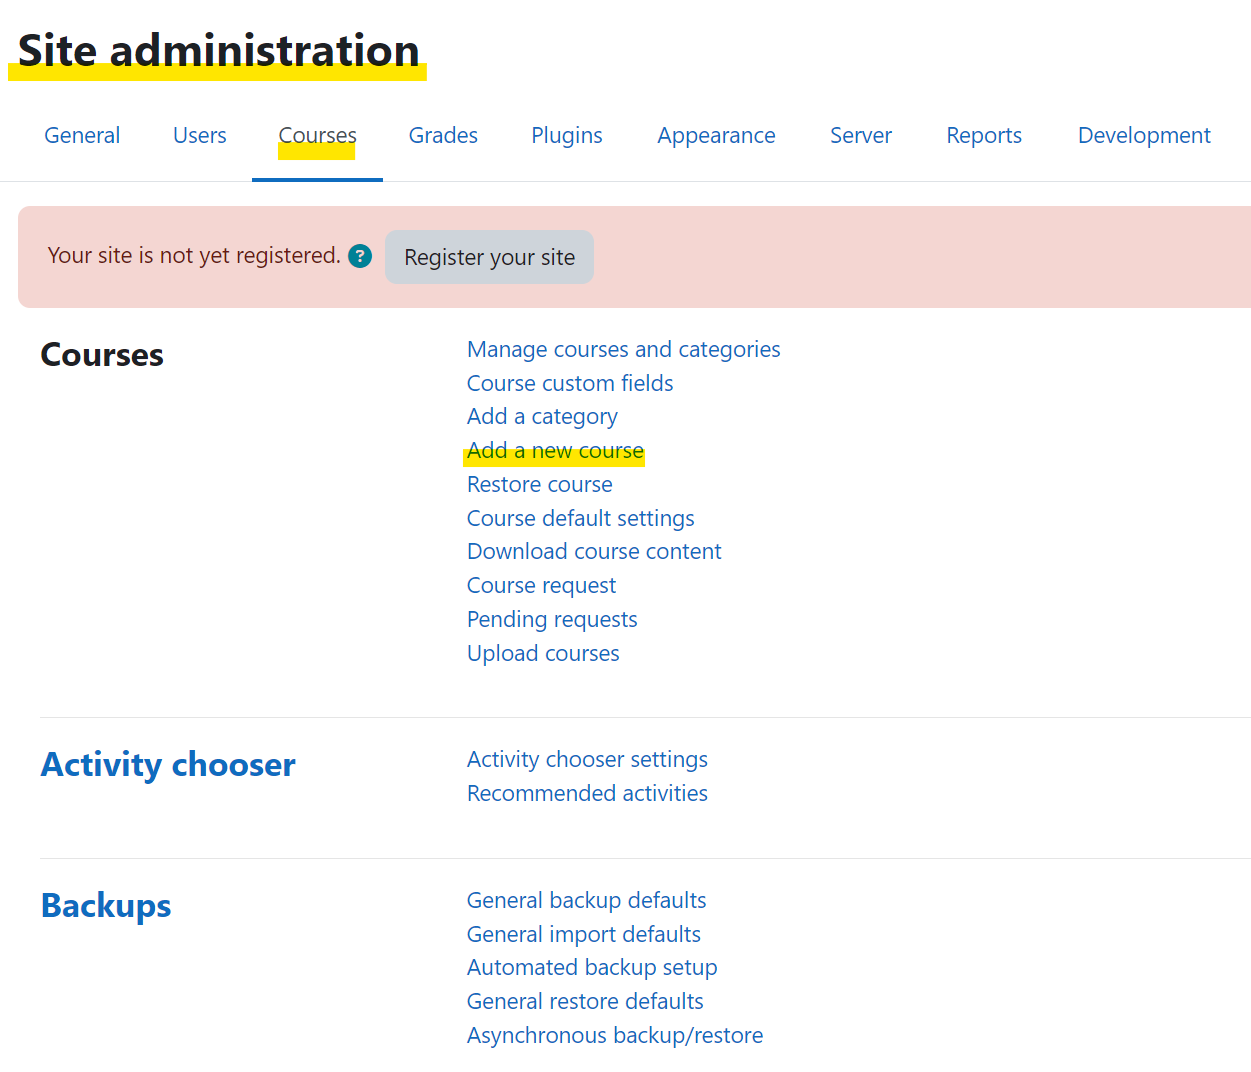
15. Give your course a name, short name and choose a category. You can add more options to the course but those are optional. Click on “Save and display”.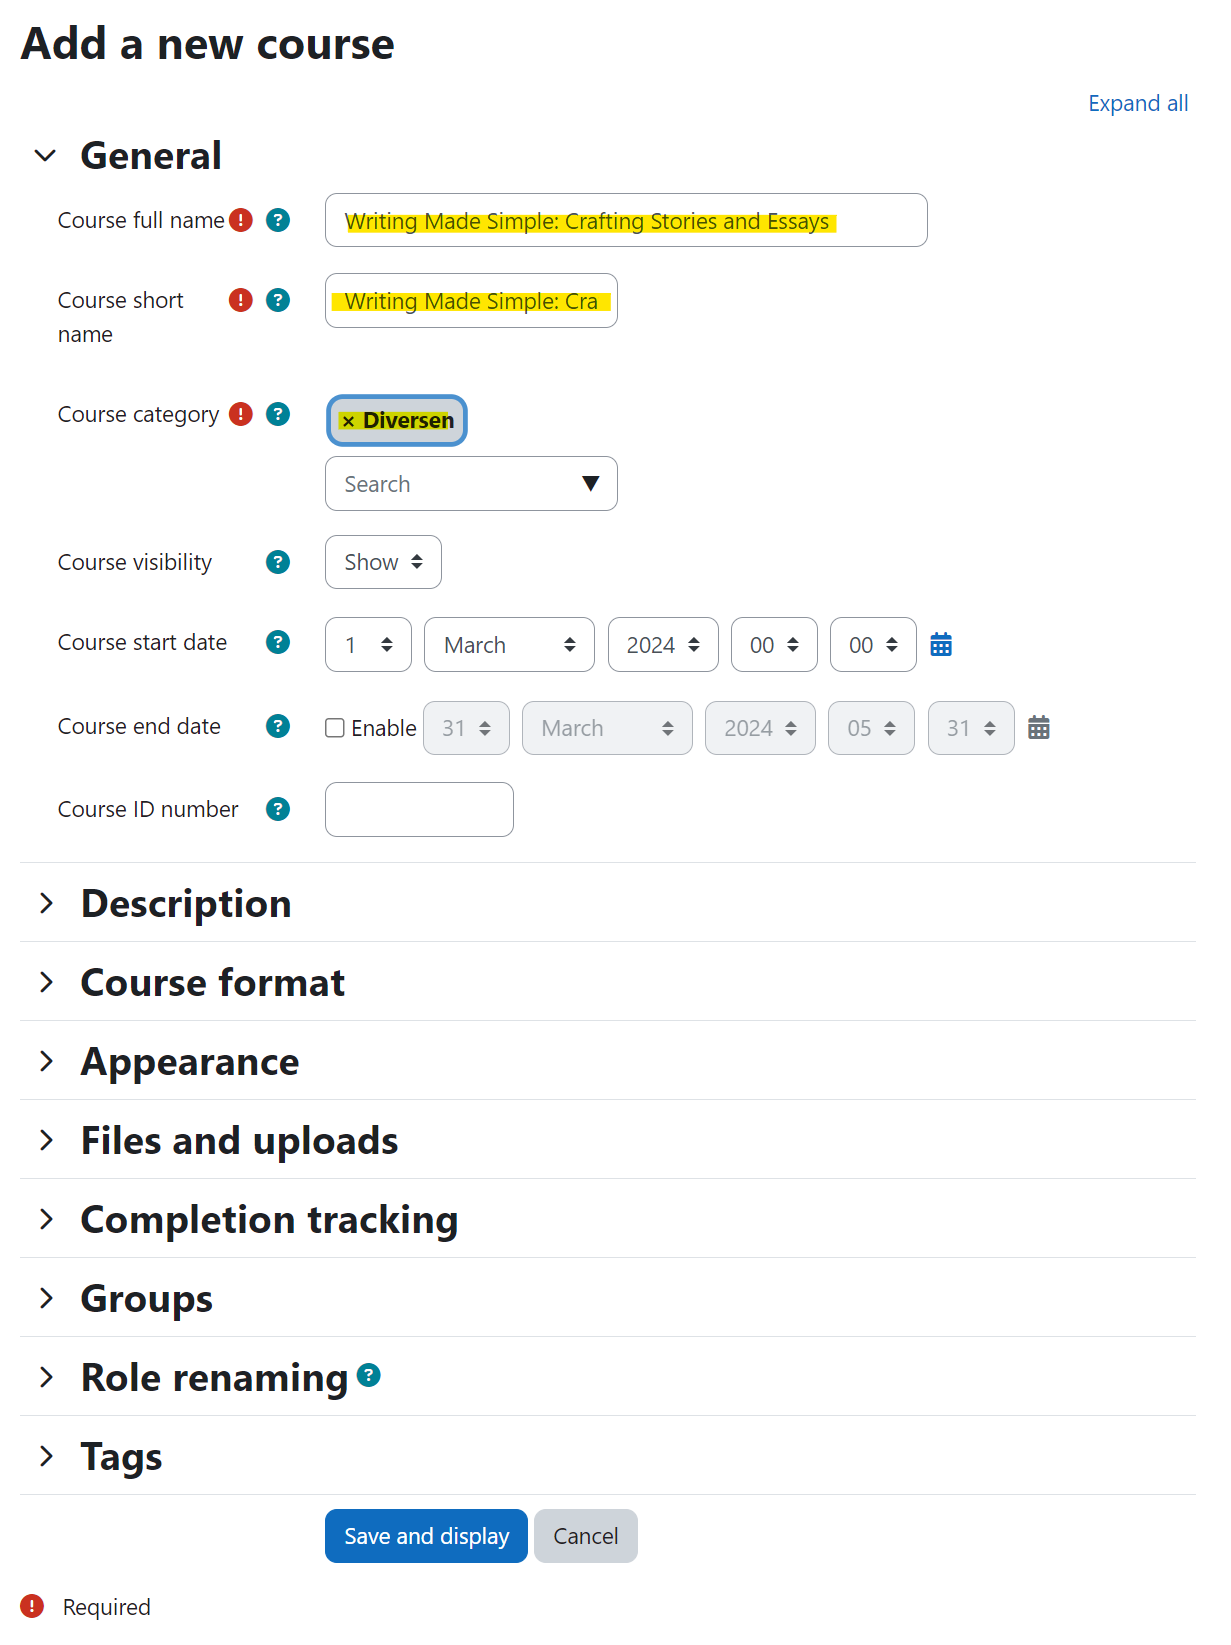
16. Your course is now created and will display in your screen, you have to set Moodle to “Edit mode” if you want to add content to your course. You can do this by using the switch in the top-right corner of the screen.
17. Select “Add an activity or resource”.
18. Select “External tool”.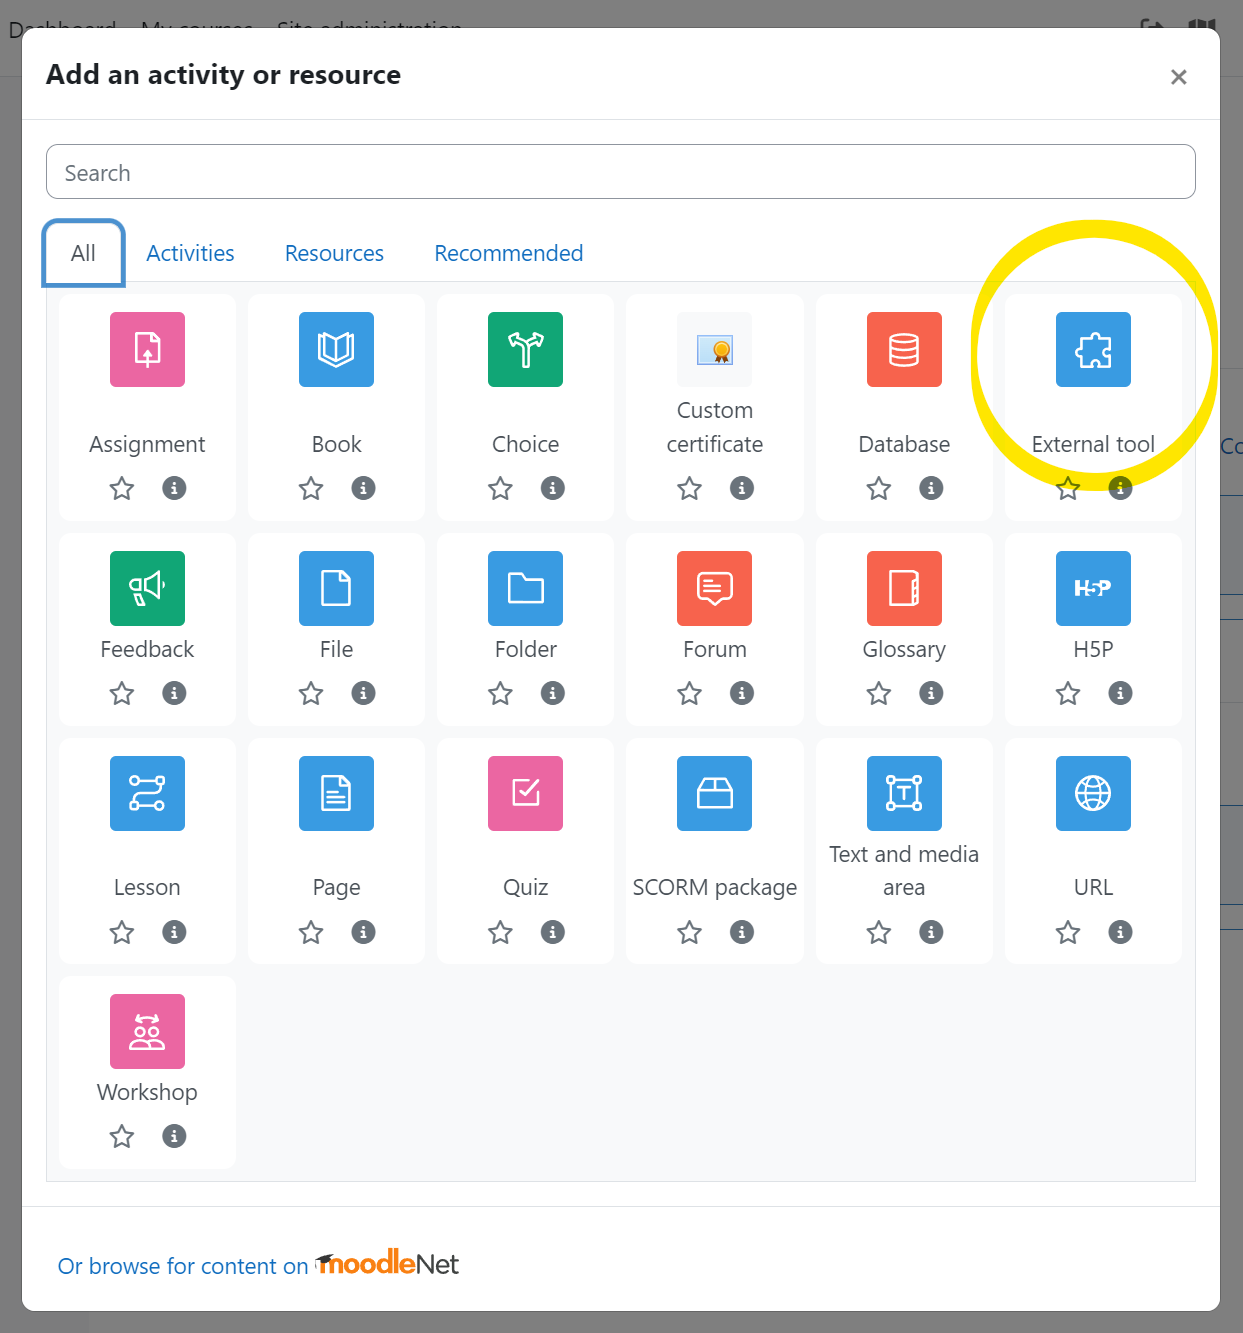
19. First give the activity a name and select “Automatic, based on tool URL” at Preconfigured tool, then select “Show more”.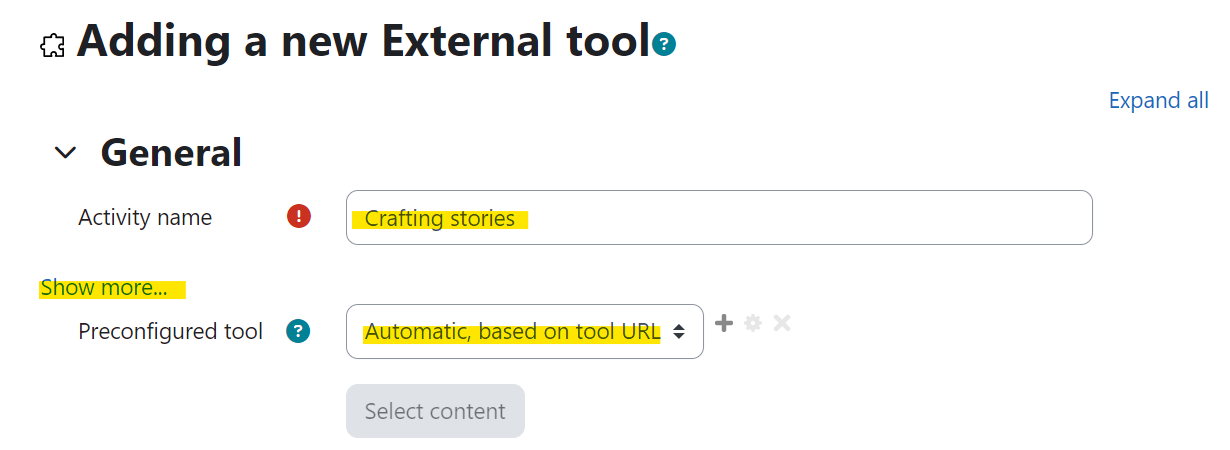
20. Now we need the “Launch details” we got from Linqur at step 5. Because this is an Advantage tool we only need the “Launch URL” and the “Custom properties”. Because we registered the platform at Linqur it’s going to recognize the “Launch URL” and if set up correctly it will give you a checkmark. Now we just need to set the “Custom parameters” with the “Custom properties” from Linqur and we’re set.
21. Scroll to the bottom and click on “Save and return to course”.
22. Add a user (participant) to the course and this user will now be able to open the SCORM package from Linqur.